Querying Tiered Data
Once rarely used data is tiered and migrated to the object storage tier, it can still be queried with standard SQL by enabling the timescaledb.enable_tiered_reads GUC. By default, the GUC is set to false, so that queries do not touch tiered data.
The timescaledb.enable_tiered_reads GUC, or Grand Unified Configuration variable, is a setting that controls if tiered data is queried. The configuration variable can be set at different levels, including globally for the entire database server, for individual databases, and for individual sessions.
With tiered reads enabled, you can query your data normally even when it's distributed across different storage tiers. Your hypertable is spread across the tiers, so queries and JOINs work and fetch the same data as usual.
By default, tiered data is not accessed by queries. Querying tiered data may slow down query performance as the data is not stored locally on the high-performance storage tier. See Performance considerations.
Enable querying tiered data for a single query
- Enable
timescaledb.enable_tiered_readsbefore querying the hypertable with tiered data and reset it after it is complete:
set timescaledb.enable_tiered_reads = true; SELECT count(*) FROM example; set timescaledb.enable_tiered_reads = false;This queries data from all chunks including tiered chunks and non tiered chunks:
 ```sql
 ||count|
 |---|
 |1000|
 ```
Enable querying tiered data for a single session
All future queries within a session can be enabled to use the object storage tier by enabling timescaledb.enable_tiered_reads within a session.
Enable
timescaledb.enable_tiered_readsfor an entire session:sqlset timescaledb.enable_tiered_reads = true;All future queries in that session are configured to read from tiered data and locally stored data.
Enable querying tiered data in all future sessions
You can also enable queries to read from tiered data always by following these steps:
Enable
timescaledb.enable_tiered_readsfor all future sessions:sqlalter database tsdb set timescaledb.enable_tiered_reads = true;In all future created sessions,
timescaledb.enable_tiered_readsinitializes withenabled.
Query data in the object storage tier
This section illustrates how querying tiered storage works.
Consider a simple database with a standard devices table and a metrics hypertable. After enabling tiered storage, you can see which chunks are tiered to the object storage tier:
    chunk_name    |      range_start       |       range_end
------------------+------------------------+------------------------
 _hyper_2_4_chunk | 2015-12-31 00:00:00+00 | 2016-01-07 00:00:00+00
 _hyper_2_3_chunk | 2017-08-17 00:00:00+00 | 2017-08-24 00:00:00+00
(2 rows)
The following query fetches data only from the object storage tier. This makes sense based on the WHERE clause specified by the query and the chunk ranges listed above for this hypertable.
 EXPLAIN SELECT * FROM metrics where ts < '2017-01-01 00:00+00';
                             QUERY PLAN
---------------------------------------------------------------------
 Foreign Scan on osm_chunk_2  (cost=0.00..0.00 rows=2 width=20)
   Filter: (ts < '2017-01-01 00:00:00'::timestamp without time zone)
   Match tiered objects: 1
   Row Groups:
     _timescaledb_internal._hyper_2_4_chunk: 0
(5 rows)
If your query does not need to touch the object storage tier, it will only process the chunks in the standard storage. The following query refers to newer data that is not yet tiered to the object storage tier. Match tiered objects :0 in the plan indicates that no tiered data matches the query constraint. So data in the object storage is not touched at all.
 EXPLAIN SELECT * FROM metrics where ts > '2022-01-01 00:00+00';
                                                    QUERY PLAN

--------------------------------------------------------------------------------
----------------------------------
 Append  (cost=0.15..25.02 rows=568 width=20)
   ->  Index Scan using _hyper_2_5_chunk_metrics_ts_idx on _hyper_2_5_chunk  (co
st=0.15..22.18 rows=567 width=20)
         Index Cond: (ts > '2022-01-01 00:00:00'::timestamp without time zone)
   ->  Foreign Scan on osm_chunk_2  (cost=0.00..0.00 rows=1 width=20)
         Filter: (ts > '2022-01-01 00:00:00'::timestamp without time zone)
         Match tiered objects: 0
         Row Groups:
(7 rows)
Here is another example with a JOIN that does not touch tiered data:
 EXPLAIN SELECT ts, device_id, description FROM metrics
   JOIN devices ON metrics.device_id = devices.id
   WHERE metrics.ts > '2023-08-01';
                            QUERY PLAN

--------------------------------------------------------------------------------
 Hash Join  (cost=32.12..184.55 rows=3607 width=44)
   Hash Cond: (devices.id = _hyper_4_9_chunk.device_id)
   ->  Seq Scan on devices  (cost=0.00..22.70 rows=1270 width=36)
   ->  Hash  (cost=25.02..25.02 rows=568 width=12)
         ->  Append  (cost=0.15..25.02 rows=568 width=12)
               ->  Index Scan using _hyper_4_9_chunk_metrics_ts_idx on _hyper_4_
9_chunk  (cost=0.15..22.18 rows=567 width=12)
                     Index Cond: (ts > '2023-08-01 00:00:00+00'::timestamp with
time zone)
               ->  Foreign Scan on osm_chunk_3  (cost=0.00..0.00 rows=1 width=12
)
                     Filter: (ts > '2023-08-01 00:00:00+00'::timestamp with time
 zone)
                     Match tiered objects: 0
                     Row Groups:
(11 rows)
Performance considerations
Queries over tiered data are expected to be slower than over local data. However, in a limited number of scenarios tiered reads can impact query planning time over local data as well. In order to prevent any unexpected performance degradation for application queries, we keep the GUC timescaledb.enable_tiered_reads set to false.
Queries without time boundaries specified are expected to perform slower when querying tiered data, both during query planning and during query execution. TimescaleDBs chunk exclusion algorithms cannot be applied for this case.
sqlSELECT * FROM device_readings WHERE id = 10;Queries with predicates computed at runtime (such as
NOW()) are not always optimized at planning time and as a result might perform slower than statically assigned values when querying against the object storage tier.For example, this query is optimized at planning time:
sqlSELECT * FROM metrics WHERE ts > '2023-01-01' AND ts < '2023-02-01'The following query does not do chunk pruning at query planning time:
sqlSELECT * FROM metrics WHERE ts < now() - '10 days':: intervalAt the moment, queries against tiered data work best when the query optimizer can apply planning time optimizations.
Text and non-native types (JSON, JSONB, GIS) filtering is slower when querying tiered data.
===== PAGE: https://docs.tigerdata.com/use-timescale/data-tiering/about-data-tiering/ =====
About Tiger Cloud storage tiers
The tiered storage architecture in Tiger Cloud includes a high-performance storage tier and a low-cost object storage tier. You use the high-performance tier for data that requires quick access, and the object tier for rarely used historical data. Tiering policies move older data asynchronously and periodically from high-performance to low-cost storage, sparing you the need to do it manually. Chunks from a single hypertable, including compressed chunks, can stretch across these two storage tiers.

High-performance storage
High-performance storage is where your data is stored by default, until you [enable tiered storage][manage-tiering] and [move older data to the low-cost tier][move-data]. In the high-performance storage, your data is stored in the block format and optimized for frequent querying. The [hypercore row-columnar storage engine][hypercore] available in this tier is designed specifically for real-time analytics. It enables you to compress the data in the high-performance storage by up to 90%, while improving performance. Coupled with other optimizations, Tiger Cloud high-performance storage makes sure your data is always accessible and your queries run at lightning speed.
Tiger Cloud high-performance storage comes in the following types:
- Standard (default): based on [AWS EBS gp3][aws-gp3] and designed for general workloads. Provides up to 16 TB of storage and 16,000 IOPS.
- Enhanced: based on [EBS io2][ebs-io2] and designed for high-scale, high-throughput workloads. Provides up to 64 TB of storage and 32,000 IOPS.
[See the differences][aws-storage-types] in the underlying AWS storage. You [enable enhanced storage][enable-enhanced] as needed in Tiger Cloud Console.
Low-cost storage
Once you [enable tiered storage][manage-tiering], you can start moving rarely used data to the object tier. The object tier is based on AWS S3 and stores your data in the [Apache Parquet][parquet] format. Within a Parquet file, a set of rows is grouped together to form a row group. Within a row group, values for a single column across multiple rows are stored together. The original size of the data in your service, compressed or uncompressed, does not correspond directly to its size in S3. A compressed hypertable may even take more space in S3 than it does in Tiger Cloud.
Apache Parquet allows for more efficient scans across longer time periods, and Tiger Cloud uses other metadata and query optimizations to reduce the amount of data that needs to be fetched to satisfy a query, such as:
- Chunk skipping: exclude the chunks that fall outside the query time window.
- Row group skipping: identify the row groups within the Parquet object that satisfy the query.
- Column skipping: fetch only columns that are requested by the query.
The following query is against a tiered dataset and illustrates the optimizations:
EXPLAIN ANALYZE
SELECT count(*) FROM
( SELECT device_uuid,  sensor_id FROM public.device_readings
  WHERE observed_at > '2023-08-28 00:00+00' and observed_at < '2023-08-29 00:00+00'
  GROUP BY device_uuid,  sensor_id ) q;
            QUERY PLAN

-------------------------------------------------------------------------------------------------
 Aggregate  (cost=7277226.78..7277226.79 rows=1 width=8) (actual time=234993.749..234993.750 rows=1 loops=1)
   ->  HashAggregate  (cost=4929031.23..7177226.78 rows=8000000 width=68) (actual time=184256.546..234913.067 rows=1651523 loops=1)
         Group Key: osm_chunk_1.device_uuid, osm_chunk_1.sensor_id
         Planned Partitions: 128  Batches: 129  Memory Usage: 20497kB  Disk Usage: 4429832kB
         ->  Foreign Scan on osm_chunk_1  (cost=0.00..0.00 rows=92509677 width=68) (actual time=345.890..128688.459 rows=92505457 loops=1)
               Filter: ((observed_at > '2023-08-28 00:00:00+00'::timestamp with time zone) AND (observed_at < '2023-08-29 00:00:00+00'::timestamp with t
ime zone))
               Rows Removed by Filter: 4220
               Match tiered objects: 3
               Row Groups:
                 _timescaledb_internal._hyper_1_42_chunk: 0-74
                 _timescaledb_internal._hyper_1_43_chunk: 0-29
                 _timescaledb_internal._hyper_1_44_chunk: 0-71
               S3 requests: 177
               S3 data: 224423195 bytes
 Planning Time: 6.216 ms
 Execution Time: 235372.223 ms
(16 rows)
EXPLAIN illustrates which chunks are being pulled in from the object storage tier:
- Fetch data from chunks 42, 43, and 44 from the object storage tier.
- Skip row groups and limit the fetch to a subset of the offsets in the Parquet object that potentially match the query filter. Only fetch the data for
device_uuid,sensor_id, andobserved_atas the query needs only these 3 columns.
The object storage tier is more than an archiving solution. It is also:
- Cost-effective: store high volumes of data at a lower cost. You pay only for what you store, with no extra cost for queries.
- Scalable: scale past the restrictions of even the enhanced high-performance storage tier.
- Online: your data is always there and can be [queried when needed][querying-tiered-data].
By default, tiered data is not included when you query from a Tiger Cloud service. To access tiered data, you [enable tiered reads][querying-tiered-data] for a query, a session, or even for all sessions. After you enable tiered reads, when you run regular SQL queries, a behind-the-scenes process transparently pulls data from wherever it's located: the standard high-performance storage tier, the object storage tier, or both. You can JOIN against tiered data, build views, and even define continuous aggregates on it. In fact, because the implementation of continuous aggregates also uses hypertables, they can be tiered to low-cost storage as well.
For low-cost storage, Tiger Data charges only for the size of your data in S3 in the Apache Parquet format, regardless of whether it was compressed in Tiger Cloud before tiering. There are no additional expenses, such as data transfer or compute.
The low-cost storage tier comes with the following limitations:
Limited schema modifications: some schema modifications are not allowed on hypertables with tiered chunks.
Allowed modifications include: renaming the hypertable, adding columns with
NULLdefaults, adding indexes, changing or renaming the hypertable schema, and addingCHECKconstraints. ForCHECKconstraints, only untiered data is verified. Columns can also be deleted, but you cannot subsequently add a new column to a tiered hypertable with the same name as the now-deleted column.Disallowed modifications include: adding a column with non-
NULLdefaults, renaming a column, changing the data type of a column, and adding aNOT NULLconstraint to the column.Limited data changes: you cannot insert data into, update, or delete a tiered chunk. These limitations take effect as soon as the chunk is scheduled for tiering.
Inefficient query planner filtering for non-native data types: the query planner speeds up reads from our object storage tier by using metadata to filter out columns and row groups that don't satisfy the query. This works for all native data types, but not for non-native types, such as
JSON,JSONB, andGIS.
Latency: S3 has higher access latency than local storage. This can affect the execution time of queries in latency-sensitive environments, especially lighter queries.
Number of dimensions: you cannot use tiered storage with hypertables partitioned on more than one dimension. Make sure your hypertables are partitioned on time only, before you enable tiered storage.
===== PAGE: https://docs.tigerdata.com/use-timescale/security/overview/ =====
About security in Tiger Cloud
Protecting data starts with secure software engineering. At Tiger Data, we embed security into every stage of development, from static code analysis and automated dependency scanning to rigorous code security reviews. To go even further, we developed pgspot, an open-source extension to identify security issues with Postgres extensions, which strengthens the broader ecosystem as well as our own platform. Tiger Data products do not have any identified weaknesses.

This page lists the additional things we do to ensure operational security and to lock down Tiger Cloud services. To see our security features at a glance, see [Tiger Data Security][security-at-timescale].
Role-based access
Tiger Cloud provides role-based access for you to:
- Administer your Tiger Cloud project In Tiger Cloud Console, users with the Owner, Admin, and Viewer roles have different permissions to manage users and services in the project.
- Manage data in each service To restrict access to your data on the database level, you can create other roles on top of the default tsdbadmin role.
Data encryption
Your data on Tiger Cloud is encrypted both in transit and at rest. Both active databases and backups are encrypted.
Tiger Cloud uses AWS as its cloud provider, with all the security that AWS provides. Data encryption uses the industry-standard AES-256 algorithm. Cryptographic keys are managed by [AWS Key Management Service (AWS KMS)][aws-kms]. Keys are never stored in plaintext.
For more information about AWS security, see the AWS documentation on security in [Amazon Elastic Compute Cloud][ec2-security] and [Elastic Block Storage][ebs-security].
Networking security
Customer access to Tiger Cloud services is only provided over TLS-encrypted connections. There is no option to use unencrypted plaintext connections.
Networking with Virtual Private Cloud (VPC) peering
When using VPC peering, no public Internet-based access is provided to the service. Service addresses are published in public DNS, but they can only be connected to from the customer's peered VPC using private network addresses.
VPC peering only enables communication to be initiated from your Customer VPC to Tiger Cloud services running in the Tiger Cloud VPC. Tiger Cloud cannot initiate communication with your VPC. To learn how to set up VPC Peering, see [Secure your Tiger Cloud services with VPC Peering and AWS PrivateLink][vpc-peering].
IP address allow lists
You can allow only trusted IP addresses to access your Tiger Cloud services. You do this by creating [IP address allow lists][ip-allowlist] and attaching them to your services.
Operator access
Normally all the resources required for providing Tiger Cloud services are automatically created, maintained and terminated by the Tiger Cloud infrastructure. No manual operator intervention is required.
However, the Tiger Data operations team has the capability to securely log in to the service virtual machines for troubleshooting purposes. These accesses are audit logged.
No customer access to the virtual machine level is provided.
GDPR compliance
Tiger Data complies with the European Union's General Data Protection Regulation (GDPR), and all practices are covered by our [Privacy Policy][timescale-privacy-policy] and the [Terms of Service][tsc-tos]. All customer data is processed in accordance with Tiger Data's GDPR-compliant [Data Processor Addendum][tsc-data-processor-addendum], which applies to all Tiger Data customers.
Tiger Data operators never access customer data, unless explicitly requested by the customer to troubleshoot a technical issue. The Tiger Data operations team has mandatory recurring training regarding the applicable policies.
HIPAA compliance
The Tiger Cloud [Enterprise plan][pricing-plan-features] is Health Insurance Portability and Accountability Act (HIPAA) compliant. This allows organizations to securely manage and analyze sensitive healthcare data, ensuring they meet regulatory requirements while building compliant applications.
SOC 2 compliance
Tiger Cloud is SOC 2 Type 2 compliant. This ensures that organizations can securely manage customer data in alignment with industry standards for security, availability, processing integrity, confidentiality, and privacy. It helps businesses meet trust requirements while confidently building applications that handle sensitive information. The annual SOC 2 report is available to customers on the Scale or Enterprise pricing plans. Open a [support ticket][open-support-ticket] to get access to it.
===== PAGE: https://docs.tigerdata.com/use-timescale/security/strict-ssl/ =====
Connect with a stricter SSL mode
The default connection string for Tiger Cloud uses the Secure Sockets Layer (SSL) mode require. Users can choose not to use Transport Layer Security (TLS) while connecting to their databases, but connecting to production databases without encryption is strongly discouraged. To achieve even stronger security, clients may select to verify the identity of the server. If you want your connection client to verify the server's identity, you can connect with an [SSL mode][ssl-modes] of verify-ca or verify-full. To do so, you need to store a copy of the certificate chain where your connection tool can find it.
This section provides instructions for setting up a stricter SSL connection.
SSL certificates
As part of the secure connection protocol, the server proves its identity by providing clients with a certificate. This certificate should be issued and signed by a well-known and trusted Certificate Authority.
Because requesting a certificate from a Certificate Authority takes some time, Tiger Cloud services are initialized with a self-signed certificate. This lets you start up a service immediately. After your service is started, a signed certificate is requested behind the scenes. The new certificate is usually received within 30 minutes. Your certificate is then replaced with almost no interruption. Connections are reset, and most clients reconnect automatically.
With the signed certificate, you can switch your connections to a stricter SSL mode, such as verify-ca or verify-full.
For more information on the different SSL modes, see the [Postgres SSL mode descriptions][ssl-modes].
Connect to your database with a stricter SSL mode
To set up a stricter SSL connection:
- Generate a copy of your certificate chain and store it in the right location
- Change your Tiger Cloud connection string
Connecting to your database with a stricter SSL mode
Use the
openssltool to connect to your Tiger Cloud service and get the certificate bundle. Store the bundle in a file calledbundle.crt.Replace
service URL with portwith your Tiger Cloud connection URL:shellopenssl s_client -showcerts -partial_chain -starttls postgres \ -connect service URL with port < /dev/null 2>/dev/null | \ awk '/BEGIN CERTIFICATE/,/END CERTIFICATE/\{ print \}' > bundle.crtCopy the bundle to your clipboard:
shellpbcopy < bundle.crtshellxclip -sel clip < bundle.crtshellclip.exe < bundle.crtNavigate to https://whatsmychaincert.com/. This online tool generates a full certificate chain, including the root Certificate Authority certificate, which is not included in the certificate bundle returned by the database.
Paste your certificate bundle in the provided box. Check
Include Root Certificate. ClickGenerate Chain.Save the downloaded certificate chain to
~/.postgresql/root.crt.Change your Tiger Cloud connection string from
sslmode=requireto eithersslmode=verify-fullorsslmode=verify-ca. For example, to connect to your database withpsql, run:shellpsql "postgres://tsdbadmin@service URL with port/tsdb?sslmode=verify-full"
Verify the certificate type used by your database
To check whether the certificate has been replaced yet, connect to your database instance and inspect the returned certificate. We are using two certificate providers - Google and ZeroSSL, that's why chances are you can have a certificate issued by either of those CAs:
openssl s_client -showcerts -partial_chain -starttls postgres -connect <HOST>:<PORT> < /dev/null 2>/dev/null | grep "Google\|ZeroSSL"===== PAGE: https://docs.tigerdata.com/use-timescale/security/transit-gateway/ =====
Peer your Tiger Cloud services with AWS Transit Gateway
[AWS Transit Gateway][aws-transit-gateway] enables you to securely connect to your Tiger Cloud from AWS, Google Cloud, Microsoft Azure, or any other cloud or on-premise environment.
You use AWS Transit Gateway as a traffic controller for your network. Instead of setting up multiple direct connections to different clouds, on-premise data centers, and other AWS services, you connect everything to AWS Transit Gateway. This simplifies your network and makes it easier to manage and scale.
You can then create a peering connection between your Tiger Cloud services and AWS Transit Gateway in Tiger Cloud. This means that, no matter how big or complex your infrastructure is, you can connect securely to your Tiger Cloud services.
For enhanced security, you can add peering connections to multiple Transit Gateways with overlapping CIDRs—Tiger Cloud creates a new isolated connection for every unique Transit Gateway ID. Otherwise, the existing connection is reused for your services in the same project and region.
To configure this secure connection, you:
- Connect your infrastructure to AWS Transit Gateway.
- Create a Tiger Cloud Peering VPC with a peering connection to AWS Transit Gateway.
- Accept and configure the peering connection on your side.
- Attach individual services to the Peering VPC.
AWS Transit Gateway enables you to connect from almost any environment, this page provides examples for the most common use cases.
Create a Peering VPC in [Tiger Cloud Console][console-login]
In
Security>VPC, clickCreate a VPC: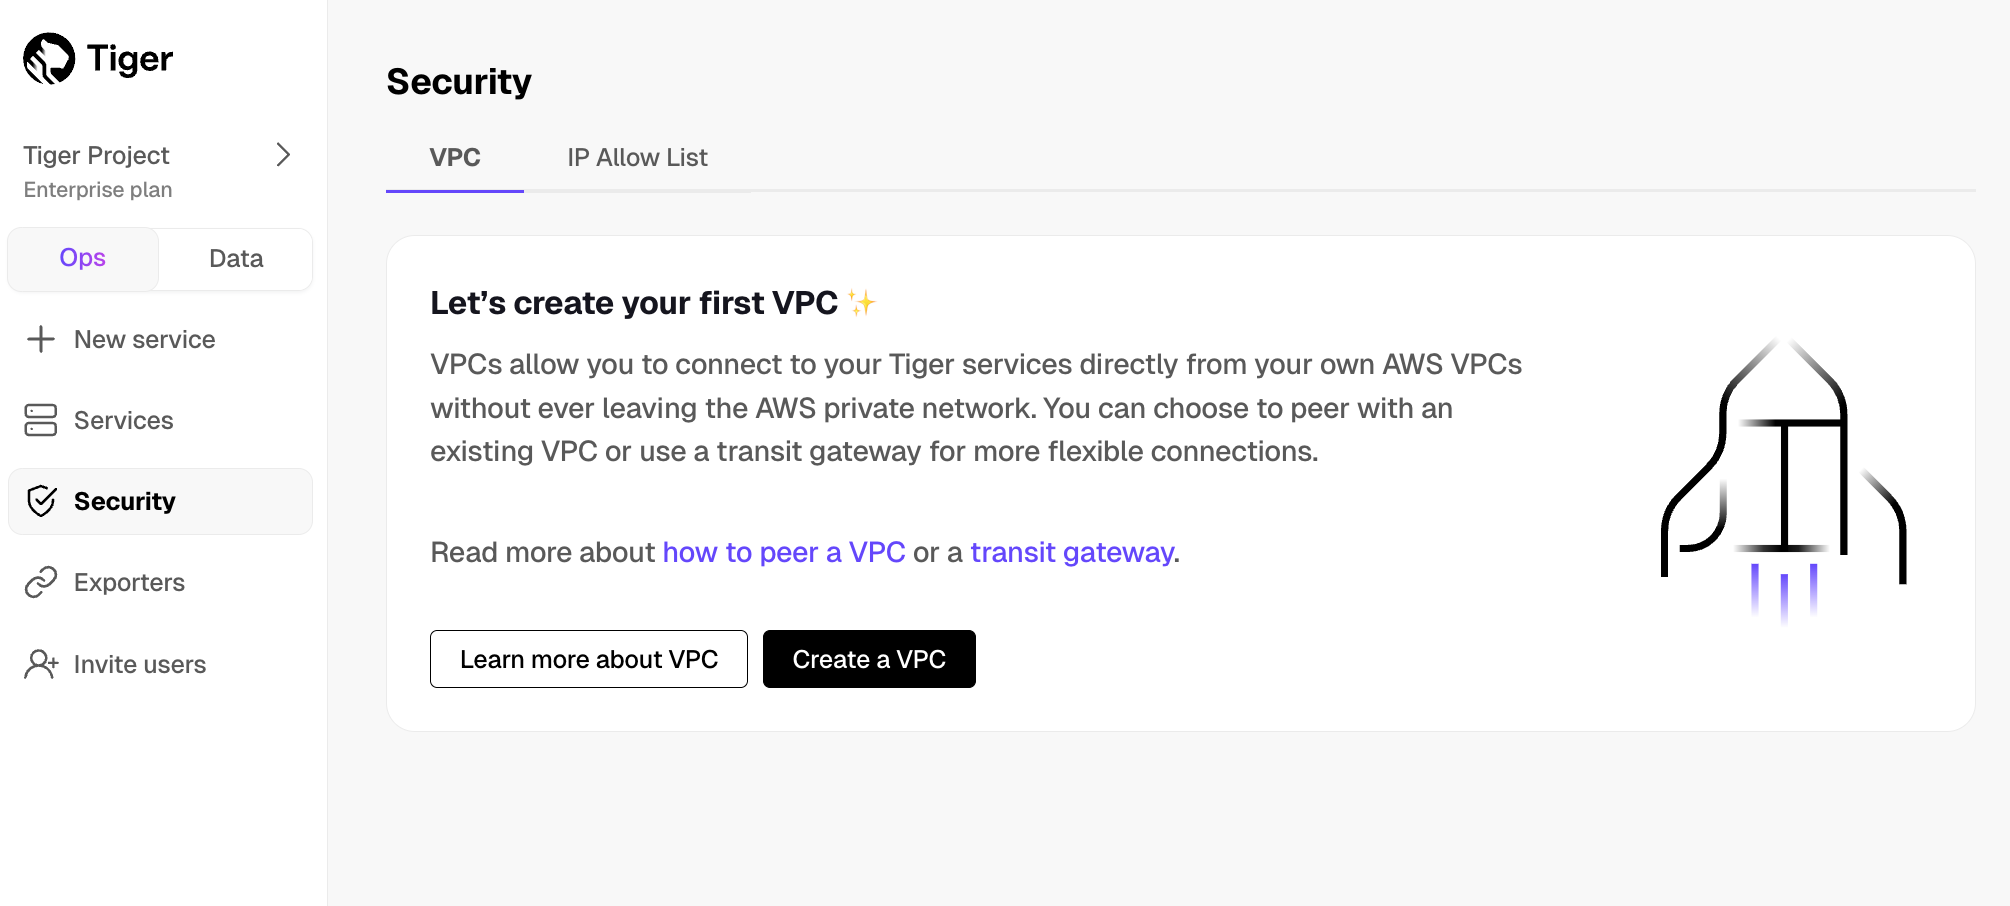
Choose your region and IP range, name your VPC, then click
Create VPC: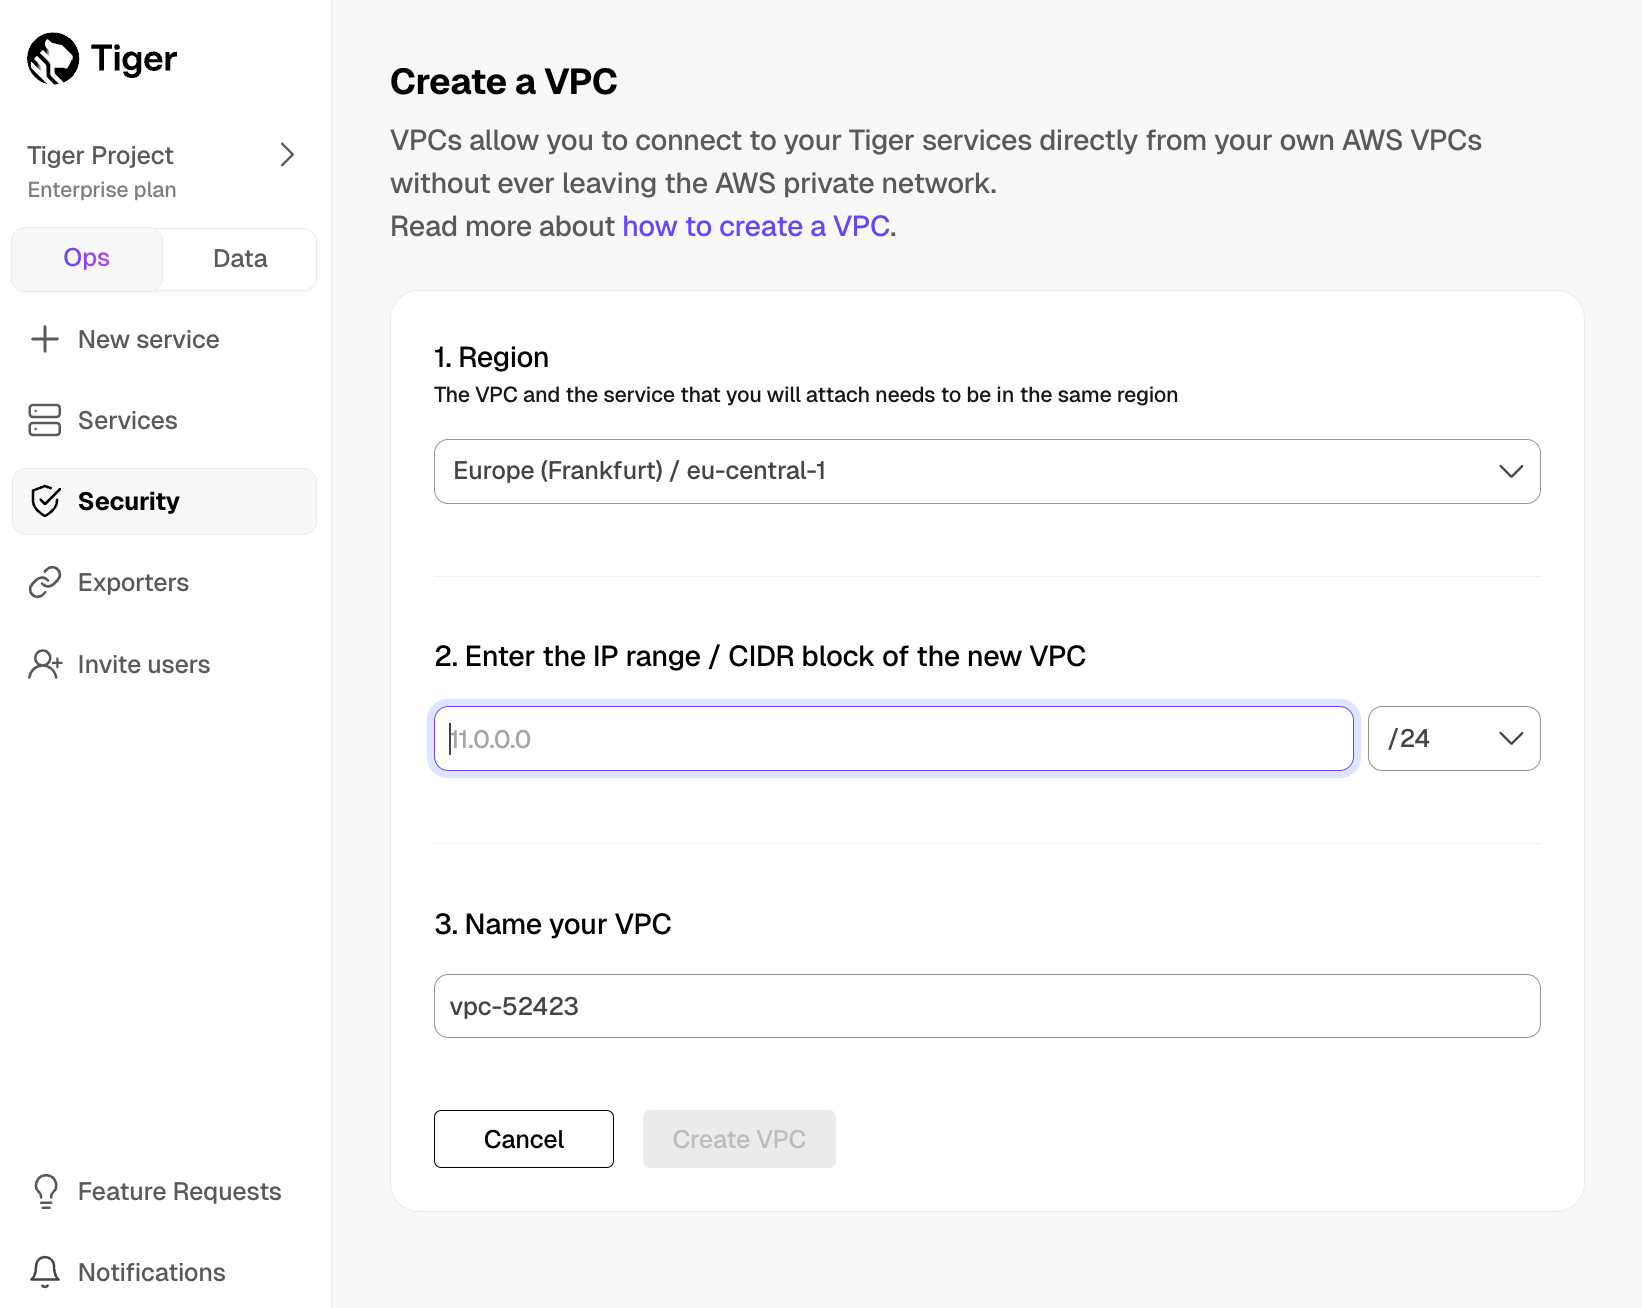
Your service and Peering VPC must be in the same AWS region. The number of Peering VPCs you can create in your project depends on your [pricing plan][pricing-plans]. If you need another Peering VPC, either contact support@tigerdata.com or change your plan in [Tiger Cloud Console][console-login].
Add a peering connection:
- In the
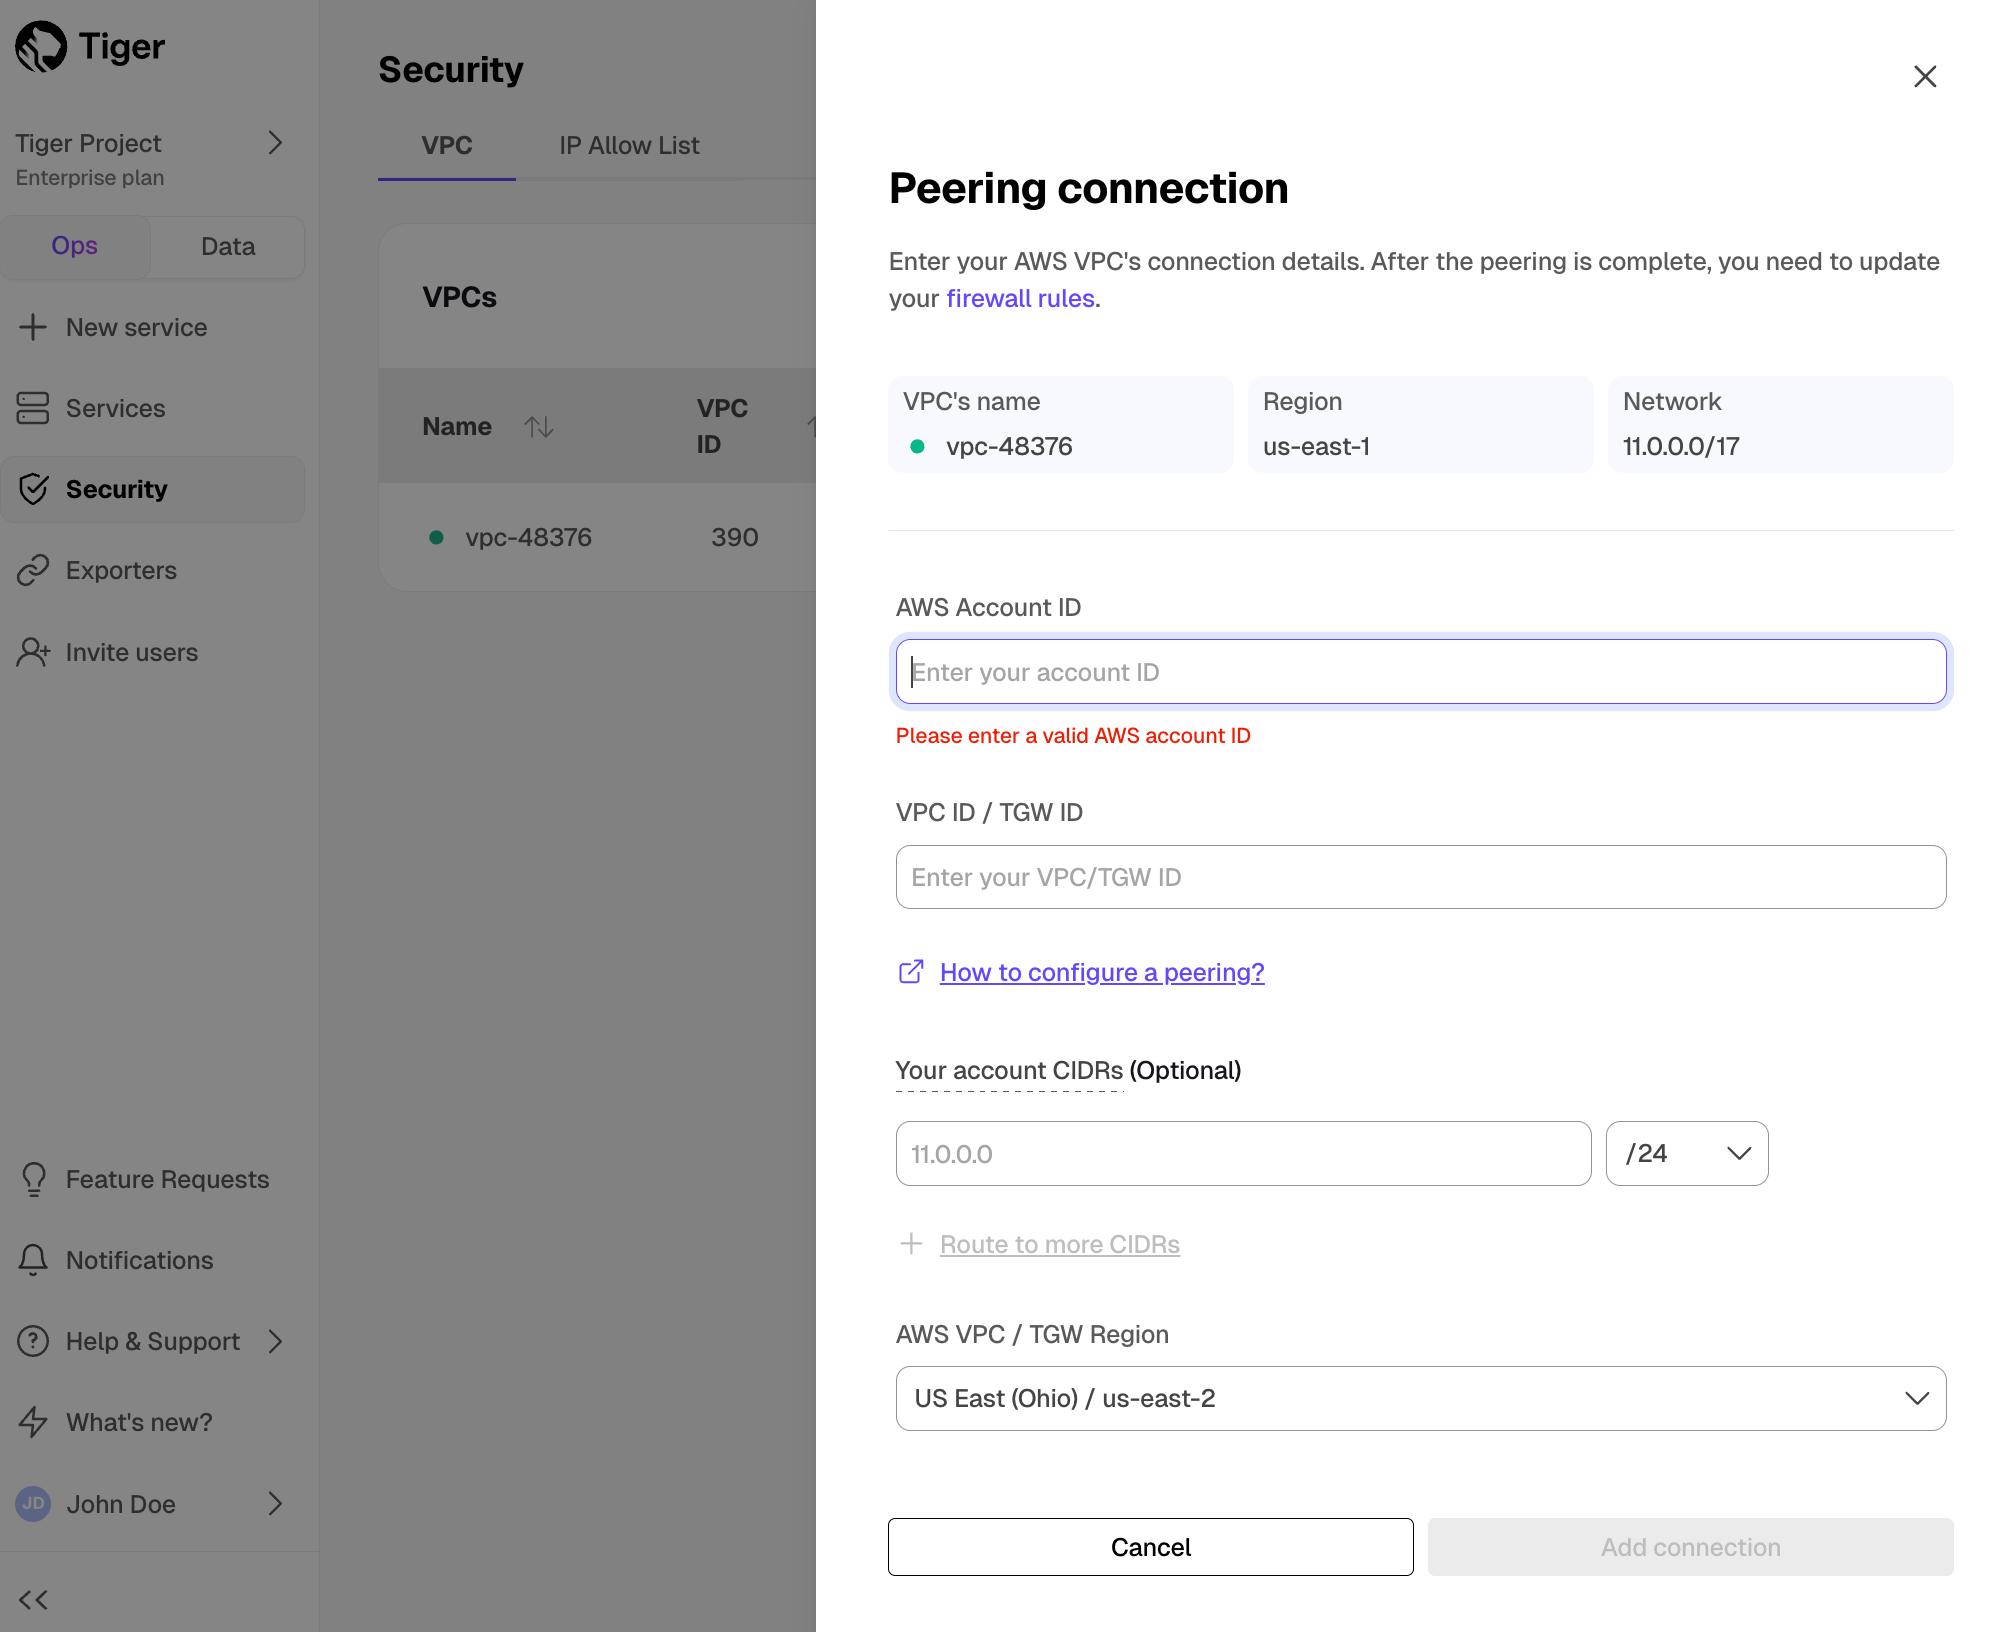
VPC Peeringcolumn, clickAdd. - Provide your AWS account ID, Transit Gateway ID, CIDR ranges, and AWS region. Tiger Cloud creates a new isolated connection for every unique Transit Gateway ID.
- Click
Add connection.
- In the
Accept and configure peering connection in your AWS account
Once your peering connection appears as
Processing, you can accept and configure it in AWS:Accept the peering request coming from Tiger Cloud. The request can take up to 5 min to arrive. Within 5 more minutes after accepting, the peering should appear as
Connectedin Tiger Cloud Console.Configure at least the following in your AWS account networking:
- Your subnet route table to route traffic to your Transit Gateway for the Peering VPC CIDRs.
- Your Transit Gateway route table to route traffic to the newly created Transit Gateway peering attachment for the Peering VPC CIDRs.
- Security groups to allow outbound TCP 5432.
Attach a Tiger Cloud service to the Peering VPC In [Tiger Cloud Console][console-services]
- Select the service you want to connect to the Peering VPC.
- Click
Operations>Security>VPC. - Select the VPC, then click
Attach VPC.
You cannot attach a Tiger Cloud service to multiple Tiger Cloud VPCs at the same time.
Connect your infrastructure to AWS Transit Gateway
Establish connectivity between Azure and AWS. See the [AWS architectural documentation][azure-aws] for details.
Create a Peering VPC in [Tiger Cloud Console][console-login]
In
Security>VPC, clickCreate a VPC:Choose your region and IP range, name your VPC, then click
Create VPC:Your service and Peering VPC must be in the same AWS region. The number of Peering VPCs you can create in your project depends on your [pricing plan][pricing-plans]. If you need another Peering VPC, either contact support@tigerdata.com or change your plan in [Tiger Cloud Console][console-login].
Add a peering connection:
- In the
VPC Peeringcolumn, clickAdd. - Provide your AWS account ID, Transit Gateway ID, CIDR ranges, and AWS region. Tiger Cloud creates a new isolated connection for every unique Transit Gateway ID.
- Click
Add connection.
- In the
Accept and configure peering connection in your AWS account
Once your peering connection appears as
Processing, you can accept and configure it in AWS:Accept the peering request coming from Tiger Cloud. The request can take up to 5 min to arrive. Within 5 more minutes after accepting, the peering should appear as
Connectedin Tiger Cloud Console.Configure at least the following in your AWS account networking:
- Your subnet route table to route traffic to your Transit Gateway for the Peering VPC CIDRs.
- Your Transit Gateway route table to route traffic to the newly created Transit Gateway peering attachment for the Peering VPC CIDRs.
- Security groups to allow outbound TCP 5432.
Attach a Tiger Cloud service to the Peering VPC In [Tiger Cloud Console][console-services]
- Select the service you want to connect to the Peering VPC.
- Click
Operations>Security>VPC. - Select the VPC, then click
Attach VPC.
You cannot attach a Tiger Cloud service to multiple Tiger Cloud VPCs at the same time.
Connect your infrastructure to AWS Transit Gateway
Establish connectivity between Google Cloud and AWS. See [Connect HA VPN to AWS peer gateways][gcp-aws].
Create a Peering VPC in [Tiger Cloud Console][console-login]
In
Security>VPC, clickCreate a VPC:Choose your region and IP range, name your VPC, then click
Create VPC:Your service and Peering VPC must be in the same AWS region. The number of Peering VPCs you can create in your project depends on your [pricing plan][pricing-plans]. If you need another Peering VPC, either contact support@tigerdata.com or change your plan in [Tiger Cloud Console][console-login].
Add a peering connection:
- In the
VPC Peeringcolumn, clickAdd. - Provide your AWS account ID, Transit Gateway ID, CIDR ranges, and AWS region. Tiger Cloud creates a new isolated connection for every unique Transit Gateway ID.
- Click
Add connection.
- In the
Accept and configure peering connection in your AWS account
Once your peering connection appears as
Processing, you can accept and configure it in AWS:Accept the peering request coming from Tiger Cloud. The request can take up to 5 min to arrive. Within 5 more minutes after accepting, the peering should appear as
Connectedin Tiger Cloud Console.Configure at least the following in your AWS account networking:
- Your subnet route table to route traffic to your Transit Gateway for the Peering VPC CIDRs.
- Your Transit Gateway route table to route traffic to the newly created Transit Gateway peering attachment for the Peering VPC CIDRs.
- Security groups to allow outbound TCP 5432.
Attach a Tiger Cloud service to the Peering VPC In [Tiger Cloud Console][console-services]
- Select the service you want to connect to the Peering VPC.
- Click
Operations>Security>VPC. - Select the VPC, then click
Attach VPC.
You cannot attach a Tiger Cloud service to multiple Tiger Cloud VPCs at the same time.
Connect your infrastructure to AWS Transit Gateway
Establish connectivity between your on-premise infrastructure and AWS. See the [Centralize network connectivity using AWS Transit Gateway][aws-onprem].
Create a Peering VPC in [Tiger Cloud Console][console-login]
In
Security>VPC, clickCreate a VPC:Choose your region and IP range, name your VPC, then click
Create VPC:Your service and Peering VPC must be in the same AWS region. The number of Peering VPCs you can create in your project depends on your [pricing plan][pricing-plans]. If you need another Peering VPC, either contact support@tigerdata.com or change your plan in [Tiger Cloud Console][console-login].
Add a peering connection:
- In the
VPC Peeringcolumn, clickAdd. - Provide your AWS account ID, Transit Gateway ID, CIDR ranges, and AWS region. Tiger Cloud creates a new isolated connection for every unique Transit Gateway ID.
- Click
Add connection.
- In the
Accept and configure peering connection in your AWS account
Once your peering connection appears as
Processing, you can accept and configure it in AWS:Accept the peering request coming from Tiger Cloud. The request can take up to 5 min to arrive. Within 5 more minutes after accepting, the peering should appear as
Connectedin Tiger Cloud Console.Configure at least the following in your AWS account networking:
- Your subnet route table to route traffic to your Transit Gateway for the Peering VPC CIDRs.
- Your Transit Gateway route table to route traffic to the newly created Transit Gateway peering attachment for the Peering VPC CIDRs.
- Security groups to allow outbound TCP 5432.
Attach a Tiger Cloud service to the Peering VPC In [Tiger Cloud Console][console-services]
- Select the service you want to connect to the Peering VPC.
- Click
Operations>Security>VPC. - Select the VPC, then click
Attach VPC.
You cannot attach a Tiger Cloud service to multiple Tiger Cloud VPCs at the same time.
You can now securely access your services in Tiger Cloud.
===== PAGE: https://docs.tigerdata.com/use-timescale/security/ip-allow-list/ =====
IP allow list
You can restrict access to your Tiger Cloud services to trusted IP addresses only. This prevents unauthorized connections without the need for a [Virtual Private Cloud][vpc-peering]. Creating IP allow lists helps comply with security standards such as SOC 2 or HIPAA that require IP filtering. This is especially useful in regulated industries like finance, healthcare, and government.
For a more fine-grained control, you create separate IP allow lists for [the ops mode and the data mode][modes].
Create and attach an IP allow list in the ops mode
You create an IP allow list at the [project level][members], then attach your service to it.
You attach a service to either one VPC, or one IP allow list. You cannot attach a service to a VPC and an IP allow list at the same time.
In [Tiger Cloud Console][console], select
Security>IP Allow List, then clickCreate IP Allow List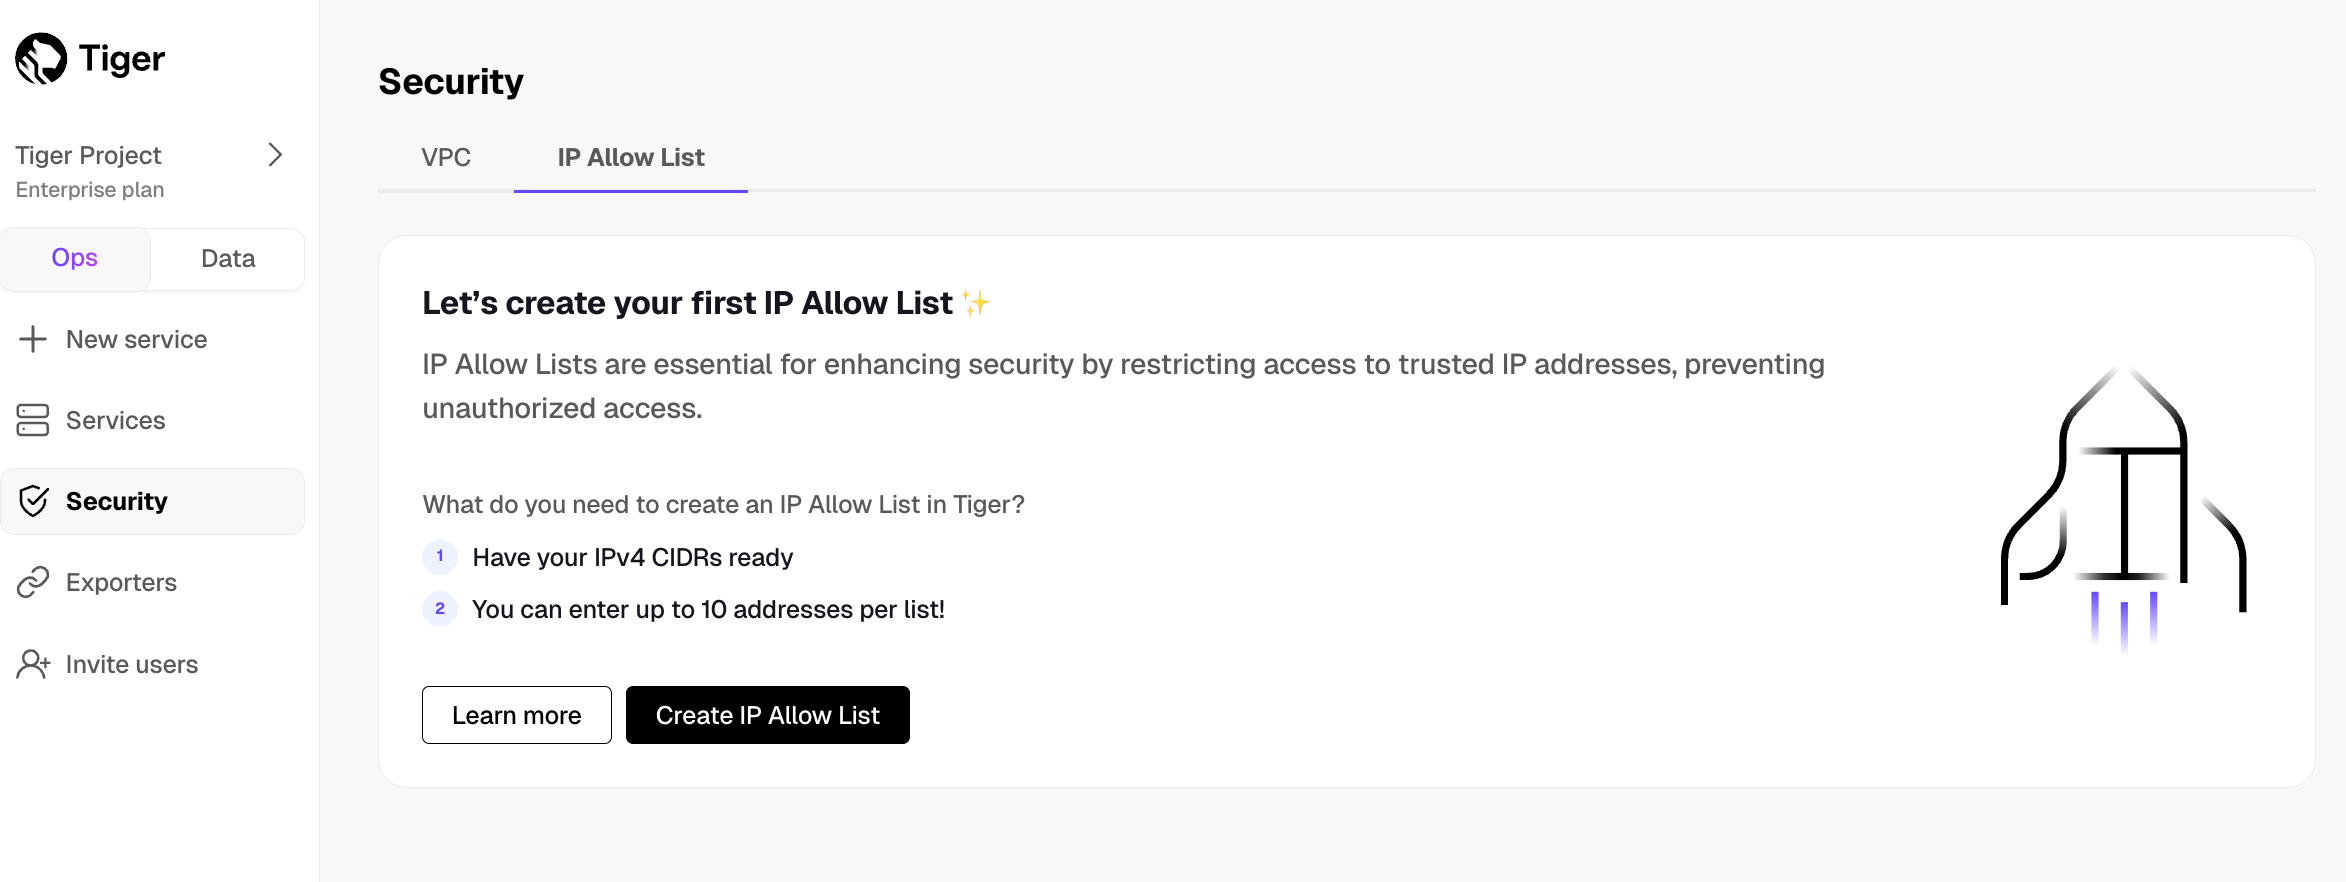
Enter your trusted IP addresses
The number of IP addresses that you can include in one list depends on your [pricing plan][pricing-plans].
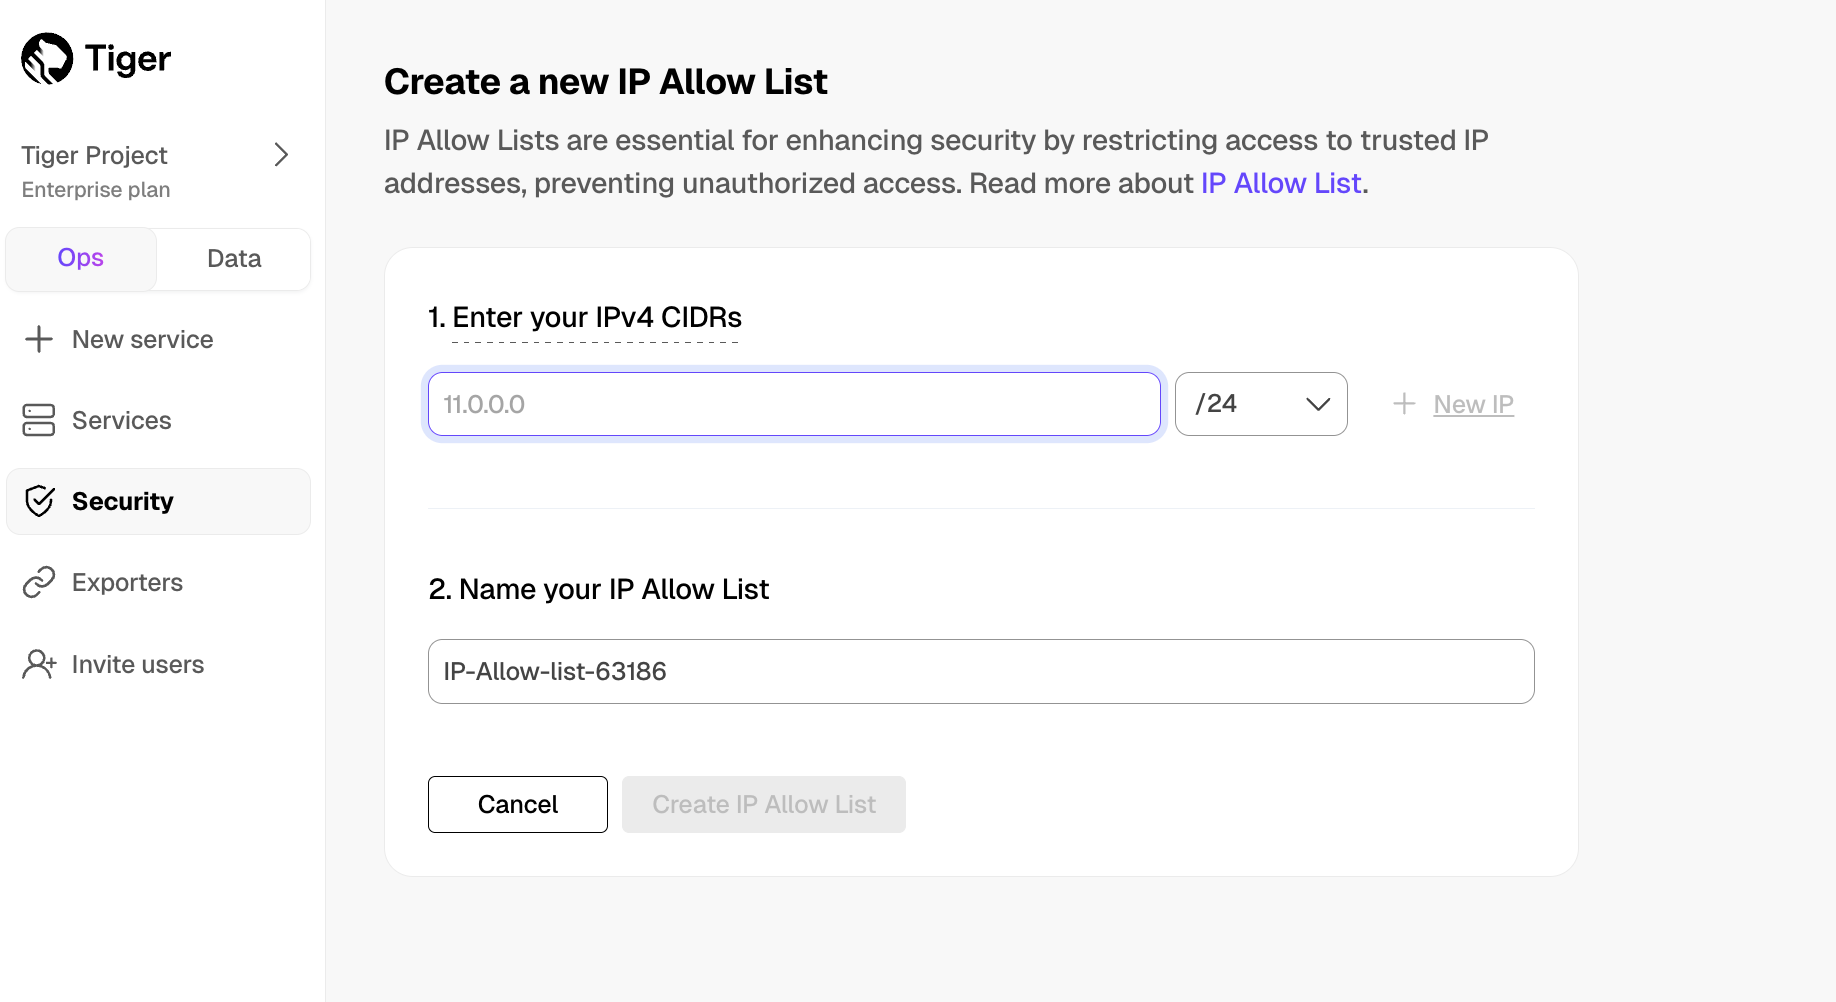
Name your allow list and click
Create IP Allow ListClick
+ Create IP Allow Listto create another list. The number of IP allow lists you can create depends on your [pricing plan][pricing-plans].Select a Tiger Cloud service, then click
Operations>Security>IP Allow List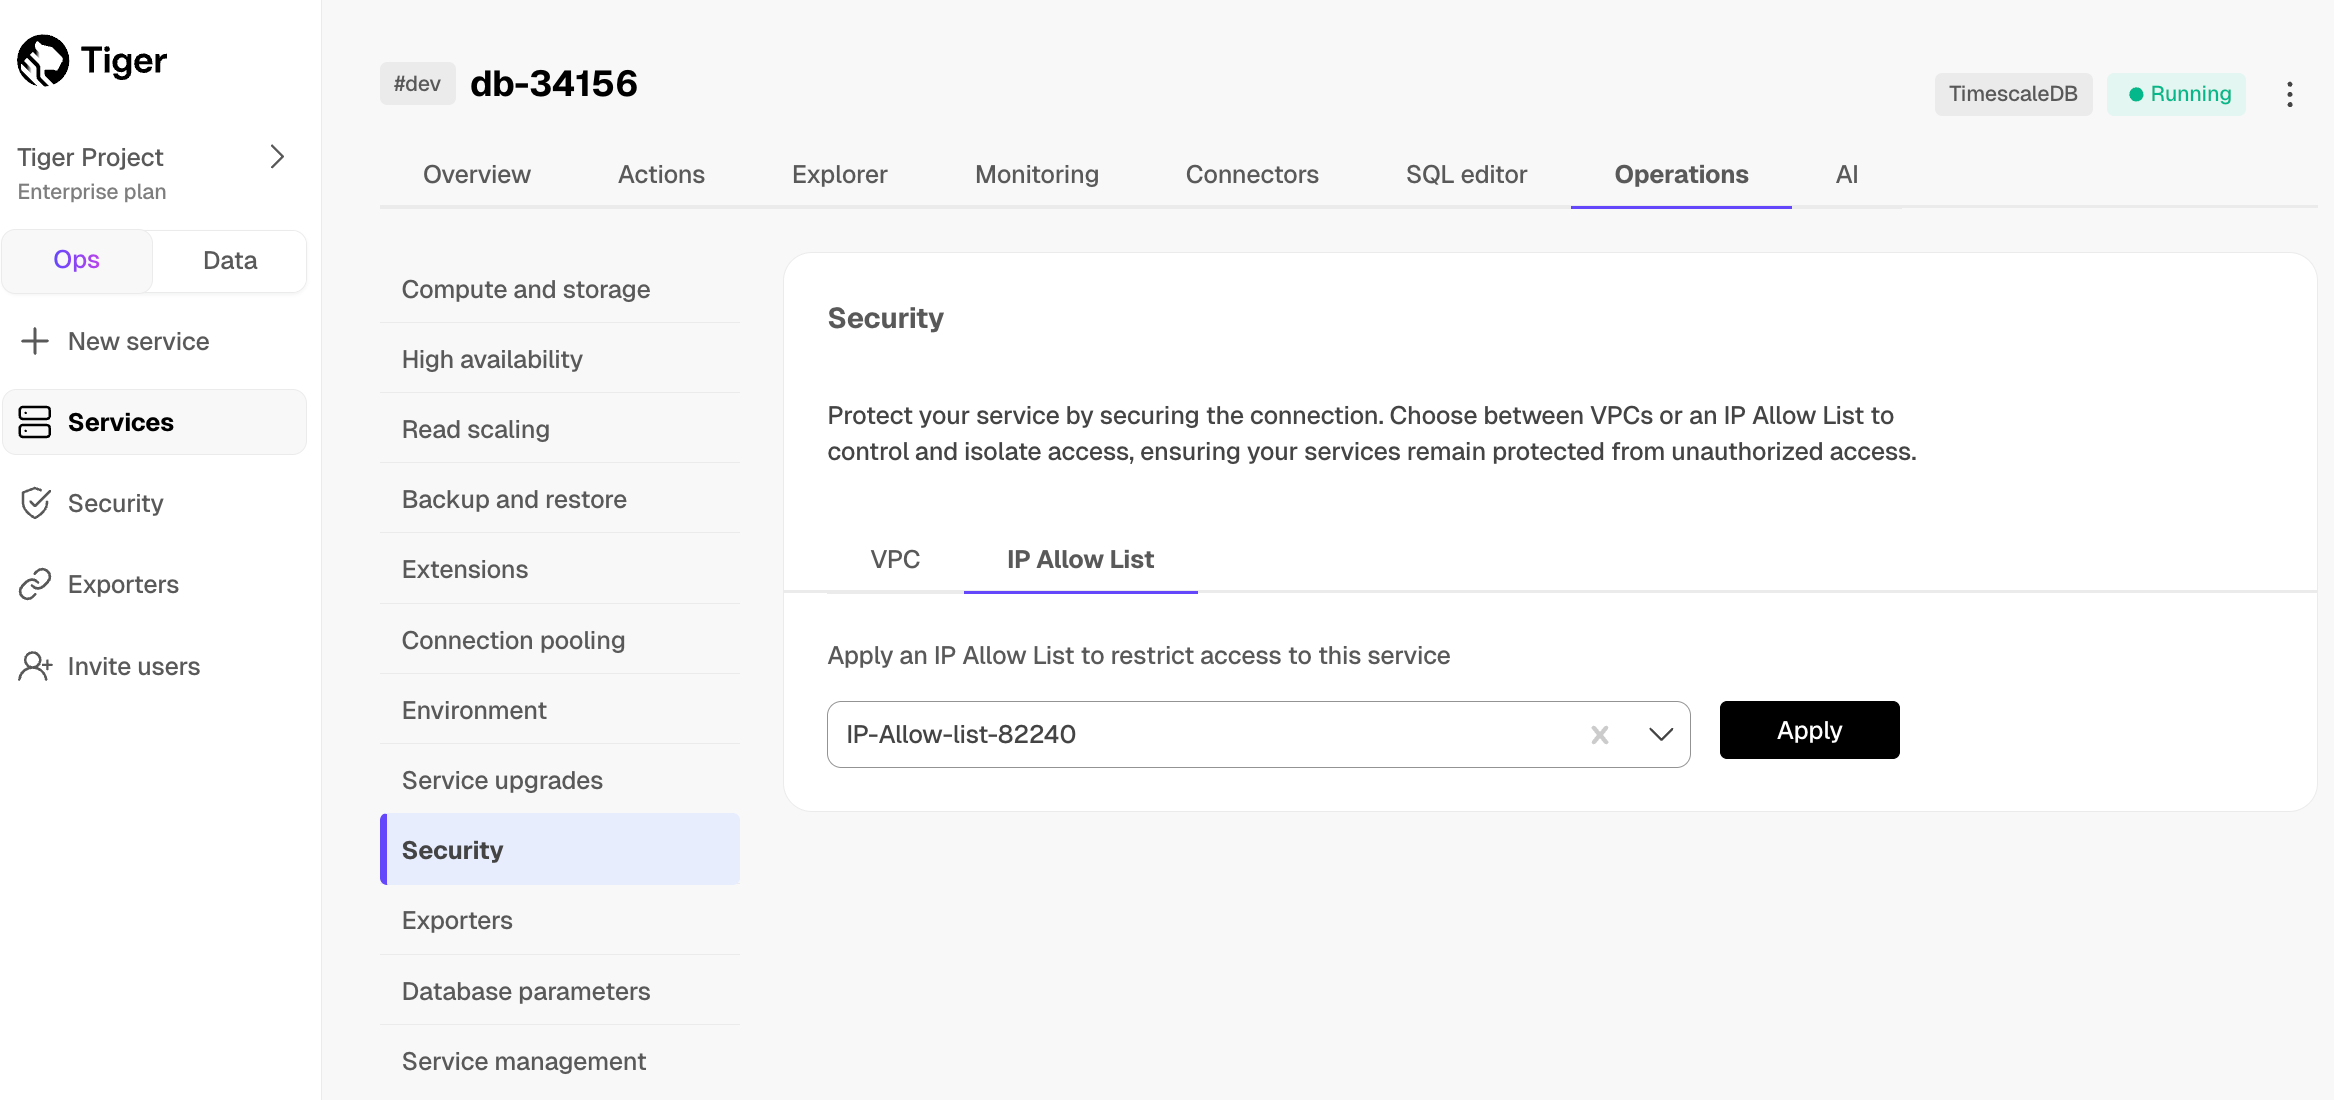
Select the list in the drop-down and click
ApplyType
Applyin the confirmation popup
You have created and attached an IP allow list for the operations available in the ops mode. You can unattach or change the list attached to a service from the same tab.
Create an IP allow list in the data mode
You create an IP allow list in the data mode settings.
In [Tiger Cloud Console][console], toggle
DataClick the project name in the upper left corner, then select
SettingsScroll down and toggle
IP AllowlistAdd IP addresses
- Click
Add entry. - Enter an IP address or a range of IP addresses.
- Click
Add. - When all the IP addresses have been added, click
Apply. - Click
Confirm.
- Click
You have successfully added an IP allow list for querying your service in the data mode.
===== PAGE: https://docs.tigerdata.com/use-timescale/security/multi-factor-authentication/ =====
Multi-factor user authentication
You can use two-factor authentication to log in to your Tiger Data account. Two-factor authentication, also known as two-step verification or 2FA, enables secure logins that require an authentication code in addition to your user password. The code is provided by an authenticator app on your mobile device. There are multiple authenticator apps available.
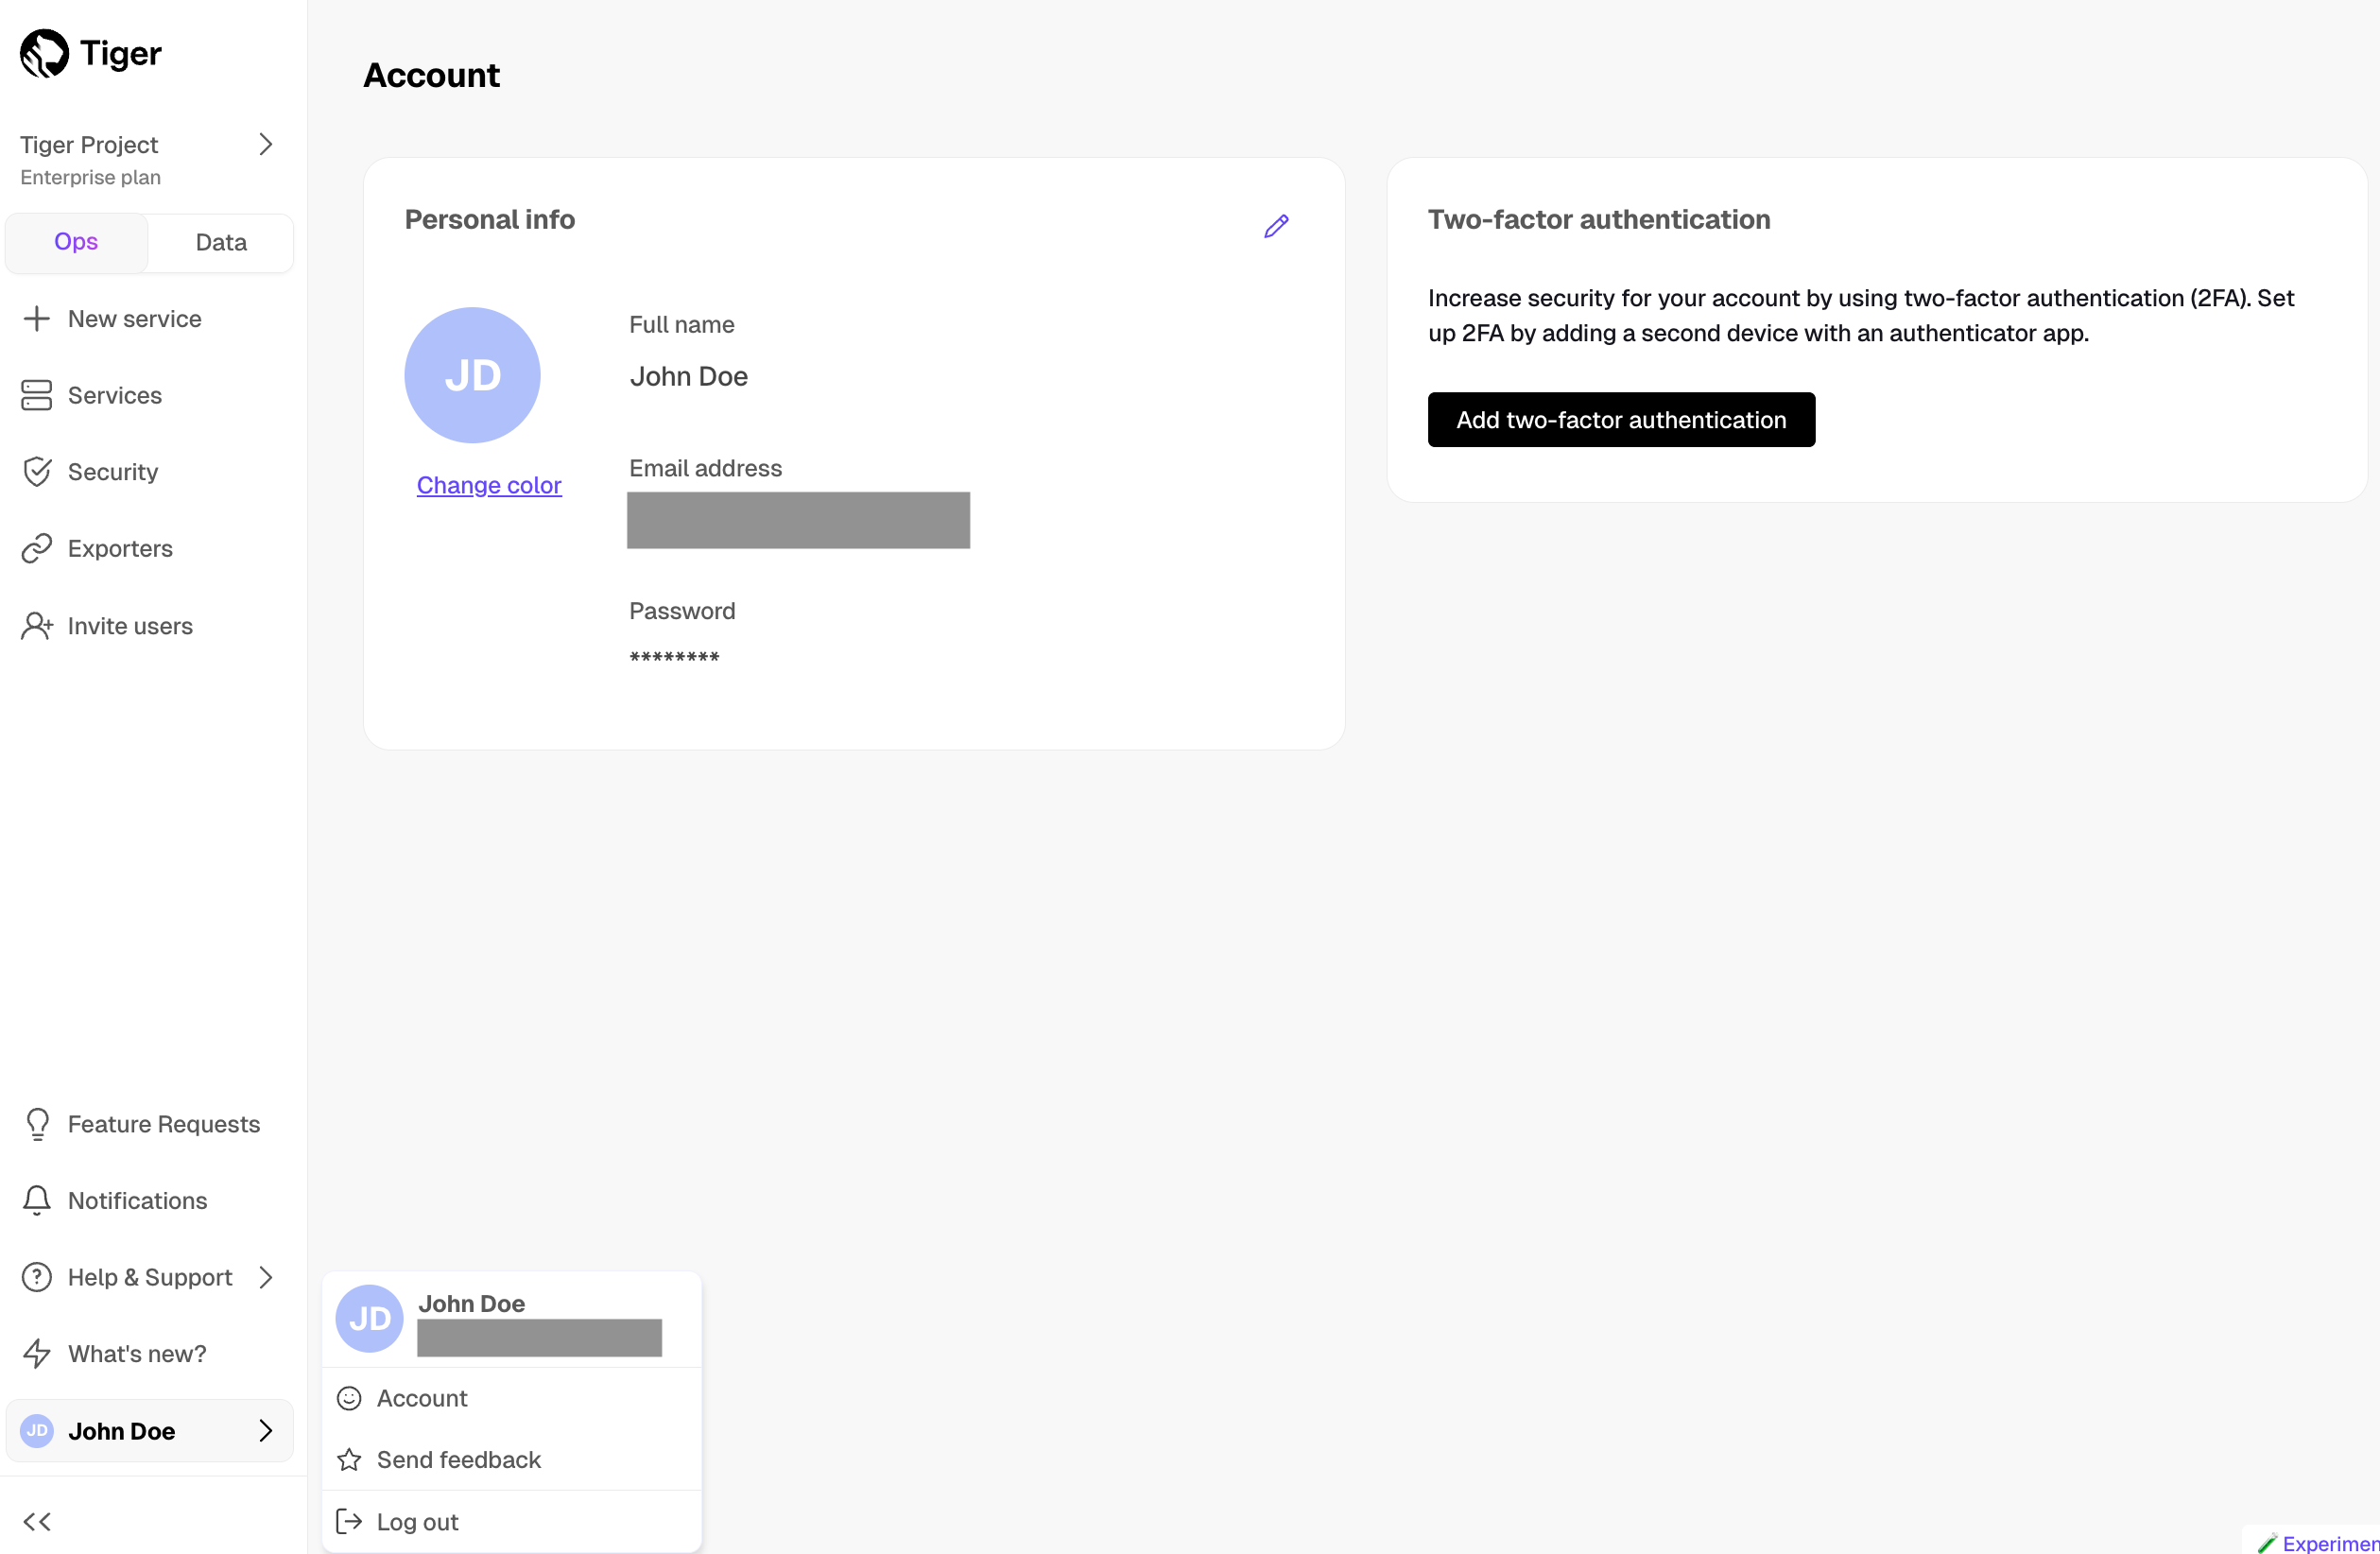
This page describes how to configure two-factor authentication with Google Authenticator.
Prerequisites
Before you begin, make sure you have:
- Installed the [Google Authenticator application][install-google-authenticator] on your mobile device.
Configure two-factor authentication with Google Authenticator
Take the following steps to configure two-factor authentication:
- Log in to [Tiger Cloud Console][cloud-login] with your username and password. 2FA is not available if you log in with Google SSO.
- Click the
User nameicon in the bottom left of Tiger Cloud Console and selectAccount. - In
Account, clickAdd two-factor authentication. - On your mobile device, open Google Authenticator, tap
+, and selectScan a QR code. - Scan the QR code provided by Tiger Cloud Console in
Connect to an authenticator appand clickNext. - In Tiger Cloud Console, enter the verification code provided by Google Authenticator, and click
Next. - In
Save your recovery codes, copy, download, or print the recovery codes. These are used to recover your account if you lose your device. - Verify that you have saved your recovery codes, by clicking
OK, I saved my recovery codes. - If two-factor authentication is enabled correctly, an email notification is sent to you.
If you lose access to the mobile device you use for multi-factor authentication, and you do not have access to your recovery codes, you cannot sign in to your Tiger Data account. To regain access to your account, contact support@tigerdata.com.
Regenerate recovery codes
If you do not have access to your authenticator app and need to log in to Tiger Cloud Console, you can use your recovery codes. Recovery codes are single-use. If you've used all 10 recovery codes, or lost access to them, you can generate another list. Generating a new list invalidates all previously generated codes.
- Log in to [Tiger Cloud Console][cloud-login] with your username and password.
- Click the
User nameicon in the bottom left and selectAccount. - In
Account, navigate toTwo-factor authentication. - Click
Regenerate recovery codes. - In
Two-factor authentication, enter the verification code from your authenticator app. Alternatively, if you do not have access to the authenticator app, clickUse recovery code insteadto enter a recovery code. - Click
Next. - In
Save your recovery codes, copy, download, or print the recovery codes. These are used to recover your account if you lose your device. - Verify that you have saved your recovery codes, by clicking
OK, I saved my recovery codes.
Remove two-factor authentication
If you need to enroll a new device for two-factor authentication, you can remove two-factor authentication from your account and then add it again with your new device.
- Log in to [Tiger Cloud Console][cloud-login] with your username and password.
- Click the
User nameicon in the bottom left of Tiger Cloud Console and selectAccount. - In
Account, navigate toTwo-factor authentication. - Click
Remove two-factor authentication. - Enter the verification code from your authenticator app to confirm. Alternatively click
Use recovery code insteadto type the recovery code. - Click
Remove.
===== PAGE: https://docs.tigerdata.com/use-timescale/security/client-credentials/ =====
Client credentials
You can use client credentials to programmatically access resources instead of using your username and password. You can generate multiple client credentials for different applications or use cases rather than a single set of user credentials for everything.
Create client credentials
When you create client credentials, a public key and a private key are generated. These keys act as the username and password for programmatic client applications. It is important that you save these keys in a safe place. You can also delete these client credentials when the client applications no longer need access to Tiger Cloud resources. For more information about obtaining an access token programmatically, see the [Tiger Cloud Terraform provider documentation][terraform-provider].
Creating client credentials
- [Log in to your Tiger Data account][cloud-login].
- Navigate to the
Project Settingspage to create client credentials for your project. - In the
Project Settingspage, clickCreate credentials. - In the
New client credentialsdialog, you can view thePublic keyand theSecret Key. Copy your secret key and store it in a secure place. You won't be able to view theSecret Keyagain in the console. - Click
Done. You can use these keys in your client applications to access Tiger Cloud resources inside the respective project. Tiger Cloud generates a defaultNamefor the client credentials. - Click the ⋮ menu and select
Rename credentials. - In the
Edit credential namedialog, type the new name and clickAccept.
Deleting client credentials
- [Log in to your Tiger Data account][cloud-login].
- Navigate to the
Project Settingspage to view client credentials for your project. - In the
Project Settingspage, click the ⋮ menu of the client credential, and selectDelete. - In the
Are you suredialog, type the name of the client credential, and clickDelete.
===== PAGE: https://docs.tigerdata.com/use-timescale/security/members/ =====
Control access to Tiger Cloud projects
When you sign up for a [30-day free trial][sign-up], Tiger Cloud creates a project with built-in role-based access.
This includes the following roles:
- Owner: Tiger Cloud assigns this role to you when your project is created. As the Owner, you can add and delete other users, transfer project ownership, administer services, and edit project settings.
- Admin: the Owner assigns this role to other users in the project. A user with the Admin role has the same scope of rights as the Owner but cannot transfer project ownership.
- Developer: the Owner and Admins assign this role to other users in the project. A Developer can build, deploy, and operate services across projects, but does not have administrative privileges over users, roles, or billing. A Developer can invite other users to the project, but only with the Viewer role.
- Viewer: the Owner and Admins assign this role to other users in the project. A Viewer has limited, read-only access to Tiger Cloud Console. This means that a Viewer cannot modify services and their configurations in any way. A Viewer has no access to the data mode and has read-queries-only access to SQL editor.
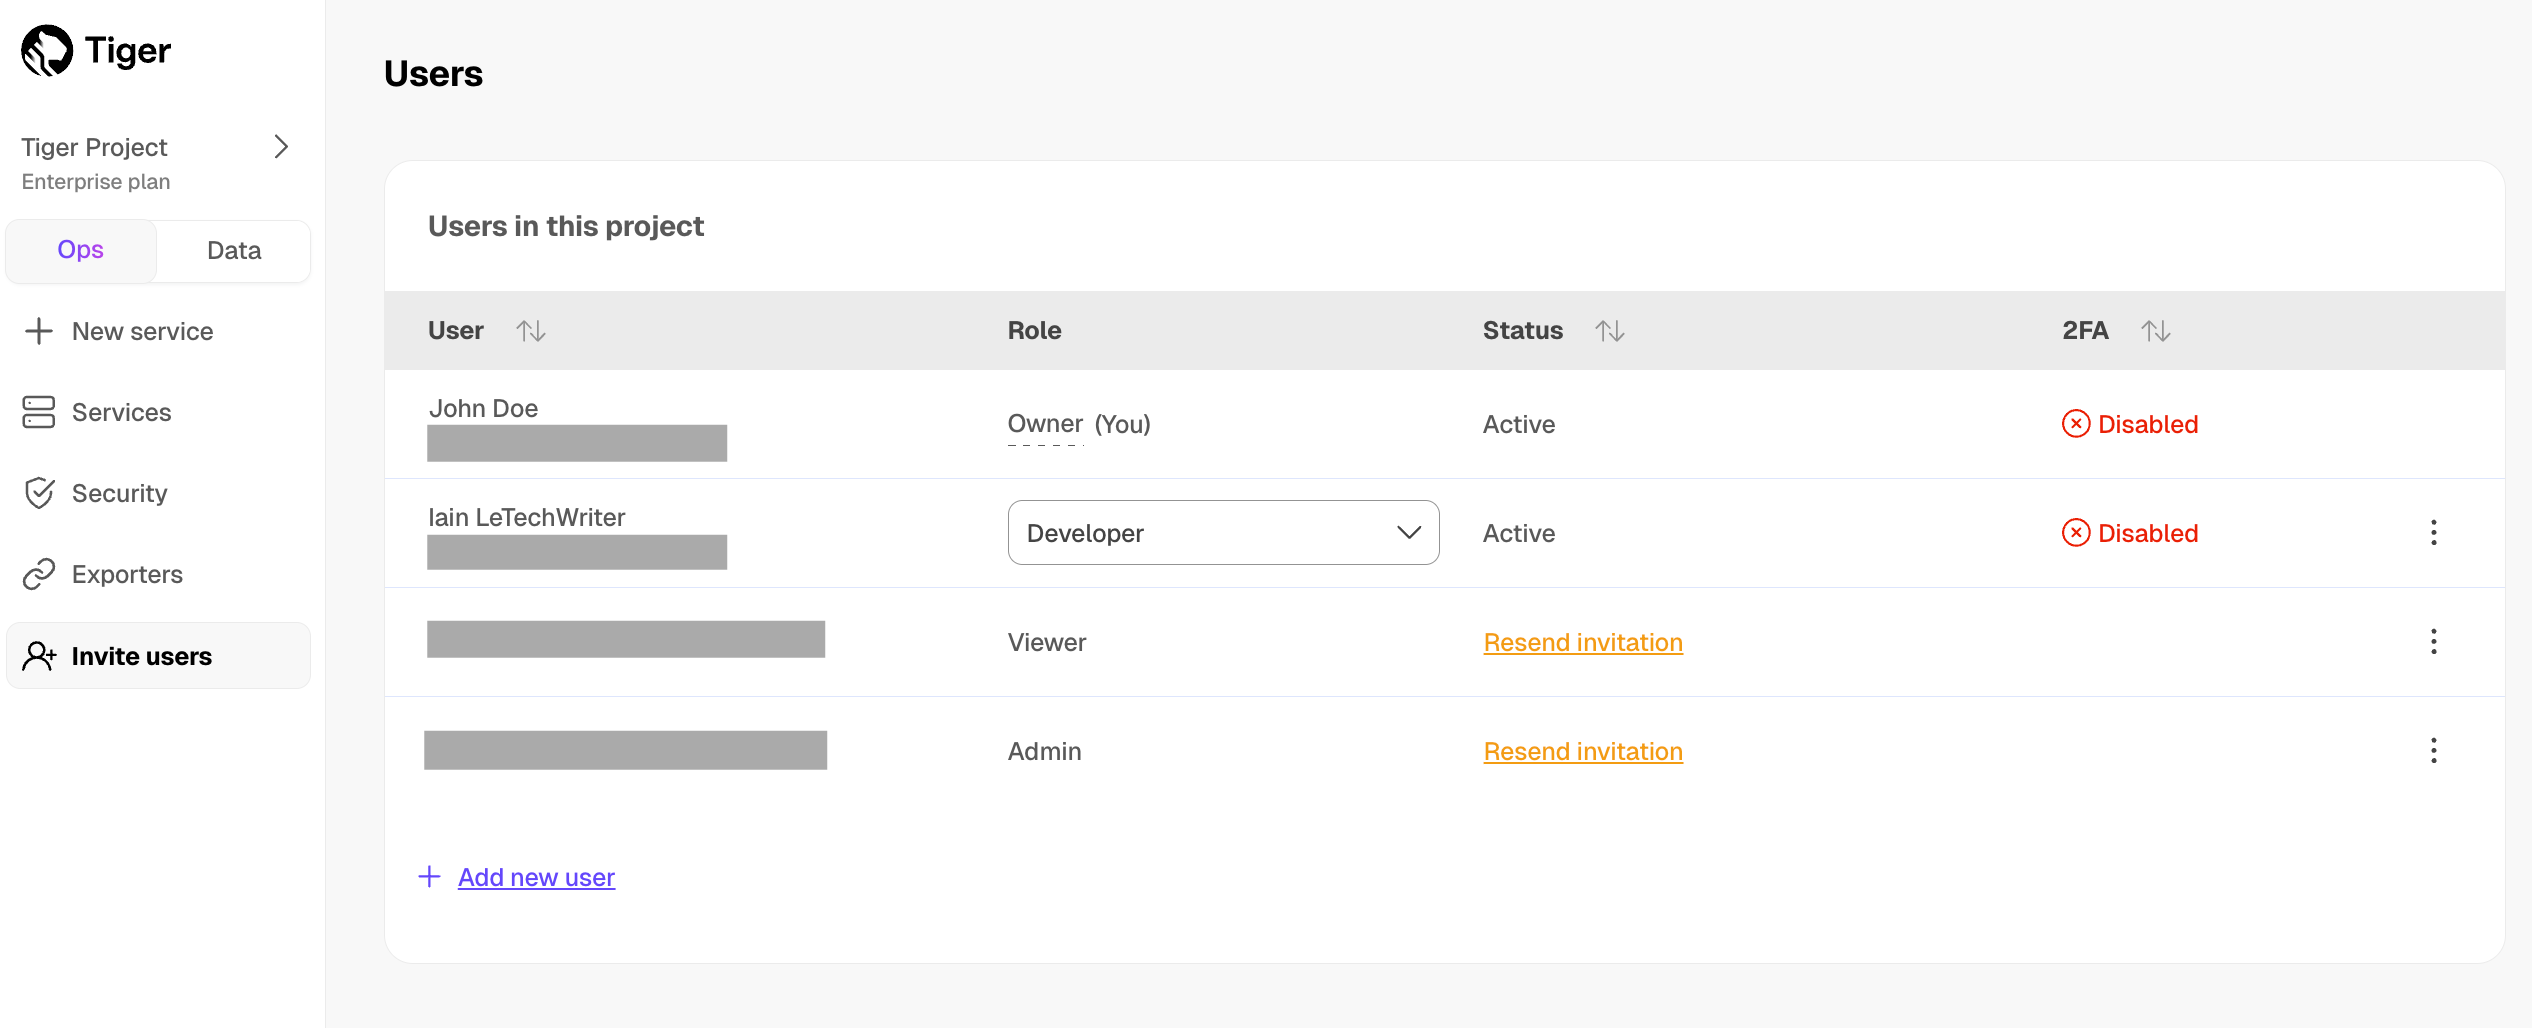
If you have the [Enterprise pricing plan][pricing-plans], you can use your company [SAML][saml] identity provider to log in to Console.
User roles in a Tiger Cloud project do not overlap with the database-level roles for the individual services. This page describes the project roles available in Console. For the database-level user roles, see [Manage data security in your Tiger Cloud service][database-rbac].
Add a user to your project
New users do not need to have a Tiger Data account before you add them, they are prompted to create one when they respond to the confirmation email. Existing users join a project in addition to the other projects they are already members of.
To add a user to a project:
In [Tiger Cloud Console][cloud-login], click
Invite users, then clickAdd new user.Type the email address of the person that you want to add, select their role, and click
Invite user.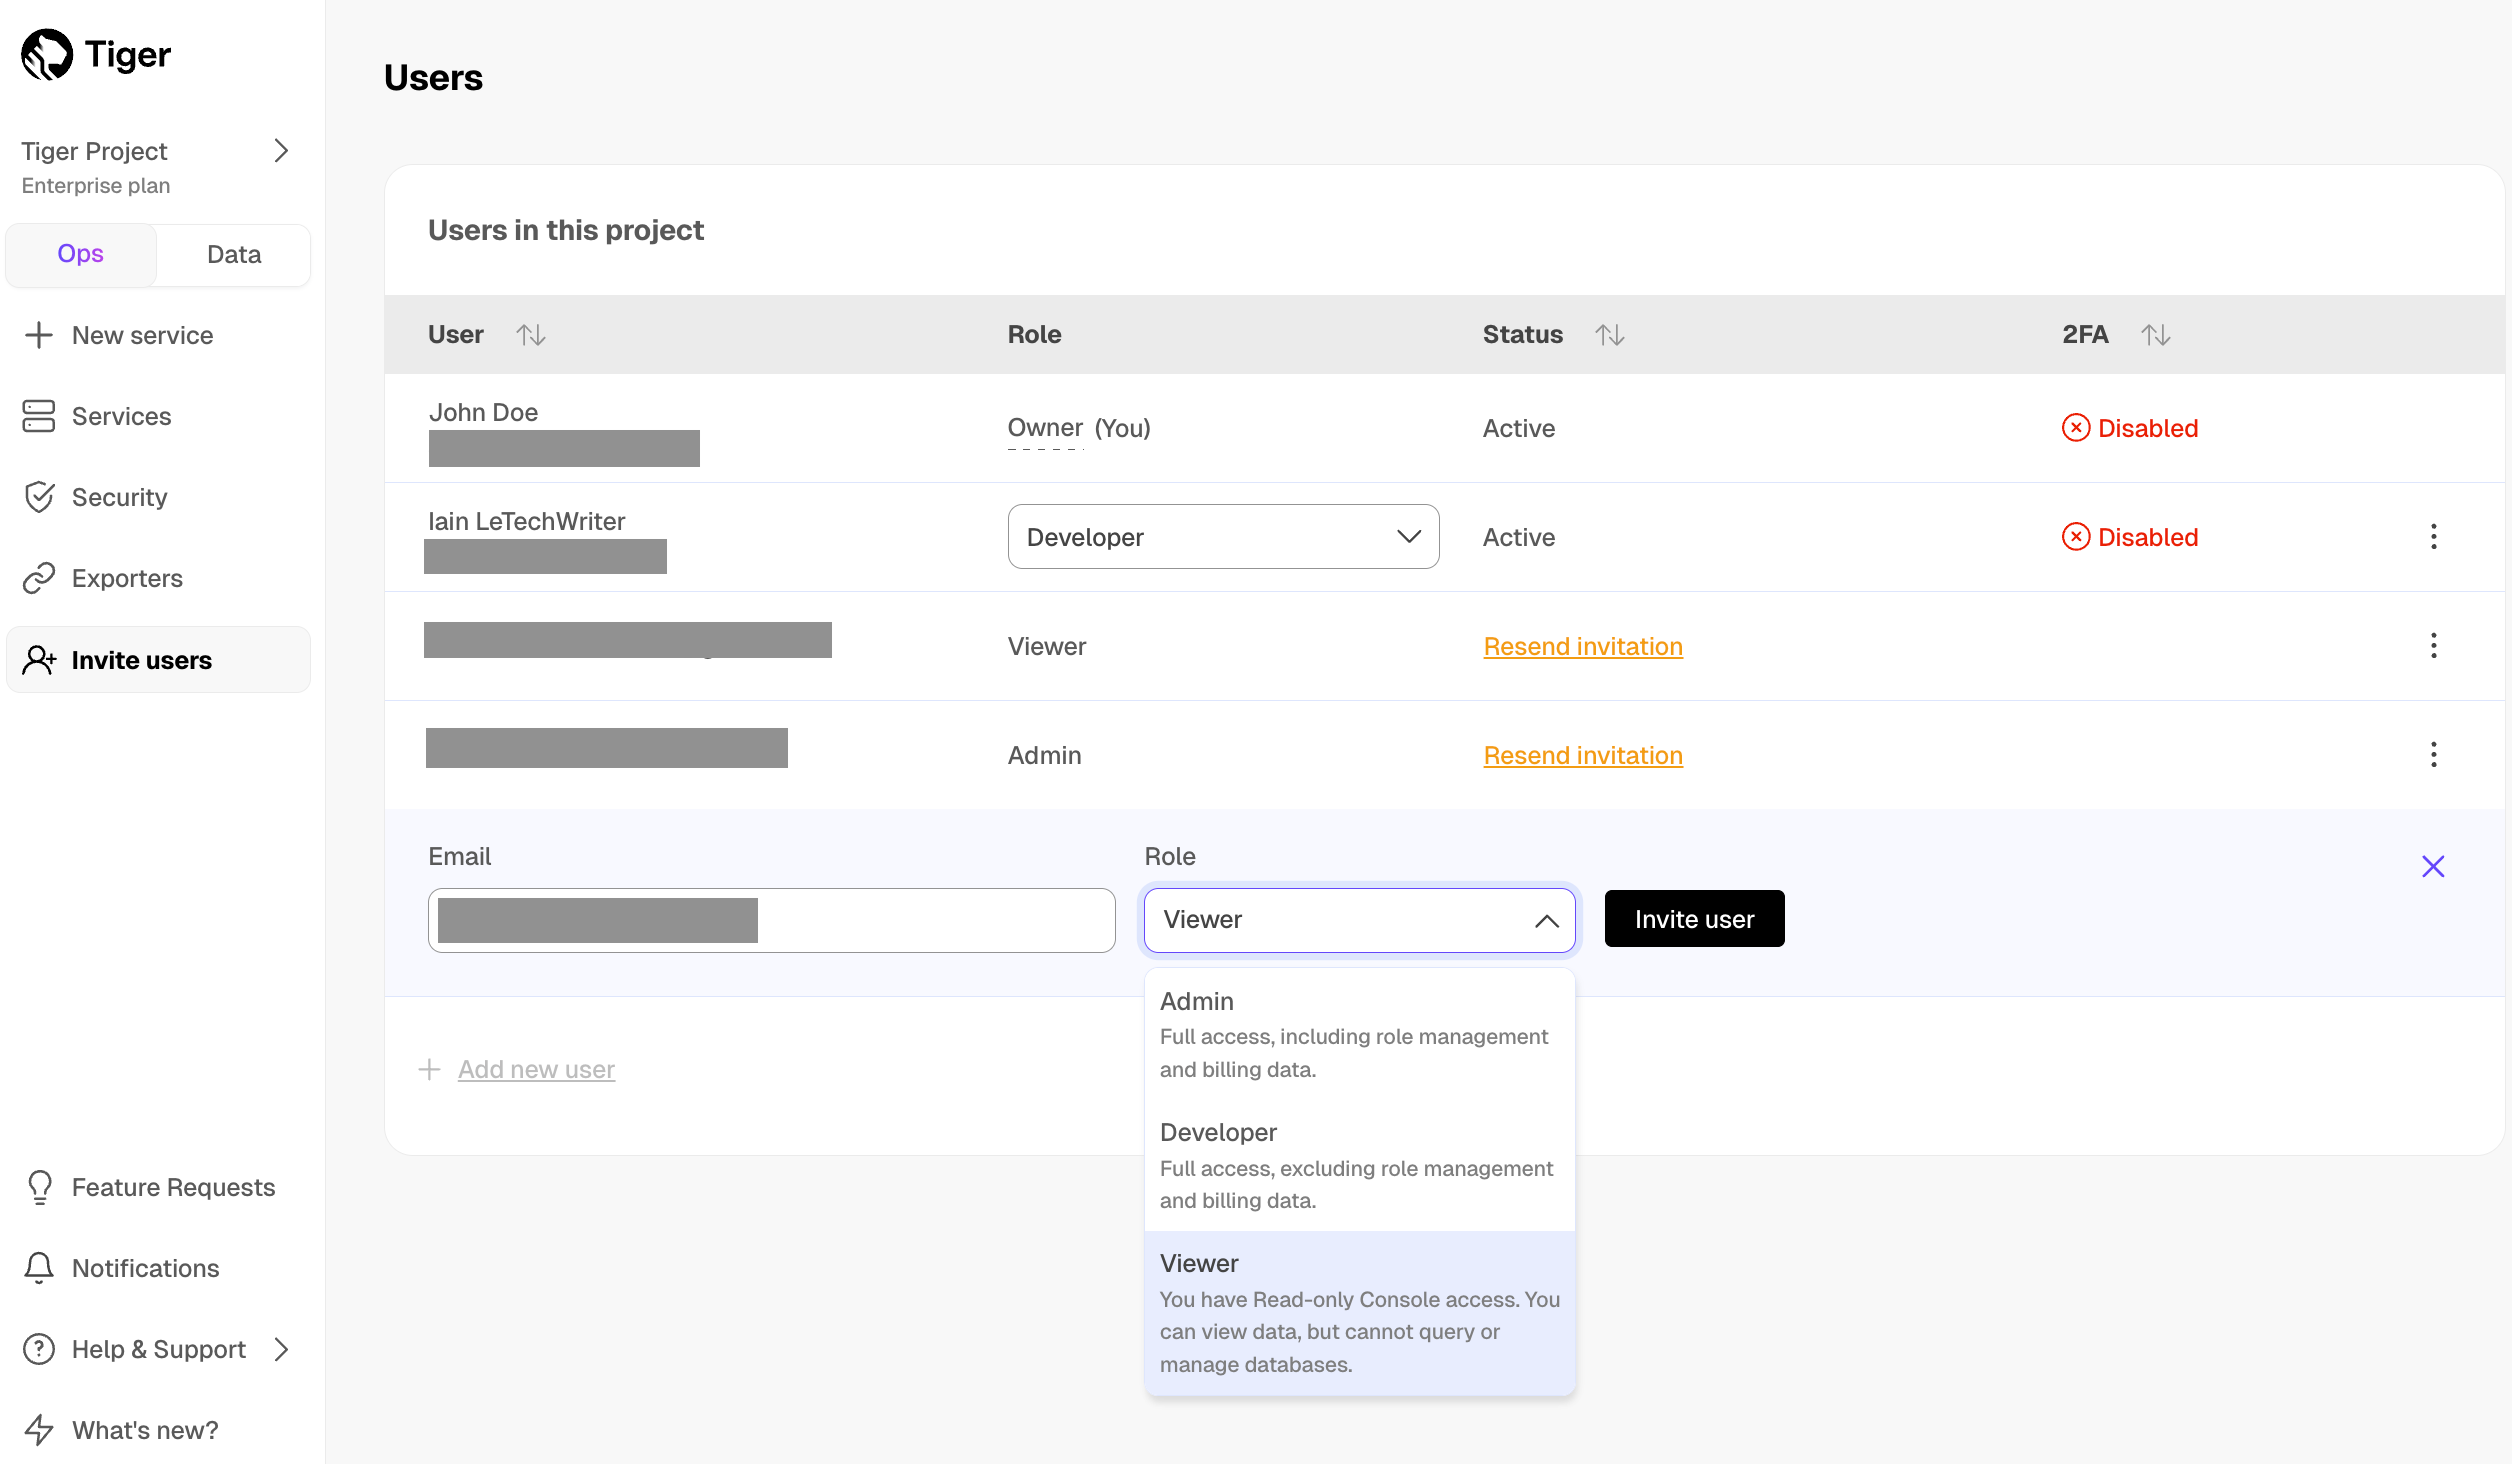
[Enterprise pricing plan][pricing-plans] and SAML users receive a notification in Console. Users in the other pricing plans receive a confirmation email. The new user then [joins the project][join-a-project].
Join a project
When you are asked to join a project, Tiger Cloud Console sends you an invitation email. Follow the instructions in the invitation email to join the project:
In the invitation email, click
Accept InviteTiger Cloud opens.
Follow the setup wizard and create a new account
You are added to the project you were invited to.
In the invitation email, click
Accept InviteTiger Cloud Console opens, and you are added to the project.
Log in to Console using your company's identity provider
Click
Notifications, then accept the invitationTiger Cloud Console opens, and you are added to the project. As you are now included in more than one project, you can easily [change projects][change-project].
Resend a project invitation
Project invitations are valid for 7 days. To resend a project invitation:
In [Tiger Cloud Console][cloud-login], click
Invite users.Next to the person you want to invite to your project, click
Resend invitation.
Change your current project
To change the project you are currently working in:
In [Tiger Cloud Console][cloud-login], click the project name >
Current projectin the top left.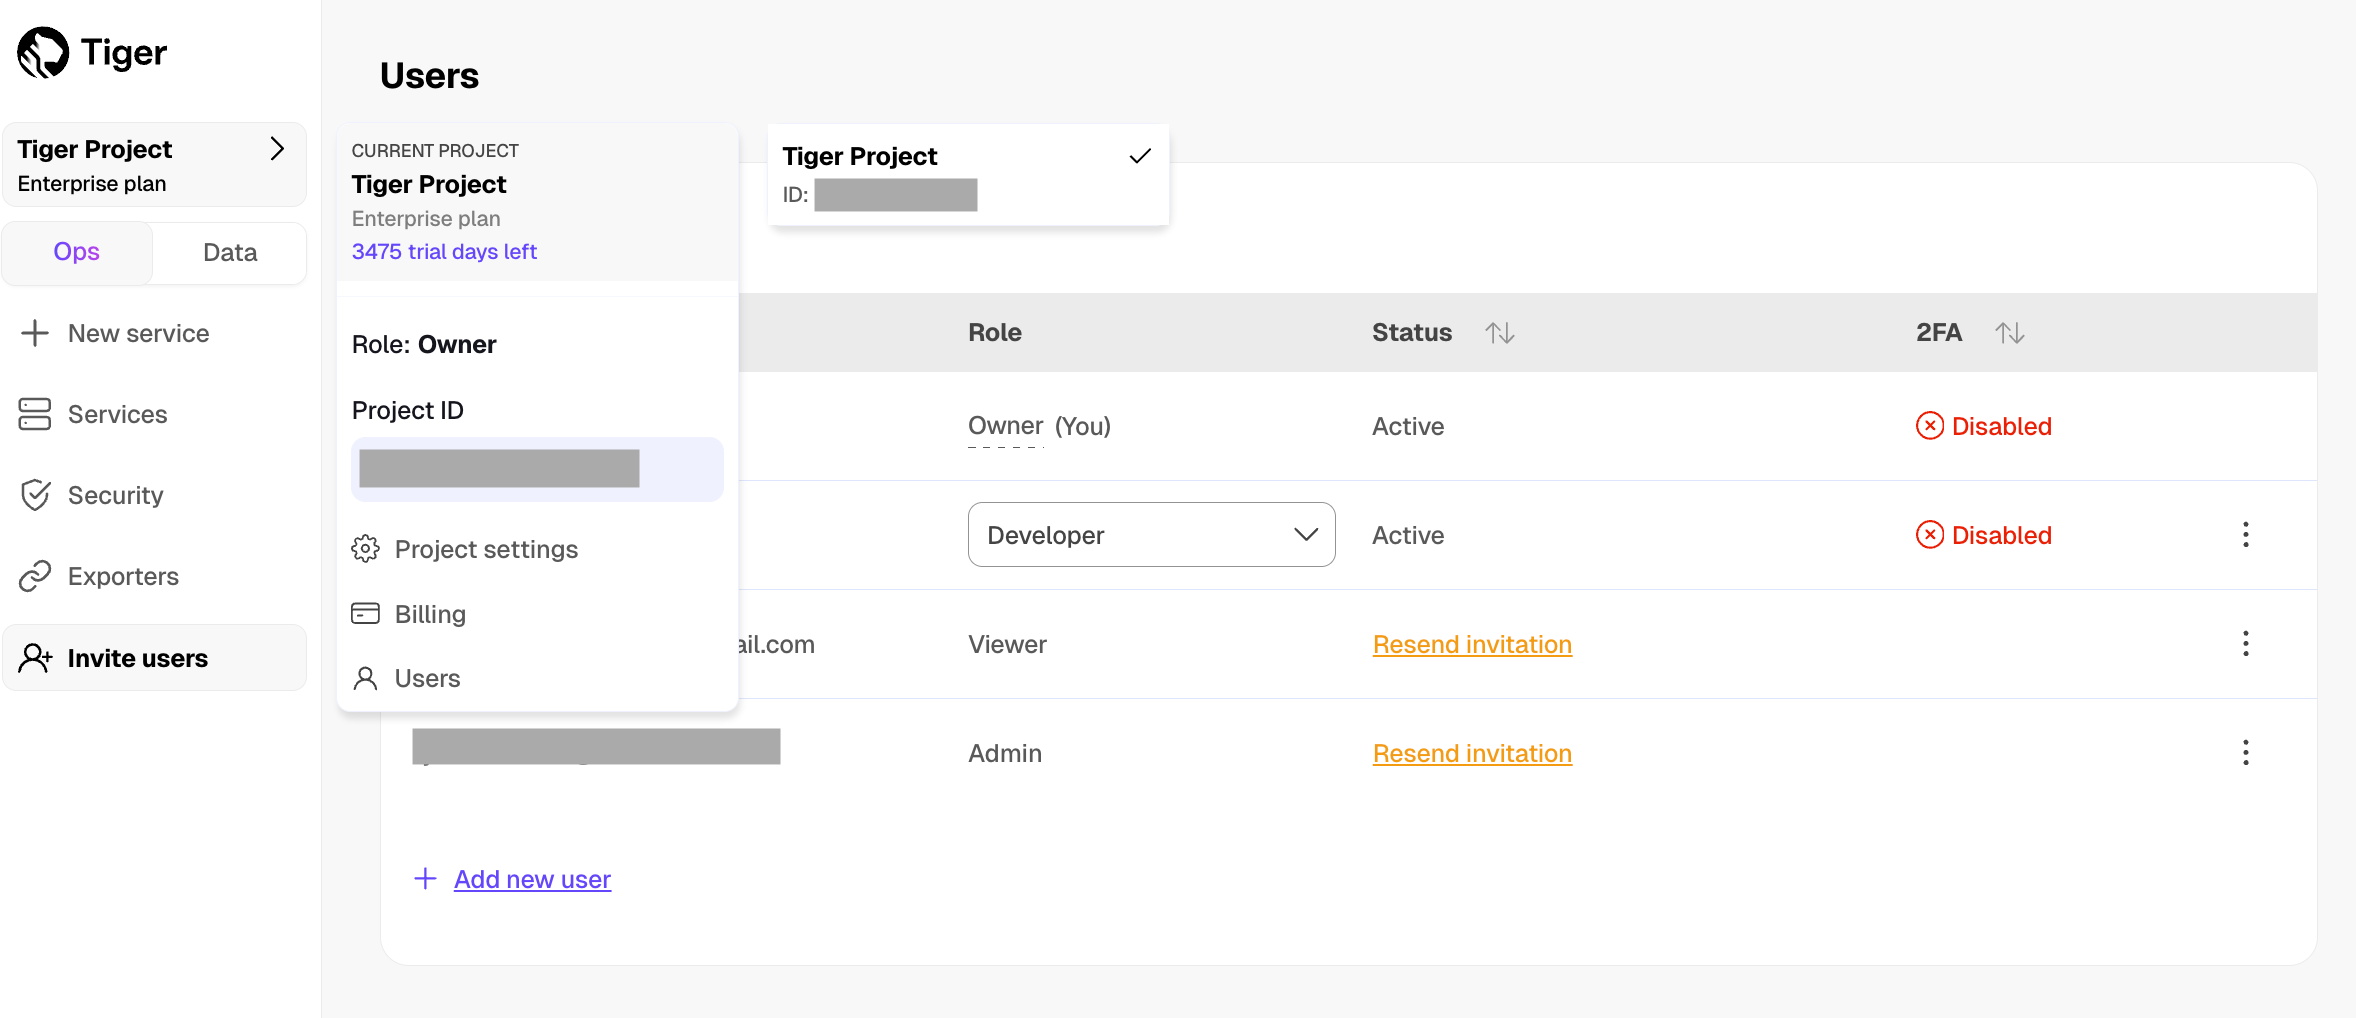
Select the project you want to use.
Transfer project ownership
Each Tiger Cloud project has one Owner. As the project Owner, you have rights to add and delete users, edit project settings, and transfer the Owner role to another user. When you transfer ownership to another user, you lose your ownership rights.
To transfer project ownership:
In [Tiger Cloud Console][cloud-login], click
Invite users.Next to the person you want to transfer project ownership to, click
⋮>Transfer project ownership.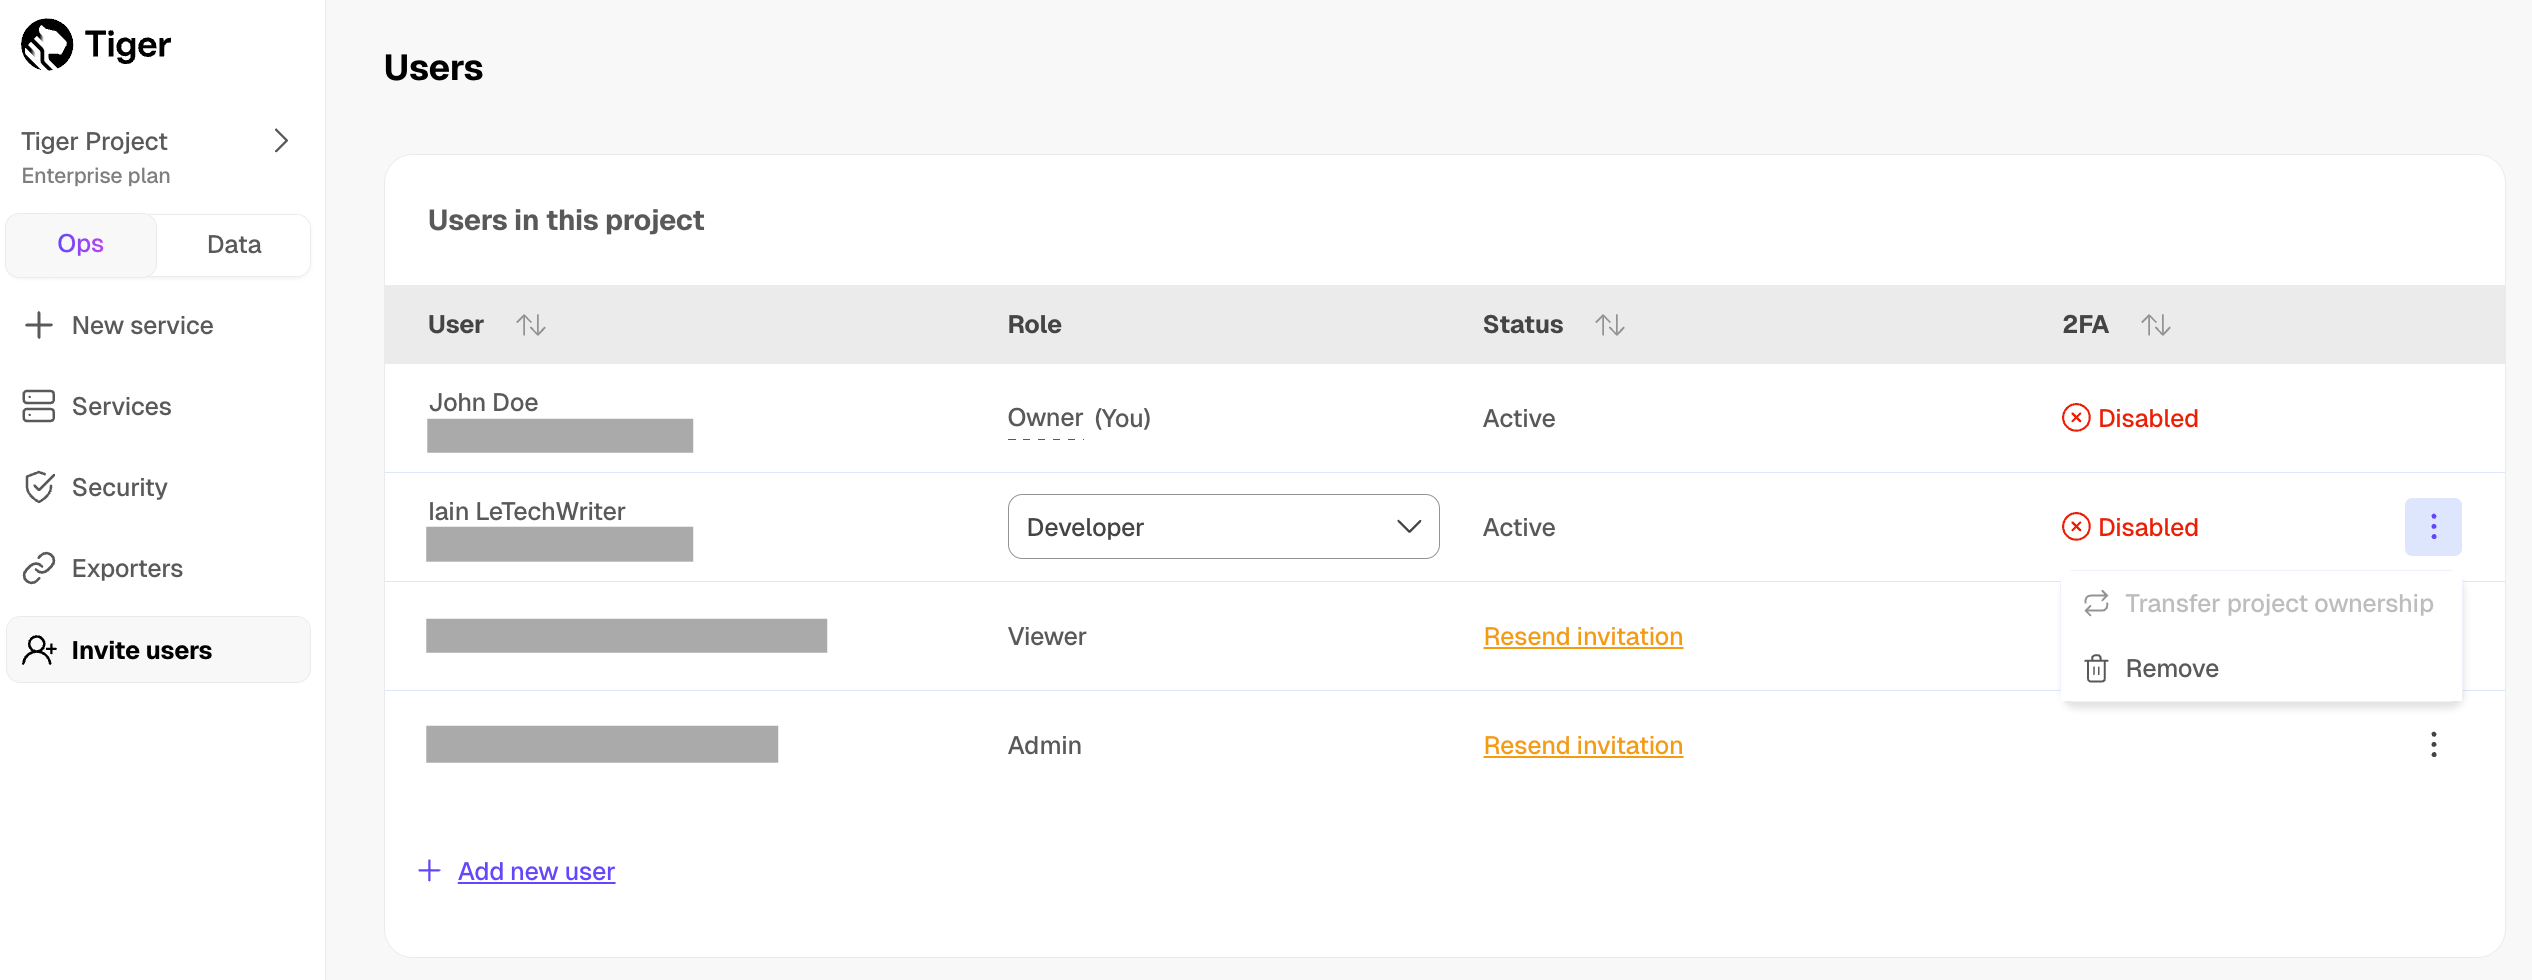
If you are unable to transfer ownership, hover over the greyed out button to see the details.
Enter your password, and click
Verify.Complete the two-factor authentication challenge and click
Confirm.
If you have the [Enterprise pricing plan][pricing-plans], and log in to Tiger Cloud using [SAML authentication][saml] or have not enabled [two-factor authentication][2fa], contact support to transfer project ownership.
Leave a project
To stop working in a project:
In [Tiger Cloud Console][cloud-login], click
Invite users.Click
⋮>Leave project, then clickLeave.
Your account is removed from the project immediately, you can no longer access this project.
Change roles of other users in a project
The Owner can change the roles of all users in the project. An Admin can change the roles of all users other than the Owner. Developer and Viewer cannot change the roles of other users.
To change the role for another user:
In [Tiger Cloud Console][cloud-login], click
Invite users.Next to the corresponding user, select another role in the dropdown.
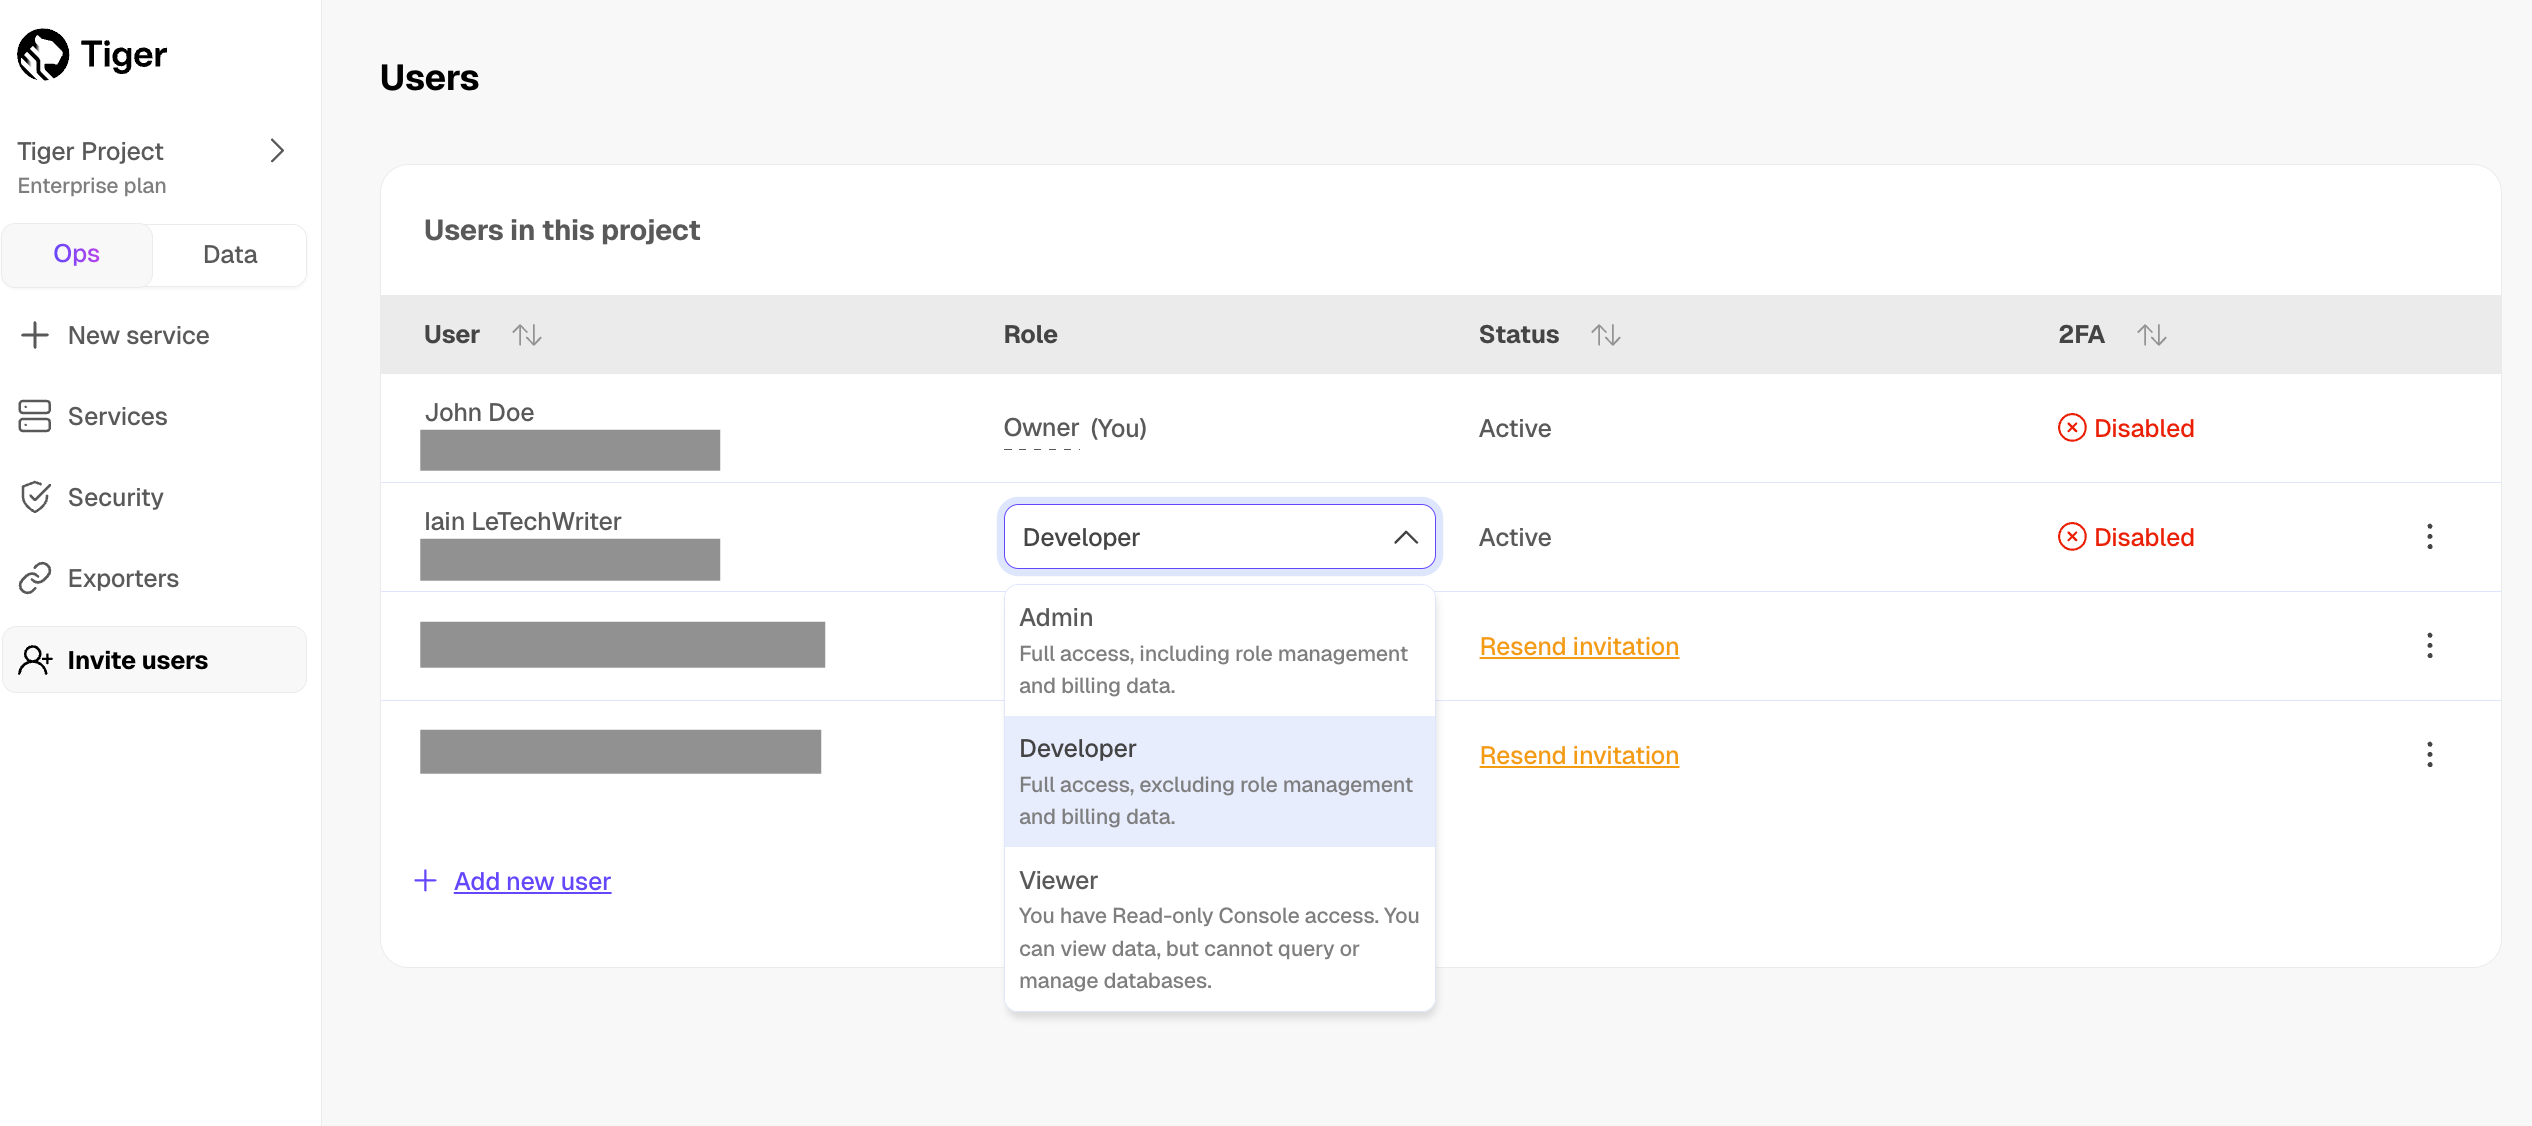
The user role is changed immediately.
Remove users from a project
To remove a user's access to a project:
- In [Tiger Cloud Console][cloud-login], click
Invite users. - Next to the person you want to remove, click
⋮>Remove. - In
Remove user, clickRemove.
The user is deleted immediately, they can no longer access your project.
===== PAGE: https://docs.tigerdata.com/use-timescale/security/vpc/ =====
Virtual Private Cloud
You use Virtual Private Cloud (VPC) peering to ensure that your Tiger Cloud services are only accessible through your secured AWS infrastructure. This reduces the potential attack vector surface and improves security.
The data isolation architecture that ensures a highly secure connection between your apps and Tiger Cloud is:
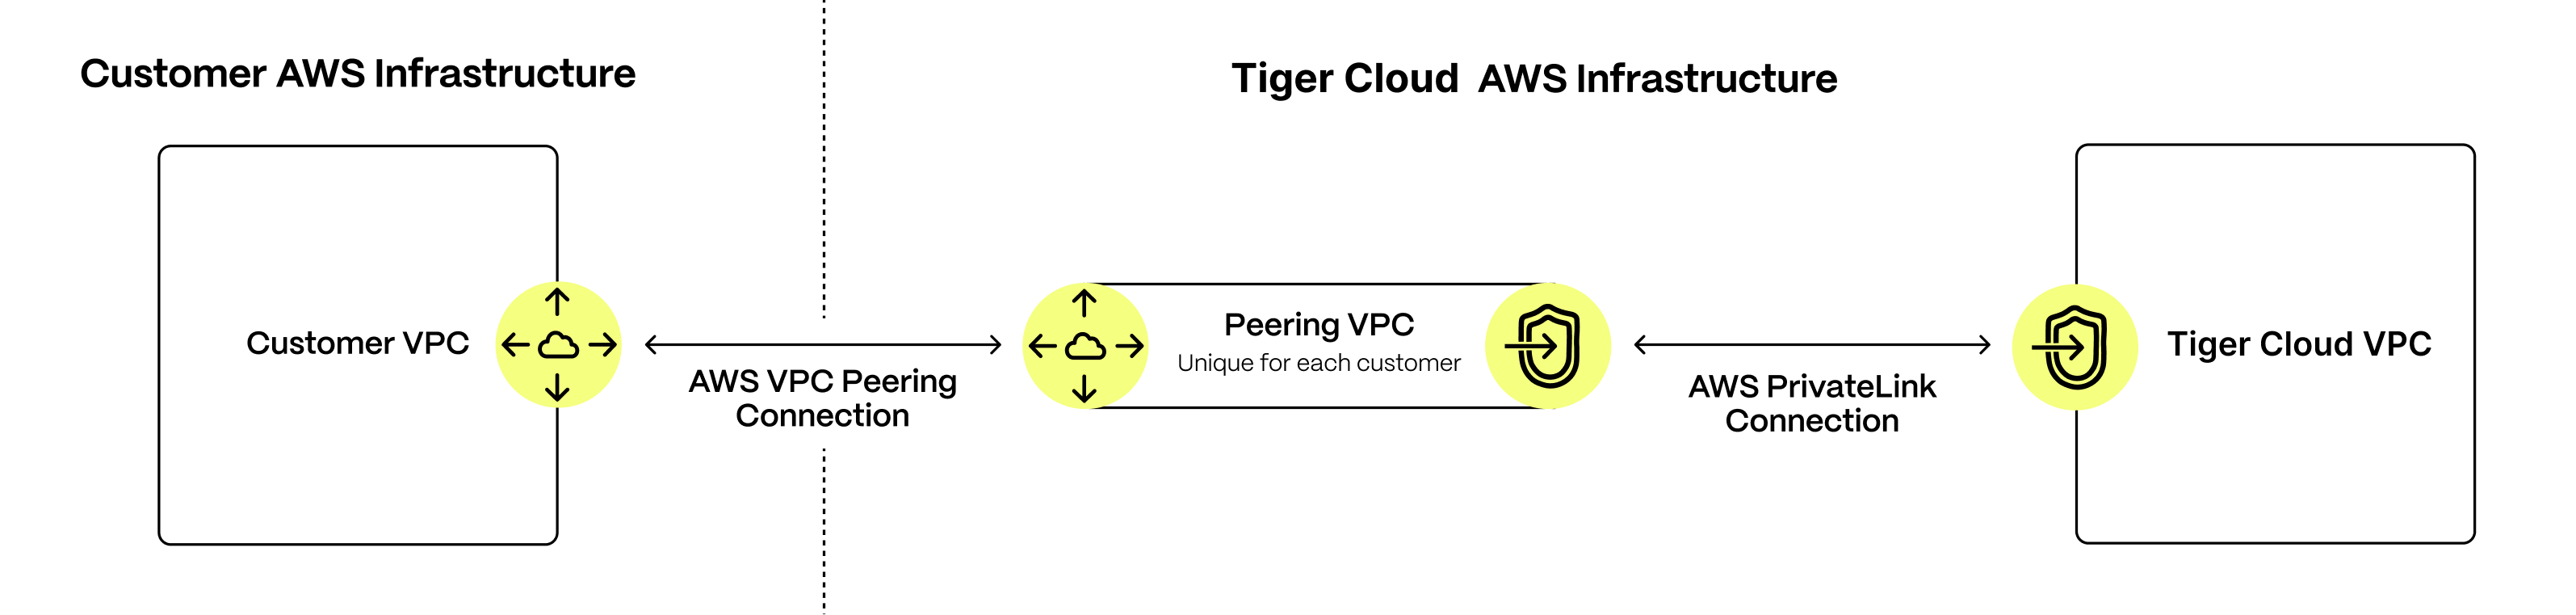
Your customer apps run inside your AWS Customer VPC, your Tiger Cloud services always run inside the secure Tiger Cloud VPC. You control secure communication between apps in your VPC and your services using a dedicated Peering VPC. The AWS PrivateLink connecting Tiger Cloud VPC to the dedicated Peering VPC gives the same level of protection as using a direct AWS PrivateLink connection. It only enables communication to be initiated from your Customer VPC to services running in the Tiger Cloud VPC. Tiger Cloud cannot initiate communication with your Customer VPC.
To configure this secure connection, you first create a Peering VPC with AWS PrivateLink in Tiger Cloud Console. After you have accepted and configured the peering connection to your Customer VPC, you use AWS Security Groups to restrict the apps in your Customer VPC that are visible to the Peering VPC. The last step is to attach individual services to the Peering VPC in Tiger Cloud Console.
You create each Peering VPC on a [Tiger Cloud project level][project-members].
You can attach:
- Up to 50 Customer VPCs to a Peering VPC.
- A Tiger Cloud service to a single Peering VPC at a time. The service and the Peering VPC must be in the same AWS region. However, you can peer a Customer VPC and a Peering VPC that are in different regions.
- Multiple Tiger Cloud services to the same Peering VPC.
You cannot attach a Tiger Cloud service to multiple Peering VPCs at the same time.
The number of Peering VPCs you can create in your project depends on your [pricing plan][pricing-plans]. If you need another Peering VPC, either contact support@tigerdata.com or change your pricing plan in [Tiger Cloud Console][console-login].
Prerequisites
To set up VPC peering, you need the following permissions in your AWS account:
- Accept VPC peering requests
- Configure route table rules
- Configure security group and firewall rules
Set up a secured connection between Tiger Cloud and AWS
To connect to a Tiger Cloud service using VPC peering, your apps and infrastructure must be already running in an Amazon Web Services (AWS) VPC. You can peer your VPC from any AWS region. However, your Peering VPC must be within one of the [Cloud-supported regions][tsc-regions].
The stages to create a secured connection between Tiger Cloud services and your AWS infrastructure are:
- [Create a Peering VPC in Tiger Cloud Console][aws-vpc-setup-vpc]
- [Complete the VPC connection in your AWS][aws-vpc-complete]
- [Set up security groups in your AWS][aws-vpc-security-groups]
- [Attach a Tiger Cloud service to the Peering VPC][aws-vpc-connect-vpcs]
Create a Peering VPC in Tiger Cloud Console
Create the VPC and the peering connection that enables you to securely route traffic between Tiger Cloud and your Customer VPC in a logically isolated virtual network.
In [Tiger Cloud Console > Security > VPC][console-vpc], click
Create a VPCChoose your region and IP range, name your VPC, then click
Create VPCThe IP ranges of the Peering VPC and Customer VPC should not overlap.
For as many peering connections as you need:
In the
VPC Peeringcolumn, clickAdd.Enter information about your existing Customer VPC, then click
Add Connection.
- You can attach:
Up to 50 Customer VPCs to a Peering VPC.
A Tiger Cloud service to a single Peering VPC at a time. The service and the Peering VPC must be in the same AWS region. However, you can peer a Customer VPC and a Peering VPC that are in different regions.
Multiple Tiger Cloud services to the same Peering VPC.
You cannot attach a Tiger Cloud service to multiple Peering VPCs at the same time.
The number of Peering VPCs you can create in your project depends on your [pricing plan][pricing-plans]. If you need another Peering VPC, either contact support@tigerdata.com or change your pricing plan in [Tiger Cloud Console][console-login].
Tiger Cloud sends a peering request to your AWS account so you can [complete the VPC connection in AWS][aws-vpc-complete].
Complete the VPC connection in AWS
When you receive the Tiger Cloud peering request in AWS, edit your routing table to match the IP Range and CIDR block between your Customer and Peering VPCs.
When you peer a VPC with multiple CIDRs, all CIDRs are added to the Tiger Cloud rules automatically. After you have finished peering, further changes in your VPC's CIDRs are not detected automatically. If you need to refresh the CIDRs, recreate the peering connection.
The request acceptance process is an important safety mechanism. Do not accept a peering request from an unknown account.
In [AWS > VPC Dashboard > Peering connections][aws-dashboard], select the peering connection request from Tiger Cloud
Copy the peering connection ID to the clipboard. The connection request starts with
pcx-.In the peering connection, click
Route Tables, then select theRoute Table IDthat corresponds to your VPCIn
Routes, clickEdit routesYou see the list of existing destinations.
 .
If you do not already have a destination that corresponds to the
IP range / CIDR blockof your Peering VPC:- Click
Add route, and set:Destination: the CIDR block of your Peering VPC. For example:10.0.0.7/17.Target: the peering connection ID you copied to your clipboard.
- Click
Save changes.
- Click
Network traffic is secured between your AWS account and Tiger Cloud for this project.
Set up security groups in AWS
Security groups allow specific inbound and outbound traffic at the resource level. You can associate a VPC with one or more security groups, and each instance in your VPC may belong to a different set of security groups. The security group choices for your VPC are:
- Create a security group to use for your Tiger Cloud VPC only.
- Associate your VPC with an existing security group.
- Do nothing, your VPC is automatically associated with the default one.
To create a security group specific to your Tiger Cloud Peering VPC:
[AWS > VPC Dashboard > Security Groups][aws-security-groups], click
Create security groupEnter the rules for this security group:
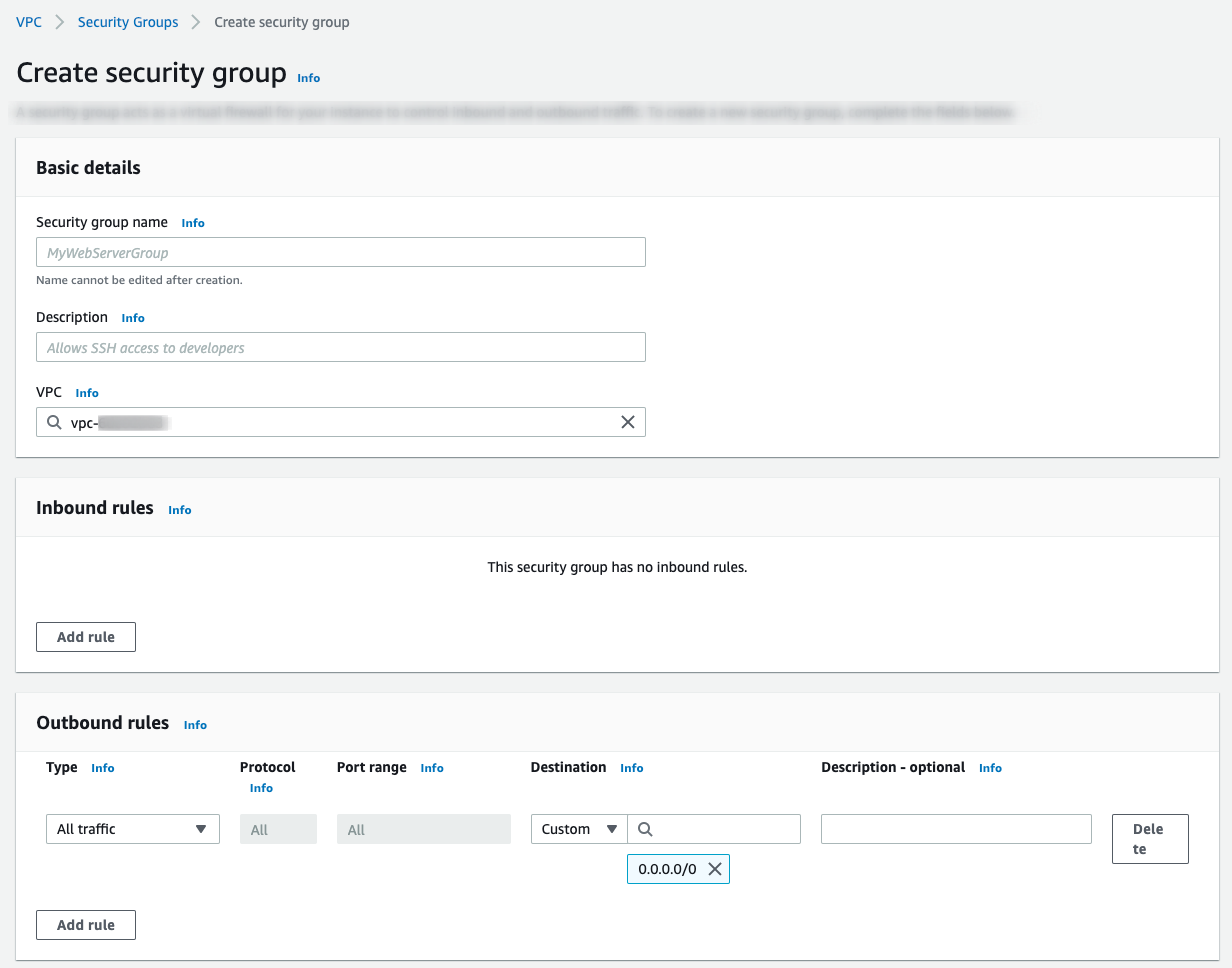
VPC: select the VPC that is peered with Tiger Cloud.Inbound rules: leave empty.Outbound rules:Type:Custom TCPProtocol:TCPPort range:5432Destination:CustomInfo: the CIDR block of your Tiger Cloud Peering VPC.
Click
Add rule, then clickCreate security group
Attach a Tiger Cloud service to the Peering VPC
Now that Tiger Cloud is communicating securely with your AWS infrastructure, you can attach one or more services to the Peering VPC.
After you attach a service to a Peering VPC, you can only access it through the peered AWS VPC. It is no longer accessible using the public internet.
- In [Tiger Cloud Console > Services][console-services] select the service you want to connect to the Peering VPC
- Click
Operations>Security>VPC - Select the VPC, then click
Attach VPC
And that is it, your service is now securely communicating with your AWS account inside a VPC.
Migrate a Tiger Cloud service between VPCs
To ensure that your applications continue to run without interruption, you keep service attached to the Peering VPC. However, you can change the Peering VPC your service is attached to, or disconnect from the Peering VPC and enable access to the service from the public internet.
Tiger Cloud uses a different DNS for services that are attached to a Peering VPC. When you migrate a service between public access and a Peering VPC, you need to update your connection string.
In [Tiger Cloud Console > Services][console-services] select the service to migrate
If you don't have a service, [create a new one][create-service].
Click
Operations>Security>VPCSelect the VPC, then click
Attach VPC
Migration takes a few minutes to complete and requires a change to DNS settings for the service. The service is not accessible during this time. If you receive a DNS error, allow some time for DNS propagation.
===== PAGE: https://docs.tigerdata.com/use-timescale/security/read-only-role/ =====
Manage data security in your Tiger Cloud service
When you create a service, Tiger Cloud assigns you the tsdmadmin role. This role has full permissions to modify data in your service. However, Tiger Cloud does not provide superuser access. tsdmadmin is not a superuser.
As tsdmadmin, you can use standard Postgres means to create other roles or assign individual permissions. This page shows you how to create a read-only role for your database. Adding a read-only role does not provide resource isolation. To restrict the access of a read-only user, as well as isolate resources, create a [read replica][read-scaling] instead.
The database-level roles for the individual services in your project do not overlap with the Tiger Cloud project user roles. This page describes the database-level roles. For user roles available in Console, see [Control user access to Tiger Cloud projects][console-rbac].
Create a read-only user
You can create a read-only user to provide limited access to your database.
Connect to your service as the tsdbadmin user.
Create the new role:
sqlCREATE ROLE readaccess;Grant the appropriate permissions for the role, as required. For example, to grant
SELECTpermissions to a specific table, use:sqlGRANT SELECT ON TO readaccess;To grant
SELECTpermissions to all tables in a specific schema, use:sqlGRANT SELECT ON ALL TABLES IN SCHEMA <SCHEMA_NAME> TO readaccess;Create a new user:
sqlCREATE USER read_user WITH PASSWORD 'read_password';Assign the role to the new user:
sqlGRANT readaccess TO read_user;
===== PAGE: https://docs.tigerdata.com/use-timescale/security/saml/ =====
SAML (Security Assertion Markup Language)
Tiger Cloud offers SAML authentication as part of its [Enterprise][enterprise-tier] offering. SAML (Security Assertion Markup Language) is an open standard for exchanging authentication and authorization data between parties. With SAML enabled Tiger Cloud customers can log into their Tiger Data account using their existing SSO service provider credentials.
Tiger Cloud supports most SAML providers that can handle IDP-initiated login
SAML offers many benefits for the Enterprise including:
- Improved security: SAML centralizes user authentication with an identity provider (IdP). This makes it more difficult for attackers to gain access to user accounts.
- Reduced IT costs: SAML can help companies reduce IT costs by eliminating the need to manage multiple user accounts and passwords.
- Improved user experience: SAML makes it easier for users to access multiple applications and resources.
Reach out to your CSM/sales contact to get started. The connection process looks like the following:
- Configure the IdP to support SAML authentication. This will involve creating a new application and configuring the IdP with the settings provided by your contact.
- Provide your contact with the requested details about your IdP.
- Test the SAML authentication process to make sure that it is working correctly.
===== PAGE: https://docs.tigerdata.com/use-timescale/schema-management/alter/ =====
Altering and updating table schemas
To modify the schema of an existing hypertable, you can use the ALTER TABLE command. When you change the hypertable schema, the changes are also propagated to each underlying chunk.
While you can change the schema of an existing hypertable, you cannot change the schema of a continuous aggregate. For continuous aggregates, the only permissible changes are renaming a view, setting a schema, changing the owner, and adjusting other parameters.
For example, to add a new column called address to a table called distributors:
ALTER TABLE distributors
  ADD COLUMN address varchar(30);
This creates the new column, with all existing entries recording NULL for the new column.
Changing the schema can, in some cases, consume a lot of resources. This is especially true if it requires underlying data to be rewritten. If you want to check your schema change before you apply it, you can use a CHECK constraint, like this:
ALTER TABLE distributors
  ADD CONSTRAINT zipchk
  CHECK (char_length(zipcode) = 5);
This scans the table to verify that existing rows meet the constraint, but does not require a table rewrite.
For more information, see the [Postgres ALTER TABLE documentation][postgres-alter-table].
===== PAGE: https://docs.tigerdata.com/use-timescale/schema-management/about-constraints/ =====
About constraints
Constraints are rules that apply to your database columns. This prevents you from entering invalid data into your database. When you create, change, or delete constraints on your hypertables, the constraints are propagated to the underlying chunks, and to any indexes.
Hypertables support all standard Postgres constraint types. For foreign keys in particular, the following is supported:
- Foreign key constraints from a hypertable referencing a regular table
- Foreign key constraints from a regular table referencing a hypertable
Foreign keys from a hypertable referencing another hypertable are not supported.
For example, you can create a table that only allows positive device IDs, and non-null temperature readings. You can also check that time values for all devices are unique. To create this table, with the constraints, use this command:
CREATE TABLE conditions (
    time       TIMESTAMPTZ
    temp       FLOAT NOT NULL,
    device_id  INTEGER CHECK (device_id > 0),
    location   INTEGER REFERENCES locations (id),
    PRIMARY KEY(time, device_id)
) WITH (
    tsdb.hypertable,
    tsdb.partition_column='time'
);
If you are self-hosting TimescaleDB v2.19.3 and below, create a [Postgres relational table][pg-create-table], then convert it using [create_hypertable][create_hypertable]. You then enable hypercore with a call to [ALTER TABLE][alter_table_hypercore].
This example also references values in another locations table using a foreign key constraint.
Time columns used for partitioning must not allow NULL values. A NOT NULL constraint is added by default to these columns if it doesn't already exist.
For more information on how to manage constraints, see the [Postgres docs][postgres-createconstraint].
===== PAGE: https://docs.tigerdata.com/use-timescale/schema-management/about-indexing/ =====
About indexes
Because looking up data can take a long time, especially if you have a lot of data in your hypertable, you can use an index to speed up read operations from non-compressed chunks in the rowstore (which use their [own columnar indexes][about-compression]).
You can create an index on any combination of columns. To define an index as a UNIQUE or PRIMARY KEY index, it must include the partitioning column (this is usually the time column).
Which column you choose to create your index on depends on what kind of data you have stored. When you create a hypertable, set the datatype for the time column as timestamptz and not timestamp. For more information, see [Postgres timestamp][postgresql-timestamp].
While it is possible to add an index that does not include the time column, doing so results in very slow ingest speeds. For time-series data, indexing on the time column allows one index to be created per chunk.
Consider a simple example with temperatures collected from two locations named office and garage:
An index on (location, time DESC) is organized like this:
garage-0940
garage-0930
garage-0920
garage-0910
office-0930
office-0920
office-0910
An index on (time DESC, location) is organized like this:
0940-garage
0930-garage
0930-office
0920-garage
0920-office
0910-garage
0910-office
A good rule of thumb with indexes is to think in layers. Start by choosing the columns that you typically want to run equality operators on, such as location = garage. Then finish by choosing columns you want to use range operators on, such as time > 0930.
As a more complex example, imagine you have a number of devices tracking 1,000 different retail stores. You have 100 devices per store, and 5 different types of devices. All of these devices report metrics as float values, and you decide to store all the metrics in the same table, like this:
CREATE TABLE devices (
     time timestamptz,
     device_id int,
     device_type int,
     store_id int,
     value float
);
When you create this table, an index is automatically generated on the time column, making it faster to query your data based on time.
If you want to query your data on something other than time, you can create different indexes. For example, you might want to query data from the last month for just a given device_id. Or you could query all data for a single store_id for the last three months.
You want to keep the index on time so that you can quickly filter for a given time range, and add another index on device_id and store_id. This creates a composite index. A composite index on (store_id, device_id, time) orders by store_id first. Each unique store_id, will then be sorted by device_id in order. And each entry with the same store_id and device_id are then ordered by time. To create this index, use this command:
CREATE INDEX ON devices (store_id, device_id, time DESC);When you have this composite index on your hypertable, you can run a range of different queries. Here are some examples:
SELECT * FROM devices WHERE store_id = xThis queries the portion of the list with a specific store_id. The index is effective for this query, but could be a bit bloated; an index on just store_id would probably be more efficient.
SELECT * FROM devices WHERE store_id = x, time > 10This query is not effective, because it would need to scan multiple sections of the list. This is because the part of the list that contains data for time > 10 for one device would be located in a different section than for a different device. In this case, consider building an index on (store_id, time) instead.
SELECT * FROM devices WHERE device_id = M, time > 10The index in the example is useless for this query, because the data for device M is located in a completely different section of the list for each store_id.
SELECT * FROM devices WHERE store_id = M, device_id = M, time > 10This is an accurate query for this index. It narrows down the list to a very specific portion.
===== PAGE: https://docs.tigerdata.com/use-timescale/schema-management/json/ =====
JSONB support for semi-structured data
You can use JSON and JSONB to provide semi-structured data. This is most useful for data that contains user-defined fields, such as field names that are defined by individual users and vary from user to user. We recommend using this in a semi-structured way, for example:
CREATE TABLE metrics (
  time TIMESTAMPTZ,
  user_id INT,
  device_id INT,
  data JSONB
);
When you are defining a schema using JSON, ensure that common fields, such as time, user_id, and device_id, are pulled outside of the JSONB structure and stored as columns. This is because field accesses are more efficient on table columns than inside JSONB structures. Storage is also more efficient.
You should also use the JSONB data type, that is, JSON stored in a binary format, rather than JSON data type. JSONB data types are more efficient in both storage overhead and lookup performance.
Use JSONB for user-defined data rather than sparse data. This works best for most data sets. For sparse data, use NULLable fields and, if possible, run on top of a compressed file system like ZFS. This will work better than a JSONB data type, unless the data is extremely sparse, for example, more than 95% of fields for a row are empty.
Index the JSONB structure
When you index JSONB data across all fields, it is usually best to use a GIN (generalized inverted) index. In most cases, you can use the default GIN operator, like this:
CREATE INDEX idxgin ON metrics USING GIN (data);For more information about GIN indexes, see the [Postgres documentation][json-indexing].
This index only optimizes queries where the WHERE clause uses the ?, ?&, ?|, or @> operator. For more information about these operators, see the [Postgres documentation][json-operators].
Index individual fields
JSONB columns sometimes have common fields containing values that are useful to index individually. Indexes like this can be useful for ordering operations on field values, [multicolumn indexes][multicolumn-index], and indexes on specialized types, such as a postGIS geography type. Another advantage of indexes on individual field values is that they are often smaller than GIN indexes on the entire JSONB field. To create an index like this, it is usually best to use a [partial index][partial-index] on an [expression][expression-index] accessing the field. For example:
CREATE INDEX idxcpu
  ON metrics(((data->>'cpu')::double precision))
  WHERE data ? 'cpu';
In this example, the expression being indexed is the cpu field inside the data JSONB object, cast to a double. The cast reduces the size of the index by storing the much smaller double, instead of a string. The WHERE clause ensures that the only rows included in the index are those that contain a cpu field, because the data ? 'cpu' returns true. This also serves to reduce the size of the index by not including rows without a cpu field. Note that in order for a query to use the index, it must have data ? 'cpu' in the WHERE clause.
This expression can also be used with a multi-column index, for example, by adding time DESC as a leading column. Note, however, that to enable index-only scans, you need data as a column, not the full expression ((data->>'cpu')::double precision).
===== PAGE: https://docs.tigerdata.com/use-timescale/schema-management/about-tablespaces/ =====
About tablespaces
Tablespaces are used to determine the physical location of the tables and indexes in your database. In most cases, you want to use faster storage to store data that is accessed frequently, and slower storage for data that is accessed less often.
Hypertables consist of a number of chunks, and each chunk can be located in a specific tablespace. This allows you to grow your hypertables across many disks. When you create a new chunk, a tablespace is automatically selected to store the chunk's data.
You can attach and detach tablespaces on a hypertable. When a disk runs out of space, you can [detach][detach_tablespace] the full tablespace from the hypertable, and than [attach][attach_tablespace] a tablespace associated with a new disk. To see the tablespaces for you hypertable, use the [show_tablespaces][show_tablespaces] command.
How hypertable chunks are assigned tablespaces
A hypertable can be partitioned in multiple dimensions, but only one of the dimensions is used to determine the tablespace assigned to a particular hypertable chunk. If a hypertable has one or more hash-partitioned, or space, dimensions, it uses the first hash-partitioned dimension. Otherwise, it uses the first time dimension.
This strategy ensures that hash-partitioned hypertables have chunks co-located according to hash partition, as long as the list of tablespaces attached to the hypertable remains the same. Modulo calculation is used to pick a tablespace, so there can be more partitions than tablespaces. For example, if there are two tablespaces, partition number three uses the first tablespace.
Hypertables that are only time-partitioned add new partitions continuously, and therefore have chunks assigned to tablespaces in a way similar to round-robin.
It is possible to attach more tablespaces than there are partitions for the hypertable. In this case, some tablespaces remain unused until others are detached or additional partitions are added. This is especially true for hash-partitioned tables.
===== PAGE: https://docs.tigerdata.com/use-timescale/schema-management/about-schemas/ =====
Table management
A database schema defines how the tables and indexes in your database are organized. Using a schema that is appropriate for your workload can result in significant performance improvements. Conversely, using a poorly suited schema can result in significant performance degradation.
If you are working with semi-structured data, such as readings from IoT sensors that collect varying measurements, you might need a flexible schema. In this case, you can use Postgres JSON and JSONB data types.
TimescaleDB supports all table objects supported within Postgres, including data types, indexes, and triggers. However, when you create a hypertable, set the datatype for the time column as timestamptz and not timestamp. For more information, see [Postgres timestamp][postgresql-timestamp].
This section explains how to design your schema, how indexing and tablespaces work, and how to use Postgres constraint types. It also includes examples to help you create your own schema, and learn how to use JSON and JSONB for semi-structured data.
===== PAGE: https://docs.tigerdata.com/use-timescale/schema-management/indexing/ =====
Indexing data
You can use an index on your database to speed up read operations. You can create an index on any combination of columns. TimescaleDB supports all table objects supported within Postgres, including data types, indexes, and triggers.
You can create an index using the CREATE INDEX command. For example, to create an index that sorts first by location, then by time, in descending order:
CREATE INDEX ON conditions (location, time DESC);You can run this command before or after you convert a regular Postgres table to a hypertable.
Default indexes
Some indexes are created by default when you perform certain actions on your database.
When you create a hypertable with a call to [CREATE TABLE][hypertable-create-table], a time index is created on your data. If you want to manually create a time index, you can use this command:
CREATE INDEX ON conditions (time DESC);You can also create an additional index on another column and time. For example:
CREATE INDEX ON conditions (location, time DESC);TimescaleDB also creates sparse indexes per compressed chunk for optimization. You can manually set up those indexes when you call [CREATE TABLE][hypertable-create-table] or [ALTER_TABLE][alter-table].
For more information about the order to use when declaring indexes, see the [about indexing][about-index] section.
If you do not want to create default indexes, you can set create_default_indexes to false when you create a hypertable. For example:
CREATE TABLE conditions (
  time        TIMESTAMPTZ       NOT NULL,
  location    TEXT              NOT NULL,
  device      TEXT              NOT NULL,
  temperature DOUBLE PRECISION  NULL,
  humidity    DOUBLE PRECISION  NULL
) WITH (
  tsdb.hypertable,
  tsdb.partition_column='time',
  tsdb.create_default_indexes=false
);
OldCreateHypertable
Refer to the installation documentation for detailed setup instructions.
Best practices for indexing
If you have sparse data, with columns that are often NULL, you can add a clause to the index, saying WHERE column IS NOT NULL. This prevents the index from indexing NULL data, which can lead to a more compact and efficient index. For example:
CREATE INDEX ON conditions (time DESC, humidity)
  WHERE humidity IS NOT NULL;
To define an index as a UNIQUE or PRIMARY KEY index, the index must include the time column and the partitioning column, if you are using one. For example, a unique index must include at least the (time, location) columns, in addition to any other columns you want to use. Generally, time-series data uses UNIQUE indexes more rarely than relational data.
If you do not want to create an index in a single transaction, you can use the [CREATE_INDEX][create-index] function. This uses a separate function to create an index on each chunk, instead of a single transaction for the entire hypertable. This means that you can perform other actions on the table while the index is being created, rather than having to wait until index creation is complete.
You can also use the Postgres WITH clause to perform indexing transactions on an individual chunk.
===== PAGE: https://docs.tigerdata.com/use-timescale/schema-management/triggers/ =====
Triggers
TimescaleDB supports the full range of Postgres triggers. Creating, altering, or dropping triggers on a hypertable propagates the changes to all of the underlying chunks.
Create a trigger
This example creates a new table called error_conditions with the same schema as conditions, but that only stores records which are considered errors. An error, in this case, is when an application sends a temperature or humidity reading with a value that is greater than or equal to 1000.
Creating a trigger
Create a function that inserts erroneous data into the
error_conditionstable:sqlCREATE OR REPLACE FUNCTION record_error() RETURNS trigger AS $record_error$ BEGIN IF NEW.temperature >= 1000 OR NEW.humidity >= 1000 THEN INSERT INTO error_conditions VALUES(NEW.time, NEW.location, NEW.temperature, NEW.humidity); END IF; RETURN NEW; END; $record_error$ LANGUAGE plpgsql;Create a trigger that calls this function whenever a new row is inserted into the hypertable:
sqlCREATE TRIGGER record_error BEFORE INSERT ON conditions FOR EACH ROW EXECUTE PROCEDURE record_error();All data is inserted into the
conditionstable, but rows that contain errors are also added to theerror_conditionstable.
TimescaleDB supports the full range of triggers, including BEFORE INSERT, AFTER INSERT, BEFORE UPDATE, AFTER UPDATE, BEFORE DELETE, and AFTER DELETE. For more information, see the [Postgres docs][postgres-createtrigger].
===== PAGE: https://docs.tigerdata.com/use-timescale/schema-management/foreign-data-wrappers/ =====
Foreign data wrappers
You use Postgres foreign data wrappers (FDWs) to query external data sources from a Tiger Cloud service. These external data sources can be one of the following:
- Other Tiger Cloud services
- Postgres databases outside of Tiger Cloud
If you are using VPC peering, you can create FDWs in your Customer VPC to query a service in your Tiger Cloud project. However, you can't create FDWs in your Tiger Cloud services to query a data source in your Customer VPC. This is because Tiger Cloud VPC peering uses AWS PrivateLink for increased security. See [VPC peering documentation][vpc-peering] for additional details.
Postgres FDWs are particularly useful if you manage multiple Tiger Cloud services with different capabilities, and need to seamlessly access and merge regular and time-series data.
Prerequisites
To follow the steps on this page:
Create a target [Tiger Cloud service][create-service] with the Real-time analytics capability.
You need [your connection details][connection-info]. This procedure also works for [self-hosted TimescaleDB][enable-timescaledb].
Query another data source
To query another data source:
You create Postgres FDWs with the postgres_fdw extension, which is enabled by default in Tiger Cloud.
Connect to your service
See [how to connect][connect].
Create a server
Run the following command using your [connection details][connection-info]:
sqlCREATE SERVER myserver FOREIGN DATA WRAPPER postgres_fdw OPTIONS (host '<host>', dbname 'tsdb', port '<port>');Create user mapping
Run the following command using your [connection details][connection-info]:
sqlCREATE USER MAPPING FOR tsdbadmin SERVER myserver OPTIONS (user 'tsdbadmin', password '<password>');Import a foreign schema (recommended) or create a foreign table
Import the whole schema:
sqlCREATE SCHEMA foreign_stuff; IMPORT FOREIGN SCHEMA public FROM SERVER myserver INTO foreign_stuff ;Alternatively, import a limited number of tables:
sqlCREATE SCHEMA foreign_stuff; IMPORT FOREIGN SCHEMA public LIMIT TO (table1, table2) FROM SERVER myserver INTO foreign_stuff;Create a foreign table. Skip if you are importing a schema:
sqlCREATE FOREIGN TABLE films ( code char(5) NOT NULL, title varchar(40) NOT NULL, did integer NOT NULL, date_prod date, kind varchar(10), len interval hour to minute ) SERVER film_server;
A user with the tsdbadmin role assigned already has the required USAGE permission to create Postgres FDWs. You can enable another user, without the tsdbadmin role assigned, to query foreign data. To do so, explicitly grant the permission. For example, for a new grafana user:
CREATE USER grafana;

GRANT grafana TO tsdbadmin;

CREATE SCHEMA fdw AUTHORIZATION grafana;

CREATE SERVER db1 FOREIGN DATA WRAPPER postgres_fdw
OPTIONS (host '<host>', dbname 'tsdb', port '<port>');

CREATE USER MAPPING FOR grafana SERVER db1
OPTIONS (user 'tsdbadmin', password '<password>');

GRANT USAGE ON FOREIGN SERVER db1 TO grafana;

SET ROLE grafana;

IMPORT FOREIGN SCHEMA public
       FROM SERVER db1
       INTO fdw;
You create Postgres FDWs with the postgres_fdw extension. See [documenation][enable-fdw-docs] on how to enable it.
Connect to your database
Use [
psql][psql] to connect to your database.Create a server
Run the following command using your [connection details][connection-info]:
sqlCREATE SERVER myserver FOREIGN DATA WRAPPER postgres_fdw OPTIONS (host '<host>', dbname '<database_name>', port '<port>');Create user mapping
Run the following command using your [connection details][connection-info]:
sqlCREATE USER MAPPING FOR postgres SERVER myserver OPTIONS (user 'postgres', password '<password>');Import a foreign schema (recommended) or create a foreign table
Import the whole schema:
sqlCREATE SCHEMA foreign_stuff; IMPORT FOREIGN SCHEMA public FROM SERVER myserver INTO foreign_stuff ;Alternatively, import a limited number of tables:
sqlCREATE SCHEMA foreign_stuff; IMPORT FOREIGN SCHEMA public LIMIT TO (table1, table2) FROM SERVER myserver INTO foreign_stuff;Create a foreign table. Skip if you are importing a schema:
sqlCREATE FOREIGN TABLE films ( code char(5) NOT NULL, title varchar(40) NOT NULL, did integer NOT NULL, date_prod date, kind varchar(10), len interval hour to minute ) SERVER film_server;
===== PAGE: https://docs.tigerdata.com/use-timescale/write-data/insert/ =====
Insert data
Insert data into a hypertable with a standard [INSERT][postgres-insert] SQL command.
Insert a single row
To insert a single row into a hypertable, use the syntax INSERT INTO ... VALUES. For example, to insert data into a hypertable named conditions:
INSERT INTO conditions(time, location, temperature, humidity)
  VALUES (NOW(), 'office', 70.0, 50.0);
Insert multiple rows
You can also insert multiple rows into a hypertable using a single INSERT call. This works even for thousands of rows at a time. This is more efficient than inserting data row-by-row, and is recommended when possible.
Use the same syntax, separating rows with a comma:
INSERT INTO conditions
  VALUES
    (NOW(), 'office', 70.0, 50.0),
    (NOW(), 'basement', 66.5, 60.0),
    (NOW(), 'garage', 77.0, 65.2);
You can insert multiple rows belonging to different chunks within the same INSERT statement. Behind the scenes, TimescaleDB batches the rows by chunk, and writes to each chunk in a single transaction.
Insert and return data
In the same INSERT command, you can return some or all of the inserted data by adding a RETURNING clause. For example, to return all the inserted data, run:
INSERT INTO conditions
  VALUES (NOW(), 'office', 70.1, 50.1)
  RETURNING *;
This returns:
time                          | location | temperature | humidity
------------------------------+----------+-------------+----------
2017-07-28 11:42:42.846621+00 | office   |        70.1 |     50.1
(1 row)
===== PAGE: https://docs.tigerdata.com/use-timescale/write-data/about-writing-data/ =====
About writing data
TimescaleDB supports writing data in the same way as Postgres, using INSERT, UPDATE, INSERT ... ON CONFLICT, and DELETE.
TimescaleDB is optimized for running real-time analytics workloads on time-series data. For this reason, hypertables are optimized for inserts to the most recent time intervals. Inserting data with recent time values gives excellent performance. However, if you need to make frequent updates to older time intervals, you might see lower write throughput.
===== PAGE: https://docs.tigerdata.com/use-timescale/write-data/upsert/ =====
Upsert data
Upserting is an operation that performs both:
- Inserting a new row if a matching row doesn't already exist
- Either updating the existing row, or doing nothing, if a matching row already exists
Upserts only work when you have a unique index or constraint. A matching row is one that has identical values for the columns covered by the index or constraint.
In Postgres, a primary key is a unique index with a NOT NULL constraint. If you have a primary key, you automatically have a unique index.
Create a table with a unique constraint
The examples in this section use a conditions table with a unique constraint on the columns (time, location). To create a unique constraint, use UNIQUE (<COLUMNS>) while defining your table:
CREATE TABLE conditions (
  time        TIMESTAMPTZ       NOT NULL,
  location    TEXT              NOT NULL,
  temperature DOUBLE PRECISION  NULL,
  humidity    DOUBLE PRECISION  NULL,
  UNIQUE (time, location)
);
You can also create a unique constraint after the table is created. Use the syntax ALTER TABLE ... ADD CONSTRAINT ... UNIQUE. In this example, the constraint is named conditions_time_location:
ALTER TABLE conditions
  ADD CONSTRAINT conditions_time_location
    UNIQUE (time, location);
When you add a unique constraint to a table, you can't insert data that violates the constraint. In other words, if you try to insert data that has identical values to another row, within the columns covered by the constraint, you get an error.
Unique constraints must include all partitioning columns. That means unique constraints on a hypertable must include the time column. If you added other partitioning columns to your hypertable, the constraint must include those as well. For more information, see the section on hypertables and unique indexes.
Insert or update data to a table with a unique constraint
You can tell the database to insert new data if it doesn't violate the constraint, and to update the existing row if it does. Use the syntax INSERT INTO ... VALUES ... ON CONFLICT ... DO UPDATE.
For example, to update the temperature and humidity values if a row with the specified time and location already exists, run:
INSERT INTO conditions
  VALUES ('2017-07-28 11:42:42.846621+00', 'office', 70.2, 50.1)
  ON CONFLICT (time, location) DO UPDATE
    SET temperature = excluded.temperature,
        humidity = excluded.humidity;
Insert or do nothing to a table with a unique constraint
You can also tell the database to do nothing if the constraint is violated. The new data is not inserted, and the old row is not updated. This is useful when writing many rows as one batch, to prevent the entire transaction from failing. The database engine skips the row and moves on.
To insert or do nothing, use the syntax INSERT INTO ... VALUES ... ON CONFLICT DO NOTHING:
INSERT INTO conditions
  VALUES ('2017-07-28 11:42:42.846621+00', 'office', 70.1, 50.0)
  ON CONFLICT DO NOTHING;
===== PAGE: https://docs.tigerdata.com/use-timescale/write-data/delete/ =====
Delete data
You can delete data from a hypertable using a standard [DELETE][postgres-delete] SQL command. If you want to delete old data once it reaches a certain age, you can also drop entire chunks or set up a data retention policy.
Delete data with DELETE command
To delete data from a table, use the syntax DELETE FROM .... In this example, data is deleted from the table conditions, if the row's temperature or humidity is below a certain level:
DELETE FROM conditions WHERE temperature < 35 OR humidity < 60;If you delete a lot of data, run VACUUM or VACUUM FULL to reclaim storage from the deleted or obsolete rows.
Delete data by dropping chunks
TimescaleDB allows you to delete data by age, by dropping chunks from a hypertable. You can do so either manually or by data retention policy.
To learn more, see the [data retention section][data-retention].
===== PAGE: https://docs.tigerdata.com/use-timescale/write-data/update/ =====
Update data
Update data in a hypertable with a standard [UPDATE][postgres-update] SQL command.
Update a single row
Update a single row with the syntax UPDATE ... SET ... WHERE. For example, to update a row in the conditions hypertable with new temperature and humidity values, run the following. The WHERE clause specifies the row to be updated.
UPDATE conditions
  SET temperature = 70.2, humidity = 50.0
  WHERE time = '2017-07-28 11:42:42.846621+00'
    AND location = 'office';
Update multiple rows at once
You can also update multiple rows at once, by using a WHERE clause that filters for more than one row. For example, run the following to update all temperature values within the given 10-minute span:
UPDATE conditions
  SET temperature = temperature + 0.1
  WHERE time >= '2017-07-28 11:40'
    AND time < '2017-07-28 11:50';
===== PAGE: https://docs.tigerdata.com/use-timescale/hypertables/hypertables-and-unique-indexes/ =====
Enforce constraints with unique indexes
You use unique indexes on a hypertable to enforce [constraints][constraints]. If you have a primary key, you have a unique index. In Postgres, a primary key is a unique index with a NOT NULL constraint.
You do not need to have a unique index on your hypertables. When you create a unique index, it must contain all the partitioning columns of the hypertable.
Create a hypertable and add unique indexes
To create a unique index on a hypertable:
Determine the partitioning columns
Before you create a unique index, you need to determine which unique indexes are allowed on your hypertable. Begin by identifying your partitioning columns.
TimescaleDB traditionally uses the following columns to partition hypertables:
- The
timecolumn used to create the hypertable. Every TimescaleDB hypertable is partitioned by time. - Any space-partitioning columns. Space partitions are optional and not included in every hypertable.
- The
Create a hypertable
Create a [hypertable][hypertables-section] for your time-series data using [CREATE TABLE][hypertable-create-table]. For [efficient queries][secondary-indexes] on data in the columnstore, remember to
segmentbythe column you will use most often to filter your data. For example:sqlCREATE TABLE hypertable_example( time TIMESTAMPTZ, user_id BIGINT, device_id BIGINT, value FLOAT ) WITH ( tsdb.hypertable, tsdb.partition_column='time', tsdb.segmentby = 'device_id', tsdb.orderby = 'time DESC' );If you are self-hosting TimescaleDB v2.19.3 and below, create a [Postgres relational table][pg-create-table], then convert it using [create_hypertable][create_hypertable]. You then enable hypercore with a call to [ALTER TABLE][alter_table_hypercore].
Create a unique index on the hypertable
When you create a unique index on a hypertable, it must contain all the partitioning columns. It may contain other columns as well, and they may be arranged in any order. You cannot create a unique index without
time, becausetimeis a partitioning column.For example:
Create a unique index on
timeanddevice_idwith a call toCREATE UNIQUE INDEX:sqlCREATE UNIQUE INDEX idx_deviceid_time ON hypertable_example(device_id, time);Create a unique index on
time,user_id, anddevice_id.device_idis not a partitioning column, but this still works:sqlCREATE UNIQUE INDEX idx_userid_deviceid_time ON hypertable_example(user_id, device_id, time);
This restriction is necessary to guarantee global uniqueness in the index.
Create a hypertable from an existing table with unique indexes
If you create a unique index on a table before turning it into a hypertable, the same restrictions apply in reverse. You can only partition the table by columns in your unique index.
Create a relational table
sqlCREATE TABLE another_hypertable_example( time TIMESTAMPTZ, user_id BIGINT, device_id BIGINT, value FLOAT );Create a unique index on the table
For example, on
device_idandtime:sqlCREATE UNIQUE INDEX idx_deviceid_time ON another_hypertable_example(device_id, time);Turn the table into a partitioned hypertable
On
timealone:sqlSELECT * from create_hypertable('another_hypertable_example', by_range('time'));On
timeanddevice_id:sqlSELECT * FROM create_hypertable('another_hypertable_example', by_range('time')); SELECT * FROM add_dimension('another_hypertable_example', by_hash('device_id', 4));
You get an error if you try to turn the relational table into a hypertable partitioned by
timeanduser_id. This is becauseuser_idis not part of theUNIQUE INDEX. To fix the error, adduser_idto your unique index.
===== PAGE: https://docs.tigerdata.com/use-timescale/hypertables/hypertable-crud/ =====
Optimize time-series data in hypertables
Hypertables are designed for real-time analytics, they are Postgres tables that automatically partition your data by time. Typically, you partition hypertables on columns that hold time values. [Best practice is to use timestamptz][timestamps-best-practice] column type. However, you can also partition on date, integer, timestamp and [UUIDv7][uuidv7_functions] types.
Prerequisites
To follow the steps on this page:
Create a target [Tiger Cloud service][create-service] with the Real-time analytics capability.
You need [your connection details][connection-info]. This procedure also works for [self-hosted TimescaleDB][enable-timescaledb].
Create a hypertable
Create a [hypertable][hypertables-section] for your time-series data using [CREATE TABLE][hypertable-create-table]. For [efficient queries][secondary-indexes] on data in the columnstore, remember to segmentby the column you will use most often to filter your data:
CREATE TABLE conditions (
   time        TIMESTAMPTZ       NOT NULL,
   location    TEXT              NOT NULL,
   device      TEXT              NOT NULL,
   temperature DOUBLE PRECISION  NULL,
   humidity    DOUBLE PRECISION  NULL
) WITH (
   tsdb.hypertable,
   tsdb.partition_column='time',
   tsdb.segmentby = 'device',
   tsdb.orderby = 'time DESC'
);
If you are self-hosting TimescaleDB v2.19.3 and below, create a [Postgres relational table][pg-create-table], then convert it using [create_hypertable][create_hypertable]. You then enable hypercore with a call to [ALTER TABLE][alter_table_hypercore].
To convert an existing table with data in it, call create_hypertable on that table with [migrate_data to true][api-create-hypertable-arguments]. However, if you have a lot of data, this may take a long time.
Speed up data ingestion
When you set timescaledb.enable_direct_compress_copy your data gets compressed in memory during ingestion with COPY statements. By writing the compressed batches immediately in the columnstore, the IO footprint is significantly lower. Also, the [columnstore policy][add_columnstore_policy] you set is less important, INSERT already produces compressed chunks.
Please note that this feature is a tech preview and not production-ready. Using this feature could lead to regressed query performance and/or storage ratio, if the ingested batches are not correctly ordered or are of too high cardinality.
To enable in-memory data compression during ingestion:
SET timescaledb.enable_direct_compress_copy=on;Important facts
- High cardinality use cases do not produce good batches and lead to degreaded query performance.
- The columnstore is optimized to store 1000 records per batch, which is the optimal format for ingestion per segment by.
- WAL records are written for the compressed batches rather than the individual tuples.
- Currently only
COPYis support,INSERTwill eventually follow. - Best results are achieved for batch ingestion with 1000 records or more, upper boundary is 10.000 records.
- Continous Aggregates are not supported at the moment.
Optimize cooling data in the columnstore
As the data cools and becomes more suited for analytics, [add a columnstore policy][add_columnstore_policy] so your data is automatically converted to the columnstore after a specific time interval. This columnar format enables fast scanning and aggregation, optimizing performance for analytical workloads while also saving significant storage space. In the columnstore conversion, hypertable chunks are compressed by up to 98%, and organized for efficient, large-scale queries. This columnar format enables fast scanning and aggregation, optimizing performance for analytical workloads.
To optimize your data, add a columnstore policy:
CALL add_columnstore_policy('conditions', after => INTERVAL '1d');You can also manually [convert chunks][convert_to_columnstore] in a hypertable to the columnstore.
Alter a hypertable
You can alter a hypertable, for example to add a column, by using the Postgres [ALTER TABLE][postgres-altertable] command. This works for both regular and distributed hypertables.
Add a column to a hypertable
You add a column to a hypertable using the ALTER TABLE command. In this example, the hypertable is named conditions and the new column is named humidity:
ALTER TABLE conditions
  ADD COLUMN humidity DOUBLE PRECISION NULL;
If the column you are adding has the default value set to NULL, or has no default value, then adding a column is relatively fast. If you set the default to a non-null value, it takes longer, because it needs to fill in this value for all existing rows of all existing chunks.
Rename a hypertable
You can change the name of a hypertable using the ALTER TABLE command. In this example, the hypertable is called conditions, and is being changed to the new name, weather:
ALTER TABLE conditions
  RENAME TO weather;
Drop a hypertable
Drop a hypertable using a standard Postgres [DROP TABLE][postgres-droptable] command:
DROP TABLE weather;All data chunks belonging to the hypertable are deleted.
===== PAGE: https://docs.tigerdata.com/use-timescale/hypertables/improve-query-performance/ =====
Improve hypertable and query performance
Hypertables are Postgres tables that help you improve insert and query performance by automatically partitioning your data by time. Each hypertable is made up of child tables called chunks. Each chunk is assigned a range of time, and only contains data from that range. When you run a query, TimescaleDB identifies the correct chunk and runs the query on it, instead of going through the entire table. This page shows you how to tune hypertables to increase performance even more.
- [Optimize hypertable chunk intervals][chunk-intervals]: choose the optimum chunk size for your data
- [Enable chunk skipping][chunk-skipping]: skip chunks on non-partitioning columns in hypertables when you query your data
- [Analyze your hypertables][analyze-hypertables]: use Postgres
ANALYZEto create the best query plan
Optimize hypertable chunk intervals
Adjusting your hypertable chunk interval can improve performance in your database.
Choose an optimum chunk interval
Postgres builds the index on the fly during ingestion. That means that to build a new entry on the index, a significant portion of the index needs to be traversed during every row insertion. When the index does not fit into memory, it is constantly flushed to disk and read back. This wastes IO resources which would otherwise be used for writing the heap/WAL data to disk.
The default chunk interval is 7 days. However, best practice is to set chunk_interval so that prior to processing, the indexes for chunks currently being ingested into fit within 25% of main memory. For example, on a system with 64 GB of memory, if index growth is approximately 2 GB per day, a 1-week chunk interval is appropriate. If index growth is around 10 GB per day, use a 1-day interval.
You set chunk_interval when you [create a hypertable][hypertable-create-table], or by calling [set_chunk_time_interval][chunk_interval] on an existing hypertable.
In the following example you create a table called conditions that stores time values in the time column and has chunks that store data for a chunk_interval of one day:
CREATE TABLE conditions (
   time        TIMESTAMPTZ       NOT NULL,
   location    TEXT              NOT NULL,
   device      TEXT              NOT NULL,
   temperature DOUBLE PRECISION  NULL,
   humidity    DOUBLE PRECISION  NULL
) WITH (
   tsdb.hypertable,
   tsdb.partition_column='time',
   tsdb.chunk_interval='1 day'
);
If you are self-hosting TimescaleDB v2.19.3 and below, create a [Postgres relational table][pg-create-table], then convert it using [create_hypertable][create_hypertable]. You then enable hypercore with a call to [ALTER TABLE][alter_table_hypercore].
Check current setting for chunk intervals
Query the TimescaleDB catalog for a hypertable. For example:
sqlSELECT * FROM timescaledb_information.dimensions WHERE hypertable_name = 'conditions';The result looks like:
sqlhypertable_schema | hypertable_name | dimension_number | column_name | column_type | dimension_type | time_interval | integer_interval | integer_now_func | num_partitions -------------------+-----------------+------------------+-------------+--------------------------+----------------+---------------+------------------+------------------+---------------- public | metrics | 1 | recorded | timestamp with time zone | Time | 1 day | | |Time-based interval lengths are reported in microseconds.
Change the chunk interval length on an existing hypertable
To change the chunk interval on an already existing hypertable, call
set_chunk_time_interval.sqlSELECT set_chunk_time_interval('conditions', INTERVAL '24 hours');The updated chunk interval only applies to new chunks. This means setting an overly long interval might take a long time to correct. For example, if you set
chunk_intervalto 1 year and start inserting data, you can no longer shorten the chunk for that year. If you need to correct this situation, create a new hypertable and migrate your data.While chunk turnover does not degrade performance, chunk creation does take longer lock time than a normal
INSERToperation into a chunk that has already been created. This means that if multiple chunks are being created at the same time, the transactions block each other until the first transaction is completed.
If you use expensive index types, such as some PostGIS geospatial indexes, take care to check the total size of the chunk and its index using [chunks_detailed_size][chunks_detailed_size].
Enable chunk skipping
Early access: TimescaleDB v2.17.1
One of the key purposes of hypertables is to make your analytical queries run with the lowest latency possible. When you execute a query on a hypertable, you do not parse the whole table; you only access the chunks necessary to satisfy the query. This works well when the WHERE clause of a query uses the column by which a hypertable is partitioned. For example, in a hypertable where every day of the year is a separate chunk, a query for September 1 accesses only the chunk for that day.
However, many queries use columns other than the partitioning one. For example, a satellite company might have a table with two columns: one for when data was gathered by a satellite and one for when it was added to the database. If you partition by the date of gathering, a query by the date of adding accesses all chunks in the hypertable and slows the performance.
To improve query performance, TimescaleDB enables you to skip chunks on non-partitioning columns in hypertables.
Chunk skipping only works on chunks converted to the columnstore after you enable_chunk_skipping.
How chunk skipping works
You enable chunk skipping on a column in a hypertable. TimescaleDB tracks the minimum and maximum values for that column in each chunk. These ranges are stored in the start (inclusive) and end (exclusive) format in the chunk_column_stats catalog table. TimescaleDB uses these ranges for dynamic chunk exclusion when the WHERE clause of an SQL query specifies ranges on the column.
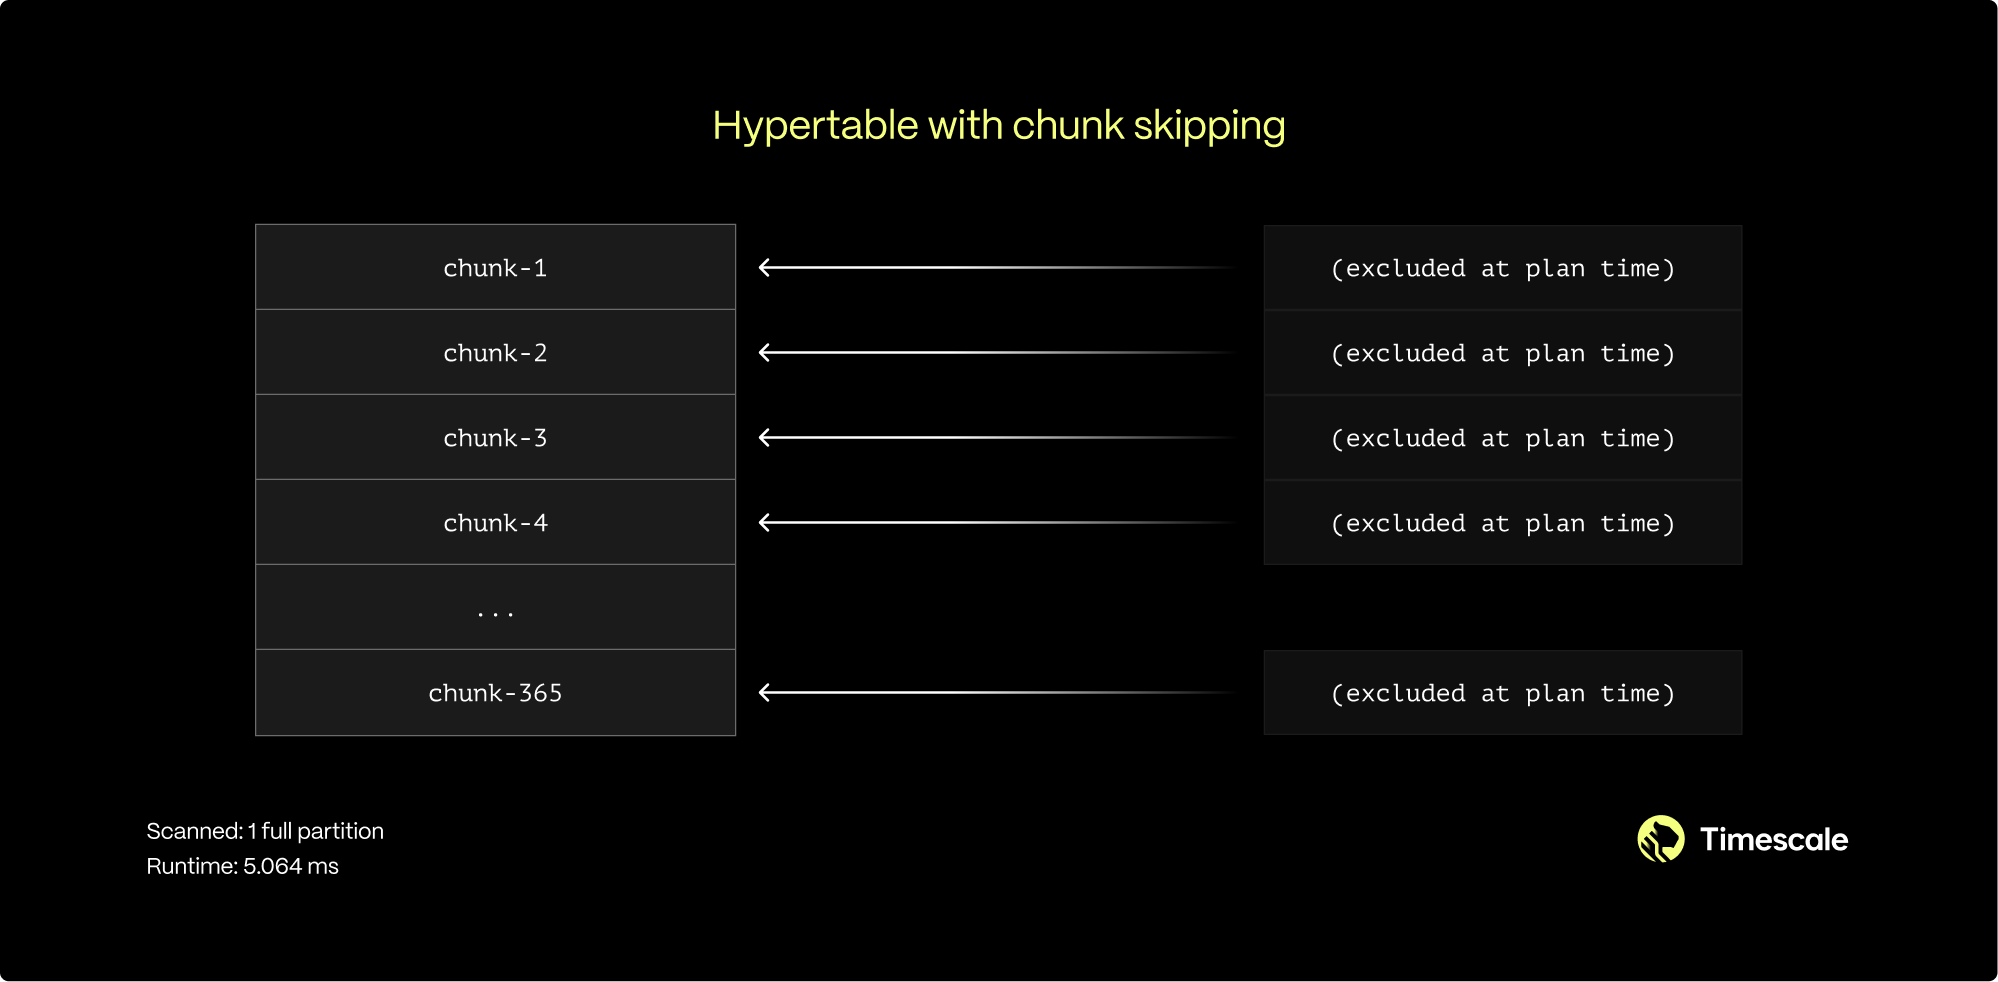
You can enable chunk skipping on hypertables compressed into the columnstore for smallint, int, bigint, serial, bigserial, date, timestamp, or timestamptz type columns.
When to enable chunk skipping
You can enable chunk skipping on as many columns as you need. However, best practice is to enable it on columns that are both:
- Correlated, that is, related to the partitioning column in some way.
- Referenced in the
WHEREclauses of the queries.
In the satellite example, the time of adding data to a database inevitably follows the time of gathering. Sequential IDs and the creation timestamp for both entities also increase synchronously. This means those two columns are correlated.
For a more in-depth look on chunk skipping, see our blog post.
Enable chunk skipping
To enable chunk skipping on a column, call enable_chunk_skipping on a hypertable for a column_name. For example, the following query enables chunk skipping on the order_id column in the orders table:
SELECT enable_chunk_skipping('orders', 'order_id');For more details on how to implement chunk skipping, see the [API Reference][api-reference].
Analyze your hypertables
You can use the Postgres ANALYZE command to query all chunks in your hypertable. The statistics collected by the ANALYZE command are used by the Postgres planner to create the best query plan. For more information about the ANALYZE command, see the [Postgres documentation][pg-analyze].
===== PAGE: https://docs.tigerdata.com/use-timescale/extensions/pgvector/ =====
Create a chatbot using pgvector
The pgvector Postgres extension helps you to store and search over machine learning-generated embeddings. It provides different capabilities that allows you to identify both exact and approximate nearest neighbors. It is designed to work seamlessly with other Postgres features, including indexing and querying.
For more information about these functions and the options available, see the [pgvector][pgvector-repo] repository.
Use the pgvector extension to create a chatbot
The pgvector Postgres extension allows you to create, store, and query OpenAI [vector embeddings][vector-embeddings] in a Postgres database instance. This page shows you how to use [retrieval augmented generation (RAG)][rag-docs] to create a chatbot that combines your data with ChatGPT using OpenAI and pgvector. RAG provides a solution to the problem that a foundational model such as GPT-3 or GPT-4 could be missing some information needed to give a good answer, because that information was not in the dataset used to train the model. This can happen if the information is stored in private documents or only became available recently.
In this example, you create embeddings, insert the embeddings into a Tiger Cloud service and query the embeddings using pgvector. The content for the embeddings is from the Tiger Data blog, specifically from the [Developer Q&A][developer-qa] section, which features posts by Tiger Data users talking about their real-world use cases.
Prerequisites
Before you begin, make sure you have:
Installed Python.
Created a [Tiger Cloud service][cloud-login].
Downloaded the cheatsheet when you created the service. This sheet contains the connection details for the database you want to use as a vector database.
Cloned the [pgvector repository][timescale-pgvector].
Signed up for an [OpenAI developer account][openai-signup].
Created an API key and made a note of your OpenAI [API key][api-key].
If you are on a free plan there may be rate limiting for your API requests.
Using the pgvector extension to create a chatbot
Create and activate a Python virtual environment:
bashvirtualenv pgvectorenv source pgvectorenv/bin/activateSet the environment variables for
OPENAI_API_KEYandTIMESCALE_CONNECTION_STRING. In this example, to set the environment variables in macOS, open thezshrcprofile. Replace<OPENAI_API>, and<SERVICE_URL>with your OpenAI API key and the URL of your Tiger Cloud service:bashnano ~/.zshrc export OPENAI_API_KEY='<OPENAI_API>' export TIMESCALE_CONNECTION_STRING='<SERVICE_URL>' Update the shell with the new variables using `source ~/.zshrc`Confirm that you have set the environment variables using:
bashecho $OPENAI_API_KEY echo $TIMESCALE_CONNECTION_STRINGInstall the required modules and packages using the
requirements.txt. This file is located in thevector-cookbook\openai_pgvector_helloworlddirectory:bashpip install -r requirements.txtTo create embeddings for your data using the OpenAI API, open an editor of your choice and create the
create_embeddings.pyfile.python############################################################################### ############################################################################### import openai import os import pandas as pd import numpy as np import json import tiktoken from dotenv import load_dotenv, find_dotenv _ = load_dotenv(find_dotenv()) openai.api_key = os.environ['OPENAI_API_KEY'] df = pd.read_csv('blog_posts_data.csv') df.head() ############################################################################### ############################################################################### def num_tokens_from_string(string: str, encoding_name = "cl100k_base") -> int: if not string: return 0 encoding = tiktoken.get_encoding(encoding_name) num_tokens = len(encoding.encode(string)) return num_tokens def get_embedding_cost(num_tokens): return num_tokens/1000*0.0001 def get_total_embeddings_cost(): total_tokens = 0 for i in range(len(df.index)): text = df['content'][i] token_len = num_tokens_from_string(text) total_tokens = total_tokens + token_len total_cost = get_embedding_cost(total_tokens) return total_cost ############################################################################### total_cost = get_total_embeddings_cost() print("Estimated price to embed this content = $" + str(total_cost)) ############################################################################### ############################################################################### new_list = [] for i in range(len(df.index)): text = df['content'][i] token_len = num_tokens_from_string(text) if token_len <= 512: new_list.append([df['title'][i], df['content'][i], df['url'][i], token_len]) else: start = 0 ideal_token_size = 512 ideal_size = int(ideal_token_size // (4/3)) end = ideal_size #split text by spaces into words words = text.split() #remove empty spaces words = [x for x in words if x != ' '] total_words = len(words) #calculate iterations chunks = total_words // ideal_size if total_words % ideal_size != 0: chunks += 1 new_content = [] for j in range(chunks): if end > total_words: end = total_words new_content = words[start:end] new_content_string = ' '.join(new_content) new_content_token_len = num_tokens_from_string(new_content_string) if new_content_token_len > 0: new_list.append([df['title'][i], new_content_string, df['url'][i], new_content_token_len]) start += ideal_size end += ideal_size def get_embeddings(text): response = openai.Embedding.create( model="text-embedding-ada-002", input = text.replace("\n"," ") ) embedding = response['data'][0]['embedding'] return embedding for i in range(len(new_list)): text = new_list[i][1] embedding = get_embeddings(text) new_list[i].append(embedding) df_new = pd.DataFrame(new_list, columns=['title', 'content', 'url', 'tokens', 'embeddings']) df_new.head() df_new.to_csv('blog_data_and_embeddings.csv', index=False) print("Done! Check the file blog_data_and_embeddings.csv for your results.")Run the script using the
python create_embeddings.pycommand. You should see an output that looks a bit like this:bashEstimated price to embed this content = $0.0060178 Done! Check the file blog_data_and_embeddings.csv for your results.To insert these embeddings into your Tiger Cloud service using the
pgvectorextension, open an editor of your choice and create theinsert_embeddings.pyfile.python############################################################################### ############################################################################### import openai import os import pandas as pd import numpy as np import psycopg2 import ast import pgvector import math from psycopg2.extras import execute_values from pgvector.psycopg2 import register_vector ############################################################################### ############################################################################### connection_string = os.environ['TIMESCALE_CONNECTION_STRING'] conn = psycopg2.connect(connection_string) cur = conn.cursor() #install pgvector in your database cur.execute("CREATE EXTENSION IF NOT EXISTS vector;"); conn.commit() register_vector(conn) table_create_command = """ CREATE TABLE embeddings ( id bigserial primary key, title text, url text, content text, tokens integer, embedding vector(1536) ); """ cur.execute(table_create_command) cur.close() conn.commit() ############################################################################### df = pd.read_csv('blog_data_and_embeddings.csv') titles = df['title'] urls = df['url'] contents = df['content'] tokens = df['tokens'] embeds = [list(map(float, ast.literal_eval(embed_str))) for embed_str in df['embeddings']] df_new = pd.DataFrame(\{ 'title': titles, 'url': urls, 'content': contents, 'tokens': tokens, 'embeddings': embeds \}) print(df_new.head()) ############################################################################### ############################################################################### register_vector(conn) cur = conn.cursor() data_list = [(row['title'], row['url'], row['content'], int(row['tokens']), np.array(row['embeddings'])) for index, row in df_new.iterrows()] execute_values(cur, "INSERT INTO embeddings (title, url, content, tokens, embedding) VALUES %s", data_list) conn.commit() cur.execute("SELECT COUNT(*) as cnt FROM embeddings;") num_records = cur.fetchone()[0] print("Number of vector records in table: ", num_records,"\n") cur.execute("SELECT * FROM embeddings LIMIT 1;") records = cur.fetchall() print("First record in table: ", records) #calculate the index parameters according to best practices num_lists = num_records / 1000 if num_lists < 10: num_lists = 10 if num_records > 1000000: num_lists = math.sqrt(num_records) #use the cosine distance measure, which is what we'll later use for querying cur.execute(f'CREATE INDEX ON embeddings USING ivfflat (embedding vector_cosine_ops) WITH (lists = \{num_lists\});') conn.commit() print("Index created on embeddings table")Run the script using the
python insert_embeddings.pycommand. You should see an output that looks a bit like this:bash0 How to Build a Weather Station With Elixir, Ne... ... [0.021399984136223793, 0.021850213408470154, -... 1 How to Build a Weather Station With Elixir, Ne... ... [0.01620873250067234, 0.011362895369529724, 0.... 2 How to Build a Weather Station With Elixir, Ne... ... [0.022517921403050423, -0.0019158280920237303,... 3 CloudQuery on Using Postgres for Cloud Asset... ... [0.008915113285183907, -0.004873732570558786, ... 4 CloudQuery on Using PostgreSQL for Cloud Asset... ... [0.0204352755099535, 0.010087345726788044, 0.0... [5 rows x 5 columns] Number of vector records in table: 129 First record in table: [(1, 'How to Build a Weather Station With Elixir, Nerves, and TimescaleDB', 'https://www.timescale.com/blog/how-to-build-a-weather-station-with-elixir-nerves-and-timescaledb/', 'This is an installment of our “Community Member Spotlight” series, where we invite our customers to share their work, shining a light on their success and inspiring others with new ways to use technology to solve problems.In this edition,Alexander Koutmos, author of the Build a Weather Station with Elixir and Nerves book, joins us to share how he uses Grafana and TimescaleDB to store and visualize weather data collected from IoT sensors.About the teamThe bookBuild a Weather Station with Elixir and Nerveswas a joint effort between Bruce Tate, Frank Hunleth, and me.I have been writing software professionally for almost a decade and have been working primarily with Elixir since 2016. I currently maintain a few Elixir libraries onHexand also runStagira, a software consultancy company.Bruce Tateis a kayaker, programmer, and father of two from Chattanooga, Tennessee. He is the author of more than ten books and has been around Elixir from the beginning. He is the founder ofGroxio, a company that trains Elixir developers.Frank Hunlethis an embedded systems programmer, OSS maintainer, and Nerves core team member. When not in front of a computer, he loves running and spending time with his family.About the projectIn the Pragmatic Bookshelf book,Build a Weather Station with Elixir and Nerves, we take a project-based approach and guide the reader to create a Nerves-powered IoT weather station.For those unfamiliar with the Elixir ecosystem,Nervesis an IoT framework that allows you to build and deploy IoT applications on a wide array of embedded devices. At a high level, Nerves allows you to focus on building your project and takes care of a lot of the boilerplate associated with running Elixir on embedded devices.The goal of the book is to guide the reader through the process of building an end-to-end IoT solution for capturing, persisting, and visualizing weather data.Assembled weather station hooked up to development machine.One of the motivating factors for this book was to create a real-world project where readers could get hands-on experience with hardware without worrying too much about the nitty-gritty of soldering components together. Experimenting with hardware can often feel intimidating and confusing, but with Elixir and Nerves, we feel confident that even beginners get comfortable and productive quickly. As a result, in the book, we leverage a Raspberry Pi Zero W along with a few I2C enabled sensors to', 501, array([ 0.02139998, 0.02185021, -0.00537814, ..., -0.01257126, -0.02165324, -0.03714396], dtype=float32))] Index created on embeddings tableTo query the embeddings that you inserted in to your Tiger Cloud service, open an editor of your choice and create the
query_embeddings.pyfile. Here, the query isHow does Density use TimescaleDB?.python############################################################################### ############################################################################### import openai import os import pandas as pd import numpy as np import json import tiktoken import psycopg2 import ast import pgvector import math from psycopg2.extras import execute_values from pgvector.psycopg2 import register_vector from dotenv import load_dotenv, find_dotenv _ = load_dotenv(find_dotenv()) openai.api_key = os.environ['OPENAI_API_KEY'] connection_string = os.environ['TIMESCALE_CONNECTION_STRING'] conn = psycopg2.connect(connection_string) ############################################################################### ############################################################################### def get_top3_similar_docs(query_embedding, conn): embedding_array = np.array(query_embedding) register_vector(conn) cur = conn.cursor() cur.execute("SELECT content FROM embeddings ORDER BY embedding <=> %s LIMIT 3", (embedding_array,)) top3_docs = cur.fetchall() return top3_docs def get_completion_from_messages(messages, model="gpt-3.5-turbo-0613", temperature=0, max_tokens=1000): response = openai.ChatCompletion.create( model=model, messages=messages, temperature=temperature, max_tokens=max_tokens, ) return response.choices[0].message["content"] def get_embeddings(text): response = openai.Embedding.create( model="text-embedding-ada-002", input = text.replace("\n"," ") ) embedding = response['data'][0]['embedding'] return embedding ############################################################################### ############################################################################### ############################################################################### def process_input_with_retrieval(user_input): delimiter = "```" #Step 1: Get documents related to the user input from database related_docs = get_top3_similar_docs(get_embeddings(user_input), conn) system_message = f""" You are a friendly chatbot. \ You can answer questions about timescaledb, its features and its use cases. \ You respond in a concise, technically credible tone. \ """ messages = [ \{"role": "system", "content": system_message\}, \{"role": "user", "content": f"\{delimiter\}\{user_input\}\{delimiter\}"\}, \{"role": "assistant", "content": f"Relevant Tiger Data case studies information: \n \{related_docs[0] [0]\} \n \{related_docs[1][0]\} \{related_docs[2][0]\}"\} ] final_response = get_completion_from_messages(messages) return final_response ############################################################################### input = "How does Density use TimescaleDB?" response = process_input_with_retrieval(input) print(input) print(response)Run the script using the
python query_embeddings.pycommand. You should see an output that looks a bit like this:bashHow does Density use TimescaleDB? Density uses TimescaleDB as the main database in their smart city system. They store counts of people in spaces over time and derive metrics such as dwell time and space usage. TimescaleDB's flexibility and ability to handle time-series data efficiently allows Density to slice, dice, and compose queries in various ways. They also leverage TimescaleDB's continuous aggregates feature to roll up high-resolution data to lower resolutions, improving query performance. Additionally, TimescaleDB's support for percentile calculations has helped Density deliver accurate percentile values for their data. Overall, TimescaleDB has significantly improved the performance and scalability of Density's analytics workload.
===== PAGE: https://docs.tigerdata.com/use-timescale/extensions/pgcrypto/ =====
Encrypt data using pgcrypto
The pgcrypto Postgres extension provides cryptographic functions such as:
- General hashing
- Password hashing
- PGP encryption
- Raw encryption
- Random-data
For more information about these functions and the options available, see the [pgcrypto documentation][pgcrypto-docs].
Use the pgcrypto extension to encrypt inserted data
The pgcrypto extension allows you to encrypt, decrypt, hash, and create digital signatures within your database. Tiger Data understands how precious your data is and safeguards sensitive information.
Using the pgcrypto extension to encrypt inserted data
Install the
pgcryptoextension:sqlCREATE EXTENSION IF NOT EXISTS pgcrypto;You can confirm if the extension is installed using the
\dxcommand. The installed extensions are listed:sqlList of installed extensions Name | Version | Schema | Description ---------------------+---------+------------+--------------------------------------------------------------------------------------- pg_stat_statements | 1.10 | public | track planning and execution statistics of all SQL statements executed pgcrypto | 1.3 | public | cryptographic functions plpgsql | 1.0 | pg_catalog | PL/pgSQL procedural language timescaledb | 2.11.0 | public | Enables scalable inserts and complex queries for time-series data (Community Edition) timescaledb_toolkit | 1.16.0 | public | Library of analytical hyperfunctions, time-series pipelining, and other SQL utilitiesCreate a table named
user_passwords:sqlCREATE TABLE user_passwords (username varchar(100) PRIMARY KEY, crypttext text);Insert the values in the
user_passwordstable and replace<Password_Key>with a password key of your choice:sqlINSERT INTO tbl_sym_crypt (username, crypttext) VALUES ('user1', pgp_sym_encrypt('user1_password','<Password_Key>')), ('user2', pgp_sym_encrypt('user2_password','<Password_Key>'));You can confirm that the password is encrypted using the command:
sqlSELECT * FROM user_passwords;The encrypted passwords are listed:
sqlusername | crypttext ----------+---------------------------------------------------------------------------------------------------------------------------------------------------------------------- user1 | \xc30d040703025caa37f9d1c731d169d240018529d6f0002b2948905a87e4787efaa0046e58fd3f04ee95594bea1803807063321f62c9651cbf0422b04508093df9644a76684b504b317cf633552fcf164f user2 | \xc30d0407030279bbcf760b81d3de73d23c01c04142632fc8527c0c1b17cc954c77f16df46022acddc565fd18f0f0f761ddb2f31b21c4ebe47a48039d685287d64506029e027cf29b5493b574df (2 rows)To view the decrypted passwords, replace
<Password_Key>with the password key that you created:sqlSELECT username, pgp_sym_decrypt(crypttext::bytea, '<Password_Key>') FROM user_passwords;The decrypted passwords are listed:
sqlusername | pgp_sym_decrypt ----------+----------------- user1 | user1_password user2 | user2_password (2 rows)
===== PAGE: https://docs.tigerdata.com/use-timescale/extensions/postgis/ =====
Analyse geospatial data with postgis
The postgis Postgres extension provides storing, indexing, and querying geographic data. It helps in spatial data analysis, the study of patterns, anomalies, and theories within spatial or geographical data.
For more information about these functions and the options available, see the [PostGIS documentation] [postgis-docs].
Use the postgis extension to analyze geospatial data
The postgis Postgres extension allows you to conduct complex analyses of your geospatial time-series data. Tiger Data understands that you have a multitude of data challenges and helps you discover when things happened, and where they occurred. In this example you can query when the covid cases were reported, where they were reported, and how many were reported around a particular location.
Using the postgis extension to analyze geospatial data
Install the
postgisextension:sqlCREATE EXTENSION postgis;You can confirm if the extension is installed using the
\dxcommand. The extensions that are installed are listed:sqlList of installed extensions Name | Version | Schema | Description ---------------------+---------+------------+--------------------------------------------------------------------------------------- pg_stat_statements | 1.10 | public | track planning and execution statistics of all SQL statements executed pgcrypto | 1.3 | public | cryptographic functions plpgsql | 1.0 | pg_catalog | PL/pgSQL procedural language postgis | 3.3.3 | public | PostGIS geometry and geography spatial types and functions timescaledb | 2.11.0 | public | Enables scalable inserts and complex queries for time-series data (Community Edition) timescaledb_toolkit | 1.16.0 | public | Library of analytical hyperfunctions, time-series pipelining, and other SQL utilities (6 rows)Create a hypertable named
covid_location, where,locationis aGEOGRAPHYtype column that stores GPS coordinates using the 4326/WGS84 coordinate system, andtimerecords the time the GPS coordinate was logged for a specificstate_id. This hypertable is partitioned on thetimecolumn:sqlCREATE TABLE covid_location ( time TIMESTAMPTZ NOT NULL, state_id INT NOT NULL, location GEOGRAPHY(POINT, 4326), cases INT NOT NULL, deaths INT NOT NULL ) WITH ( tsdb.hypertable, tsdb.partition_column='time' );If you are self-hosting TimescaleDB v2.19.3 and below, create a [Postgres relational table][pg-create-table], then convert it using [create_hypertable][create_hypertable]. You then enable hypercore with a call to [ALTER TABLE][alter_table_hypercore].
To support efficient queries, create an index on the
state_idcolumn:sqlCREATE INDEX ON covid_location (state_id, time DESC);Insert some randomly generated values in the
covid_locationtable. The longitude and latitude coordinates of New Jersey are (-73.935242 40.730610), and New York are (-74.871826 39.833851):sqlINSERT INTO covid_location VALUES ('2023-06-28 20:00:00',34,'POINT(-74.871826 39.833851)',5,2), ('2023-06-28 20:00:00',36,'POINT(-73.935242 40.730610)',7,1), ('2023-06-29 20:00:00',34,'POINT(-74.871826 39.833851)',14,0), ('2023-06-29 20:00:00',36,'POINT(-73.935242 40.730610)',12,1), ('2023-06-30 20:00:00',34,'POINT(-74.871826 39.833851)',10,4);To fetch all cases of a specific state during a specific period, use:
sqlSELECT * FROM covid_location WHERE state_id = 34 AND time BETWEEN '2023-06-28 00:00:00' AND '2023-06-30 23:59:59';The data you get back looks a bit like this:
sqltime | state_id | location | cases | deaths ------------------------+----------+----------------------------------------------------+-------+-------- 2023-06-28 20:00:00+00 | 34 | 0101000020E61000005C7347FFCBB752C0535E2BA1BBEA4340 | 5 | 2 2023-06-29 20:00:00+00 | 34 | 0101000020E61000005C7347FFCBB752C0535E2BA1BBEA4340 | 14 | 0 2023-06-30 20:00:00+00 | 34 | 0101000020E61000005C7347FFCBB752C0535E2BA1BBEA4340 | 10 | 4 (3 rows)To fetch the latest logged cases of all states using the [Tiger Data SkipScan][skip-scan] feature, replace
<Interval_Time>with the number of days between the day you are running the query and the day the last report was logged in the table, in this case 30, June, 2023:sqlSELECT DISTINCT ON (state_id) state_id, ST_AsText(location) AS location FROM covid_location WHERE time > now() - INTERVAL '<Interval_Time>' ORDER BY state_id, time DESC;The
ST_AsText(location)function converts the binary geospatial data into human-readable format. The data you get back looks a bit like this:sqlstate_id | location ----------+----------------------------- 34 | POINT(-74.871826 39.833851) (1 row)To fetch all cases and states that were within 10000 meters of Manhattan at any time:
sqlSELECT DISTINCT cases, state_id FROM covid_location WHERE ST_DWithin( location, ST_GeogFromText('POINT(-73.9851 40.7589)'), 10000 );The data you get back looks a bit like this:
sqlcases | state_id -------+---------- 7 | 36 12 | 36 (2 rows)
===== PAGE: https://docs.tigerdata.com/use-timescale/extensions/pg-textsearch/ =====
Optimize full text search with BM25
Postgres full-text search at scale consistently hits a wall where performance degrades catastrophically. Tiger Data's [pg_textsearch][pg_textsearch-repo] brings modern [BM25][bm25-wiki]-based full-text search directly into Postgres, with a memtable architecture for efficient indexing and ranking. pg_textsearch integrates seamlessly with SQL and provides better search quality and performance than the Postgres built-in full-text search.
BM25 scores in pg_textsearch are returned as negative values, where lower (more negative) numbers indicate better matches. pg_textsearch implements the following:
- Corpus-aware ranking: BM25 uses inverse document frequency to weight rare terms higher
- Term frequency saturation: prevents documents with excessive term repetition from dominating results
- Length normalization: adjusts scores based on document length relative to corpus average
- Relative ranking: focuses on rank order rather than absolute score values
This page shows you how to install pg_textsearch, configure BM25 indexes, and optimize your search capabilities using the following best practice:
- Memory planning: size your
index_memory_limitbased on corpus vocabulary and document count - Language configuration: choose appropriate text search configurations for your data language
- Hybrid search: combine with pgvector or pgvectorscale for applications requiring both semantic and keyword search
- Query optimization: use score thresholds to filter low-relevance results
- Index monitoring: regularly check index usage and memory consumption
Early access: October 2025 this preview release is designed for development and staging environments. It is not recommended for use with hypertables.
Prerequisites
To follow the steps on this page:
Create a target [Tiger Cloud service][create-service] with the Real-time analytics capability.
You need [your connection details][connection-info]. This procedure also works for [self-hosted TimescaleDB][enable-timescaledb].
Install pg_textsearch
To install this Postgres extension:
Connect to your Tiger Cloud service
In [Tiger Cloud Console][services-portal] open an [SQL editor][in-console-editors]. You can also connect to your service using [psql][connect-using-psql].
Enable the extension on your Tiger Cloud service
For new services, simply enable the extension:
sqlCREATE EXTENSION pg_textsearch;For existing services, update your instance, then enable the extension:
The extension may not be available until after your next scheduled maintenance window. To pick up the update immediately, manually pause and restart your service.
Verify the installation
sqlSELECT * FROM pg_extension WHERE extname = 'pg_textsearch';
You have installed pg_textsearch on Tiger Cloud.
Create BM25 indexes on your data
BM25 indexes provide modern relevance ranking that outperforms Postgres's built-in ts_rank functions by using corpus statistics and better algorithmic design.
To create a BM25 index with pg_textsearch:
Create a table with text content
sqlCREATE TABLE products ( id serial PRIMARY KEY, name text, description text, category text, price numeric );Insert sample data
sqlINSERT INTO products (name, description, category, price) VALUES ('Mechanical Keyboard', 'Durable mechanical switches with RGB backlighting for gaming and productivity', 'Electronics', 149.99), ('Ergonomic Mouse', 'Wireless mouse with ergonomic design to reduce wrist strain during long work sessions', 'Electronics', 79.99), ('Standing Desk', 'Adjustable height desk for better posture and productivity throughout the workday', 'Furniture', 599.99);Create a BM25 index
sqlCREATE INDEX products_search_idx ON products USING bm25(description) WITH (text_config='english');BM25 supports single-column indexes only.
You have created a BM25 index for full-text search.
Optimize search queries for performance
Use efficient query patterns to leverage BM25 ranking and optimize search performance.
Perform ranked searches using the distance operator
sqlSELECT name, description, description <@> to_bm25query('ergonomic work', 'products_search_idx') as score FROM products ORDER BY description <@> to_bm25query('ergonomic work', 'products_search_idx') LIMIT 3;Filter results by score threshold
sqlSELECT name, description <@> to_bm25query('wireless', 'products_search_idx') as score FROM products WHERE description <@> to_bm25query('wireless', 'products_search_idx') < -2.0;Combine with standard SQL operations
sqlSELECT category, name, description <@> to_bm25query('ergonomic', 'products_search_idx') as score FROM products WHERE price < 500 AND description <@> to_bm25query('ergonomic', 'products_search_idx') < -1.0 ORDER BY description <@> to_bm25query('ergonomic', 'products_search_idx') LIMIT 5;Verify index usage with EXPLAIN
sqlEXPLAIN SELECT * FROM products ORDER BY description <@> to_bm25query('wireless keyboard', 'products_search_idx') LIMIT 5;
You have optimized your search queries for BM25 ranking.
Build hybrid search with semantic and keyword search
Combine pg_textsearch with pgvector or pgvectorscale to build powerful hybrid search systems that use both semantic vector search and keyword BM25 search.
Enable the [vectorscale][pg-vectorscale] extension on your Tiger Cloud service
sqlCREATE EXTENSION IF NOT EXISTS vectorscale CASCADE;Create a table with both text content and vector embeddings
sqlCREATE TABLE articles ( id serial PRIMARY KEY, title text, content text, embedding vector(1536) -- OpenAI ada-002 embedding dimension );Create indexes for both search types
sql-- Vector index for semantic search CREATE INDEX articles_embedding_idx ON articles USING hnsw (embedding vector_cosine_ops); -- Keyword index for BM25 search CREATE INDEX articles_content_idx ON articles USING bm25(content) WITH (text_config='english');Perform hybrid search using [reciprocal rank fusion][recip-rank-fusion]
sqlWITH vector_search AS ( SELECT id, ROW_NUMBER() OVER (ORDER BY embedding <=> '[0.1, 0.2, 0.3]'::vector) AS rank FROM articles ORDER BY embedding <=> '[0.1, 0.2, 0.3]'::vector LIMIT 20 ), keyword_search AS ( SELECT id, ROW_NUMBER() OVER (ORDER BY content <@> to_bm25query('query performance', 'articles_content_idx')) AS rank FROM articles ORDER BY content <@> to_bm25query('query performance', 'articles_content_idx') LIMIT 20 ) SELECT a.id, a.title, COALESCE(1.0 / (60 + v.rank), 0.0) + COALESCE(1.0 / (60 + k.rank), 0.0) AS combined_score FROM articles a LEFT JOIN vector_search v ON a.id = v.id LEFT JOIN keyword_search k ON a.id = k.id WHERE v.id IS NOT NULL OR k.id IS NOT NULL ORDER BY combined_score DESC LIMIT 10;Adjust relative weights for different search types
sqlWITH vector_search AS ( SELECT id, ROW_NUMBER() OVER (ORDER BY embedding <=> '[0.1, 0.2, 0.3]'::vector) AS rank FROM articles ORDER BY embedding <=> '[0.1, 0.2, 0.3]'::vector LIMIT 20 ), keyword_search AS ( SELECT id, ROW_NUMBER() OVER (ORDER BY content <@> to_bm25query('query performance', 'articles_content_idx')) AS rank FROM articles ORDER BY content <@> to_bm25query('query performance', 'articles_content_idx') LIMIT 20 ) SELECT a.id, a.title, 0.7 * COALESCE(1.0 / (60 + v.rank), 0.0) + -- 70% weight to vectors 0.3 * COALESCE(1.0 / (60 + k.rank), 0.0) -- 30% weight to keywords AS combined_score FROM articles a LEFT JOIN vector_search v ON a.id = v.id LEFT JOIN keyword_search k ON a.id = k.id WHERE v.id IS NOT NULL OR k.id IS NOT NULL ORDER BY combined_score DESC LIMIT 10;
You have implemented hybrid search combining semantic and keyword search.
Configuration options
Customize pg_textsearch behavior for your specific use case and data characteristics.
Configure the memory limit
The size of the memtable depends primarily on the number of distinct terms in your corpus. A corpus with longer documents or more varied vocabulary requires more memory per document.
sql-- Set memory limit per index (default 64MB) SET pg_textsearch.index_memory_limit = '128MB';Configure language-specific text processing
sql-- French language configuration CREATE INDEX products_fr_idx ON products_fr USING pg_textsearch(description) WITH (text_config='french'); -- Simple tokenization without stemming CREATE INDEX products_simple_idx ON products USING pg_textsearch(description) WITH (text_config='simple');Tune BM25 parameters
sql-- Adjust term frequency saturation (k1) and length normalization (b) CREATE INDEX products_custom_idx ON products USING bm25(description) WITH (text_config='english', k1=1.5, b=0.8);Monitor index usage and memory consumption
Check index usage statistics
sqlSELECT schemaname, relname, indexrelname, idx_scan, idx_tup_read FROM pg_stat_user_indexes WHERE indexrelid::regclass::text ~ 'bm25';View detailed index information
sqlSELECT bm25_debug_dump_index('products_search_idx');
You have configured pg_textsearch for optimal performance. For production applications, consider implementing result caching and pagination to improve user experience with large result sets.
Current limitations
This preview release focuses on core BM25 functionality. It has the following limitations:
- Memory-only storage: indexes are limited by
pg_textsearch.index_memory_limit(default 64MB) - No phrase queries: cannot search for exact multi-word phrases yet
These limitations will be addressed in upcoming releases with disk-based segments and expanded query capabilities.
===== PAGE: https://docs.tigerdata.com/use-timescale/metrics-logging/datadog/ =====
Export metrics to Datadog
You can export telemetry data from your Tiger Cloud services with the time-series and analytics capability enabled to [Datadog][datadog]. The available metrics include CPU usage, RAM usage, and storage. This integration is available for [Scale or Enterprise][pricing-plan-features] pricing plans.
This page shows you how to create a Datadog exporter in Tiger Cloud Console, and manage the lifecycle of data exporters.
Prerequisites
To follow the steps on this page:
- Create a target [Tiger Cloud service][create-service] with real-time analytics enabled.
Create a data exporter
Tiger Cloud data exporters send telemetry data from a Tiger Cloud service to third-party monitoring tools. You create an exporter on the [project level][projects], in the same AWS region as your service:
In Tiger Cloud Console, open [Exporters][console-integrations]
Click
New exporterSelect
MetricsforData typeandDatadogfor provider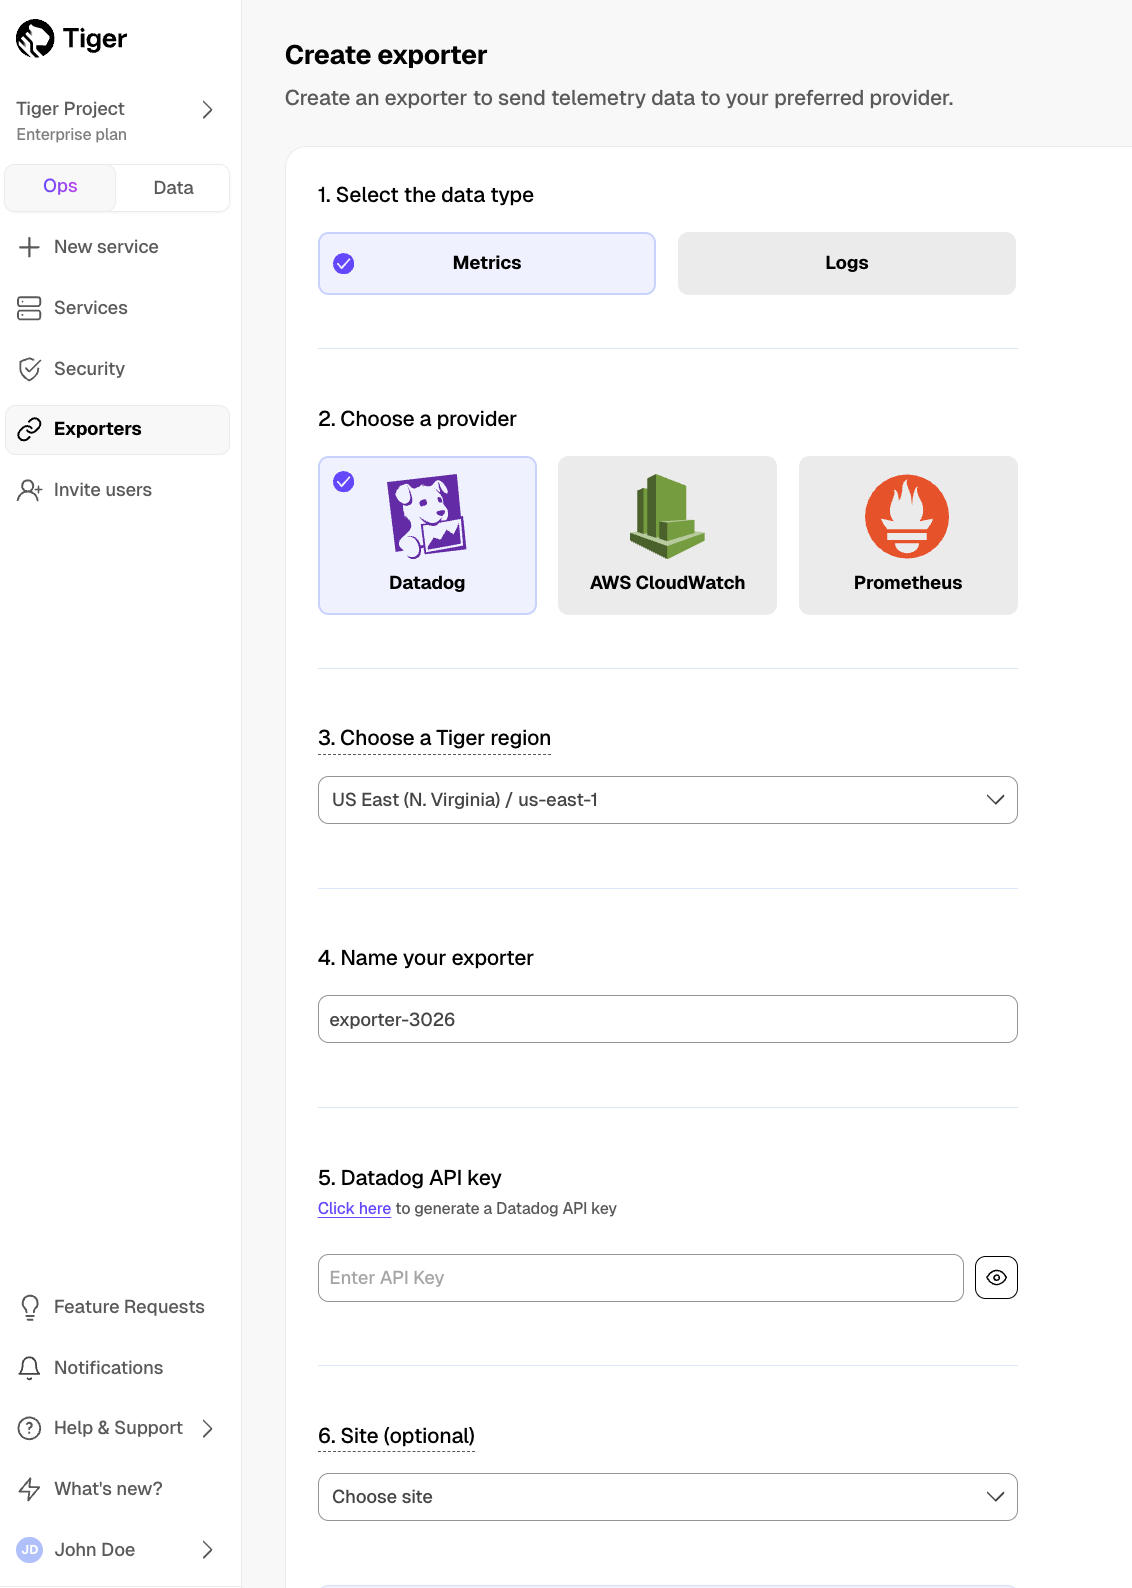
Choose your AWS region and provide the API key
The AWS region must be the same for your Tiger Cloud exporter and the Datadog provider.
Set
Siteto your Datadog region, then clickCreate exporter
Manage a data exporter
This section shows you how to attach, monitor, edit, and delete a data exporter.
Attach a data exporter to a Tiger Cloud service
To send telemetry data to an external monitoring tool, you attach a data exporter to your Tiger Cloud service. You can attach only one exporter to a service.
To attach an exporter:
- In [Tiger Cloud Console][console-services], choose the service
- Click
Operations>Exporters - Select the exporter, then click
Attach exporter - If you are attaching a first
Logsdata type exporter, restart the service
Monitor Tiger Cloud service metrics
You can now monitor your service metrics. Use the following metrics to check the service is running correctly:
timescale.cloud.system.cpu.usage.millicorestimescale.cloud.system.cpu.total.millicorestimescale.cloud.system.memory.usage.bytestimescale.cloud.system.memory.total.bytestimescale.cloud.system.disk.usage.bytestimescale.cloud.system.disk.total.bytes
Additionally, use the following tags to filter your results.
| Tag | Example variable | Description |
|---|---|---|
host | us-east-1.timescale.cloud | |
project-id | ||
service-id | ||
region | us-east-1 | AWS region |
role | replica or primary | For service with replicas |
node-id | For multi-node services |
Edit a data exporter
To update a data exporter:
- In Tiger Cloud Console, open [Exporters][console-integrations]
- Next to the exporter you want to edit, click the menu >
Edit - Edit the exporter fields and save your changes
You cannot change fields such as the provider or the AWS region.
Delete a data exporter
To remove a data exporter that you no longer need:
Disconnect the data exporter from your Tiger Cloud services
- In [Tiger Cloud Console][console-services], choose the service.
- Click
Operations>Exporters. - Click the trash can icon.
- Repeat for every service attached to the exporter you want to remove.
The data exporter is now unattached from all services. However, it still exists in your project.
Delete the exporter on the project level
- In Tiger Cloud Console, open [Exporters][console-integrations]
- Next to the exporter you want to edit, click menu >
Delete - Confirm that you want to delete the data exporter.
Reference
When you create the IAM OIDC provider, the URL must match the region you create the exporter in. It must be one of the following:
| Region | Zone | Location | URL |
|---|---|---|---|
ap-southeast-1 | Asia Pacific | Singapore | irsa-oidc-discovery-prod-ap-southeast-1.s3.ap-southeast-1.amazonaws.com |
ap-southeast-2 | Asia Pacific | Sydney | irsa-oidc-discovery-prod-ap-southeast-2.s3.ap-southeast-2.amazonaws.com |
ap-northeast-1 | Asia Pacific | Tokyo | irsa-oidc-discovery-prod-ap-northeast-1.s3.ap-northeast-1.amazonaws.com |
ca-central-1 | Canada | Central | irsa-oidc-discovery-prod-ca-central-1.s3.ca-central-1.amazonaws.com |
eu-central-1 | Europe | Frankfurt | irsa-oidc-discovery-prod-eu-central-1.s3.eu-central-1.amazonaws.com |
eu-west-1 | Europe | Ireland | irsa-oidc-discovery-prod-eu-west-1.s3.eu-west-1.amazonaws.com |
eu-west-2 | Europe | London | irsa-oidc-discovery-prod-eu-west-2.s3.eu-west-2.amazonaws.com |
sa-east-1 | South America | São Paulo | irsa-oidc-discovery-prod-sa-east-1.s3.sa-east-1.amazonaws.com |
us-east-1 | United States | North Virginia | irsa-oidc-discovery-prod.s3.us-east-1.amazonaws.com |
us-east-2 | United States | Ohio | irsa-oidc-discovery-prod-us-east-2.s3.us-east-2.amazonaws.com |
us-west-2 | United States | Oregon | irsa-oidc-discovery-prod-us-west-2.s3.us-west-2.amazonaws.com |
===== PAGE: https://docs.tigerdata.com/use-timescale/metrics-logging/metrics-to-prometheus/ =====
Export metrics to Prometheus
[Prometheus][prometheus] is an open-source monitoring system with a dimensional data model, flexible query language, and a modern alerting approach.
This page shows you how to export your service telemetry to Prometheus:
- For Tiger Cloud, using a dedicated Prometheus exporter in Tiger Cloud Console.
- For self-hosted TimescaleDB, using [Postgres Exporter][postgresql-exporter].
Prerequisites
To follow the steps on this page:
[Download and run Prometheus][install-prometheus].
For Tiger Cloud:
Create a target [Tiger Cloud service][create-service] with the time-series and analytics capability enabled.
For self-hosted TimescaleDB:
- Create a target [self-hosted TimescaleDB][enable-timescaledb] instance. You need your [connection details][connection-info].
- [Install Postgres Exporter][install-exporter]. To reduce latency and potential data transfer costs, install Prometheus and Postgres Exporter on a machine in the same AWS region as your Tiger Cloud service.
Export Tiger Cloud service telemetry to Prometheus
To export your data, do the following:
To export metrics from a Tiger Cloud service, you create a dedicated Prometheus exporter in Tiger Cloud Console, attach it to your service, then configure Prometheus to scrape metrics using the exposed URL. The Prometheus exporter exposes the metrics related to the Tiger Cloud service like CPU, memory, and storage. To scrape other metrics, use Postgres Exporter as described for self-hosted TimescaleDB. The Prometheus exporter is available for [Scale and Enterprise][pricing-plan-features] pricing plans.
Create a Prometheus exporter
In [Tiger Cloud Console][open-console], click
Exporters>+ New exporter.Select
Metricsfor data type andPrometheusfor provider.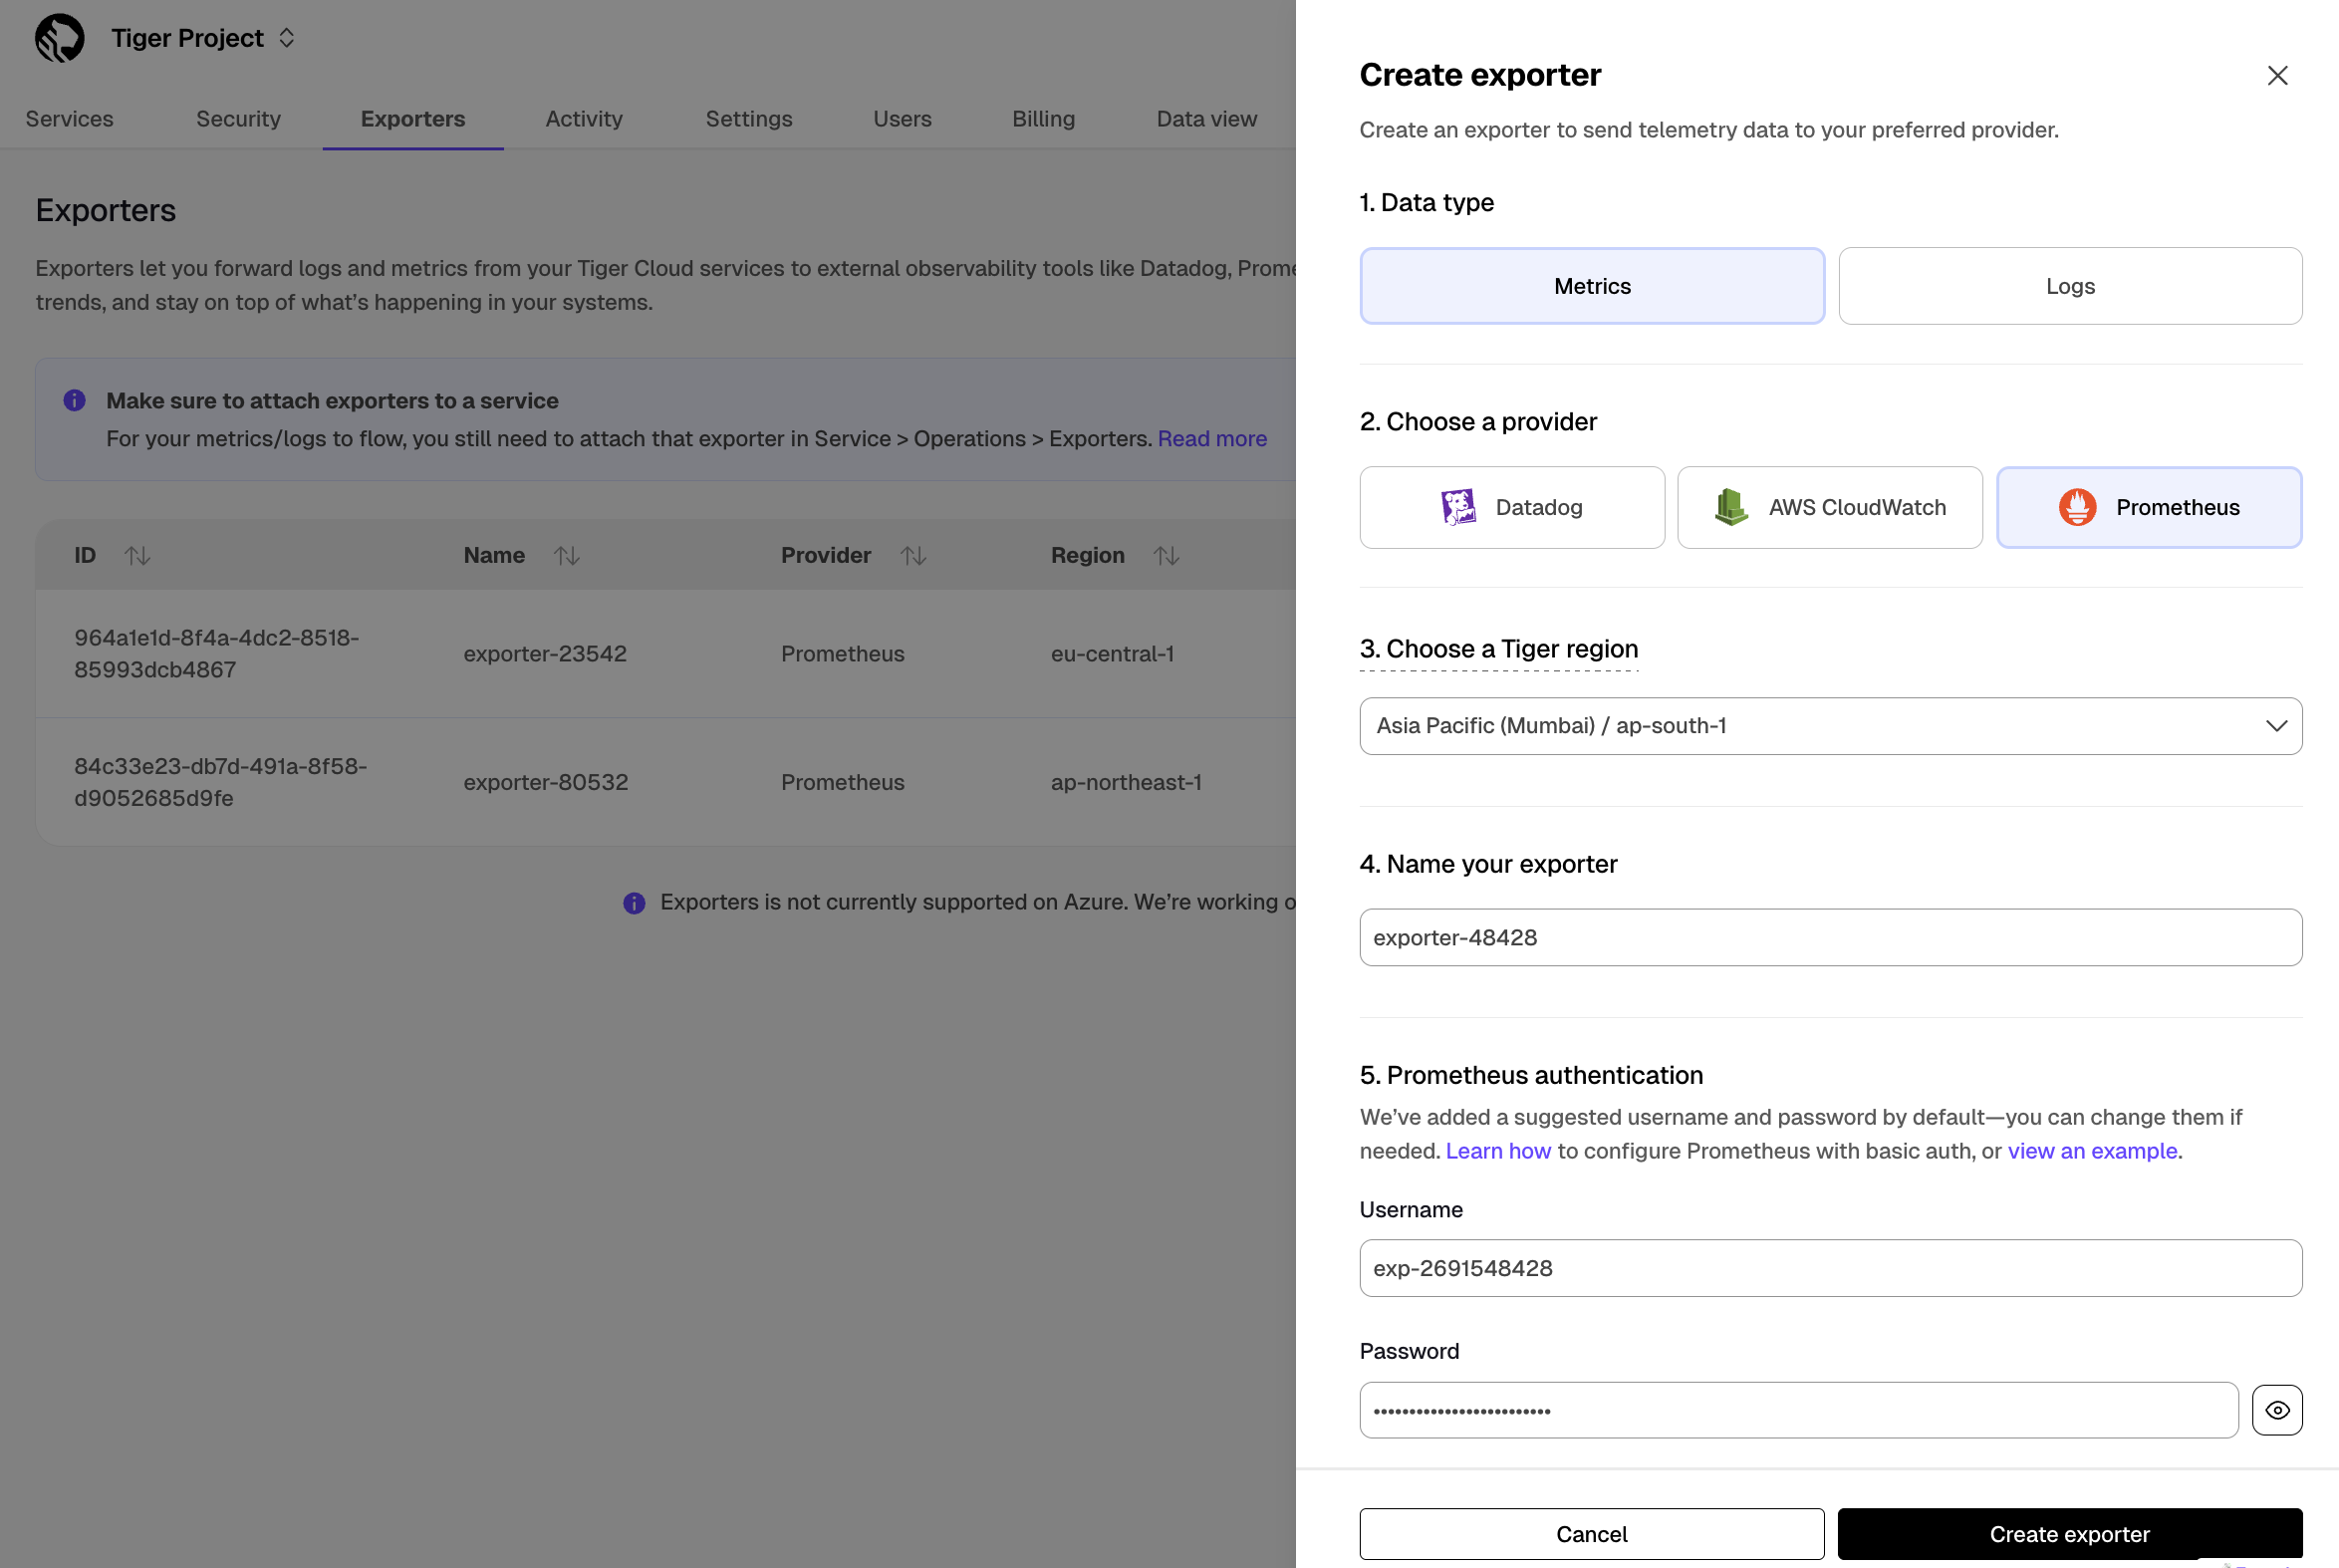
Choose the region for the exporter. Only services in the same project and region can be attached to this exporter.
Name your exporter.
Change the auto-generated Prometheus credentials, if needed. See [official documentation][prometheus-authentication] on basic authentication in Prometheus.
Attach the exporter to a service
Select a service, then click
Operations>Exporters.Select the exporter in the drop-down, then click
Attach exporter.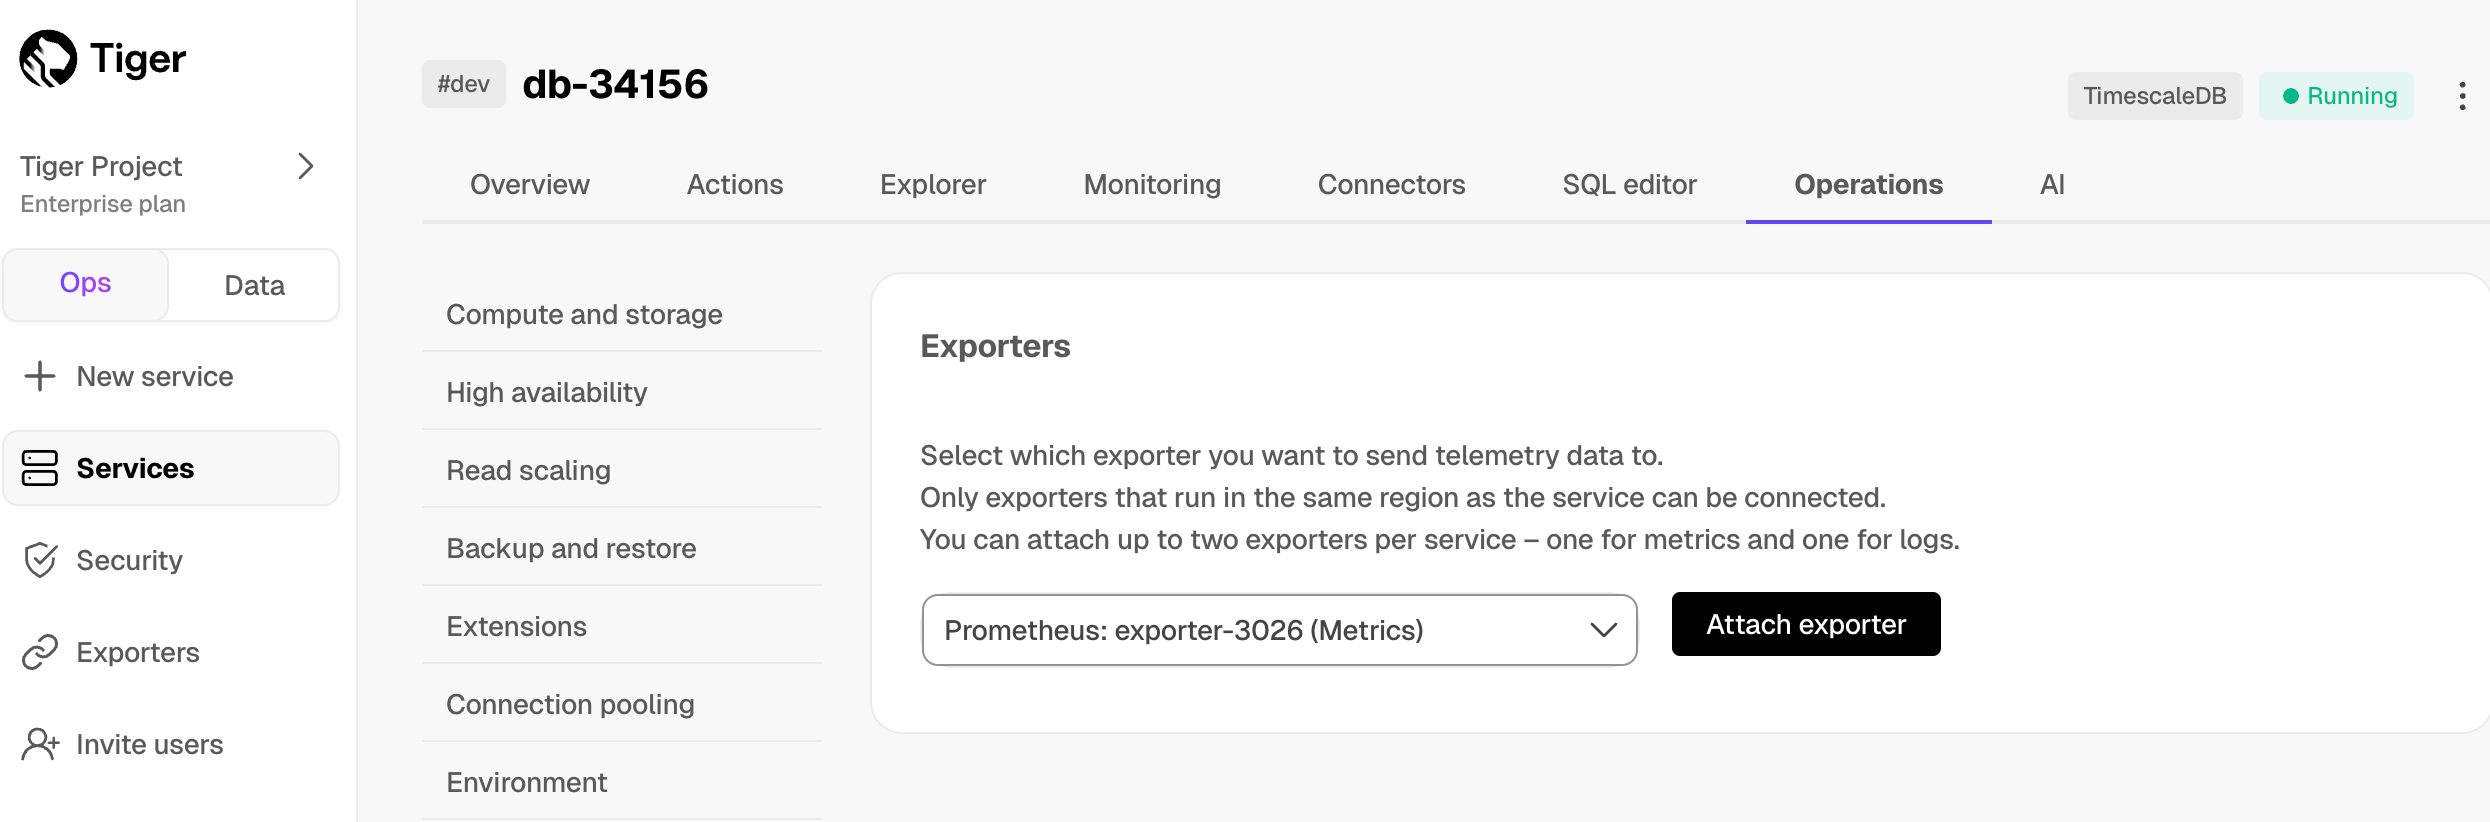
The exporter is now attached to your service. To unattach it, click the trash icon in the exporter list.
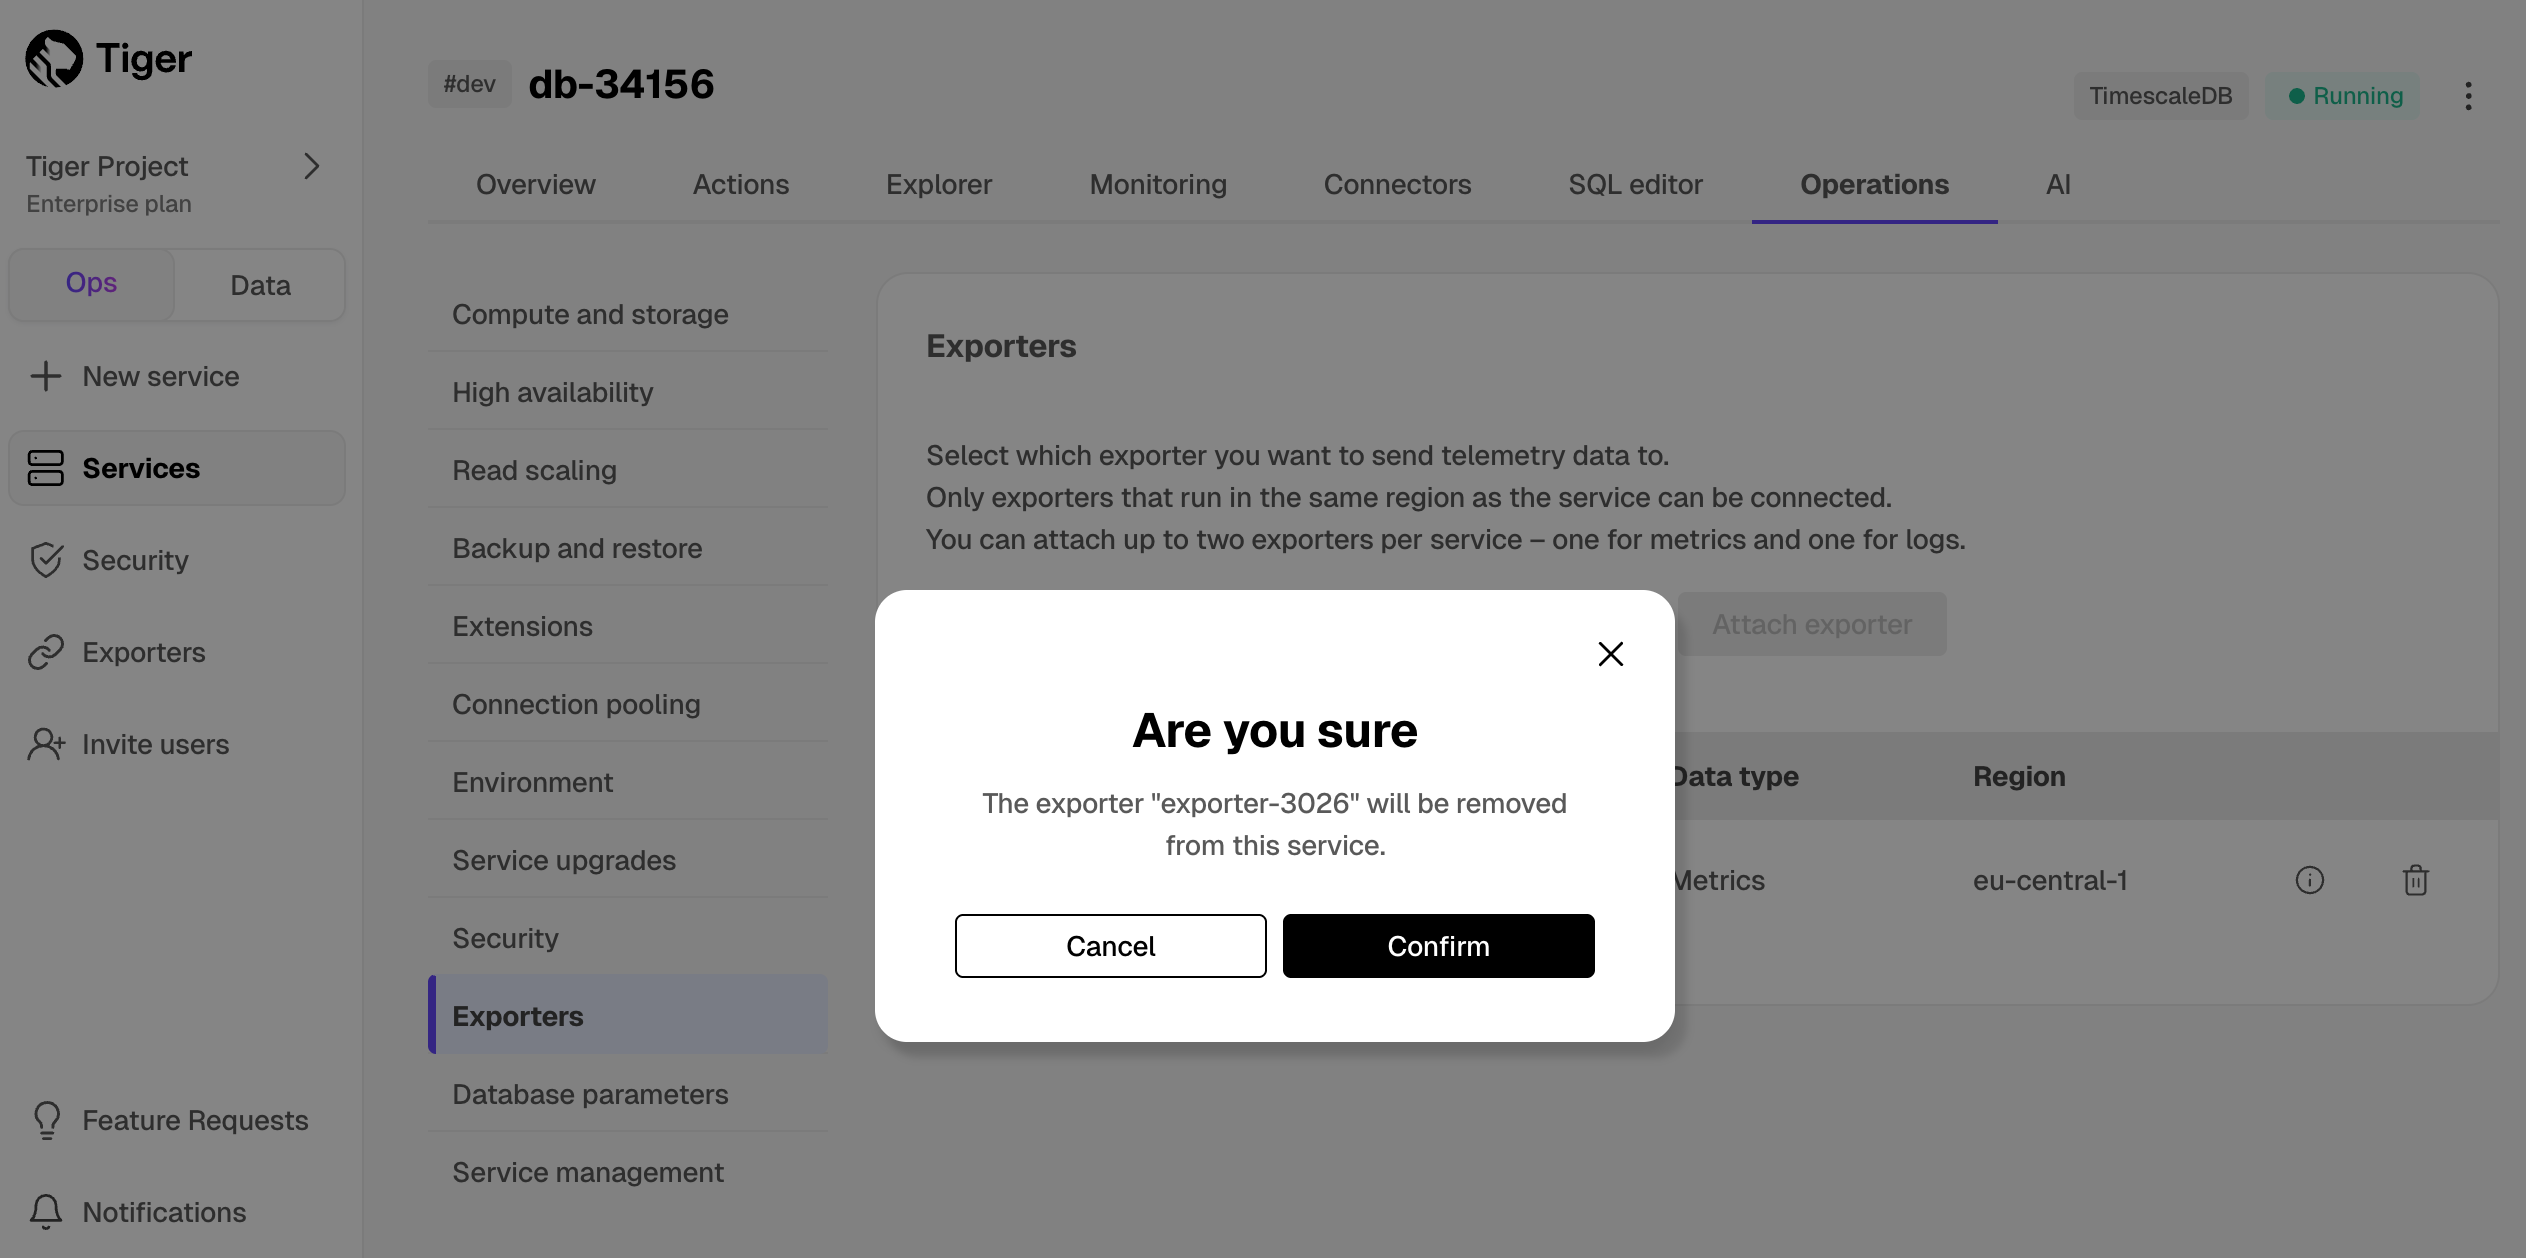
Configure the Prometheus scrape target
Select your service, then click
Operations>Exportersand click the information icon next to the exporter. You see the exporter details.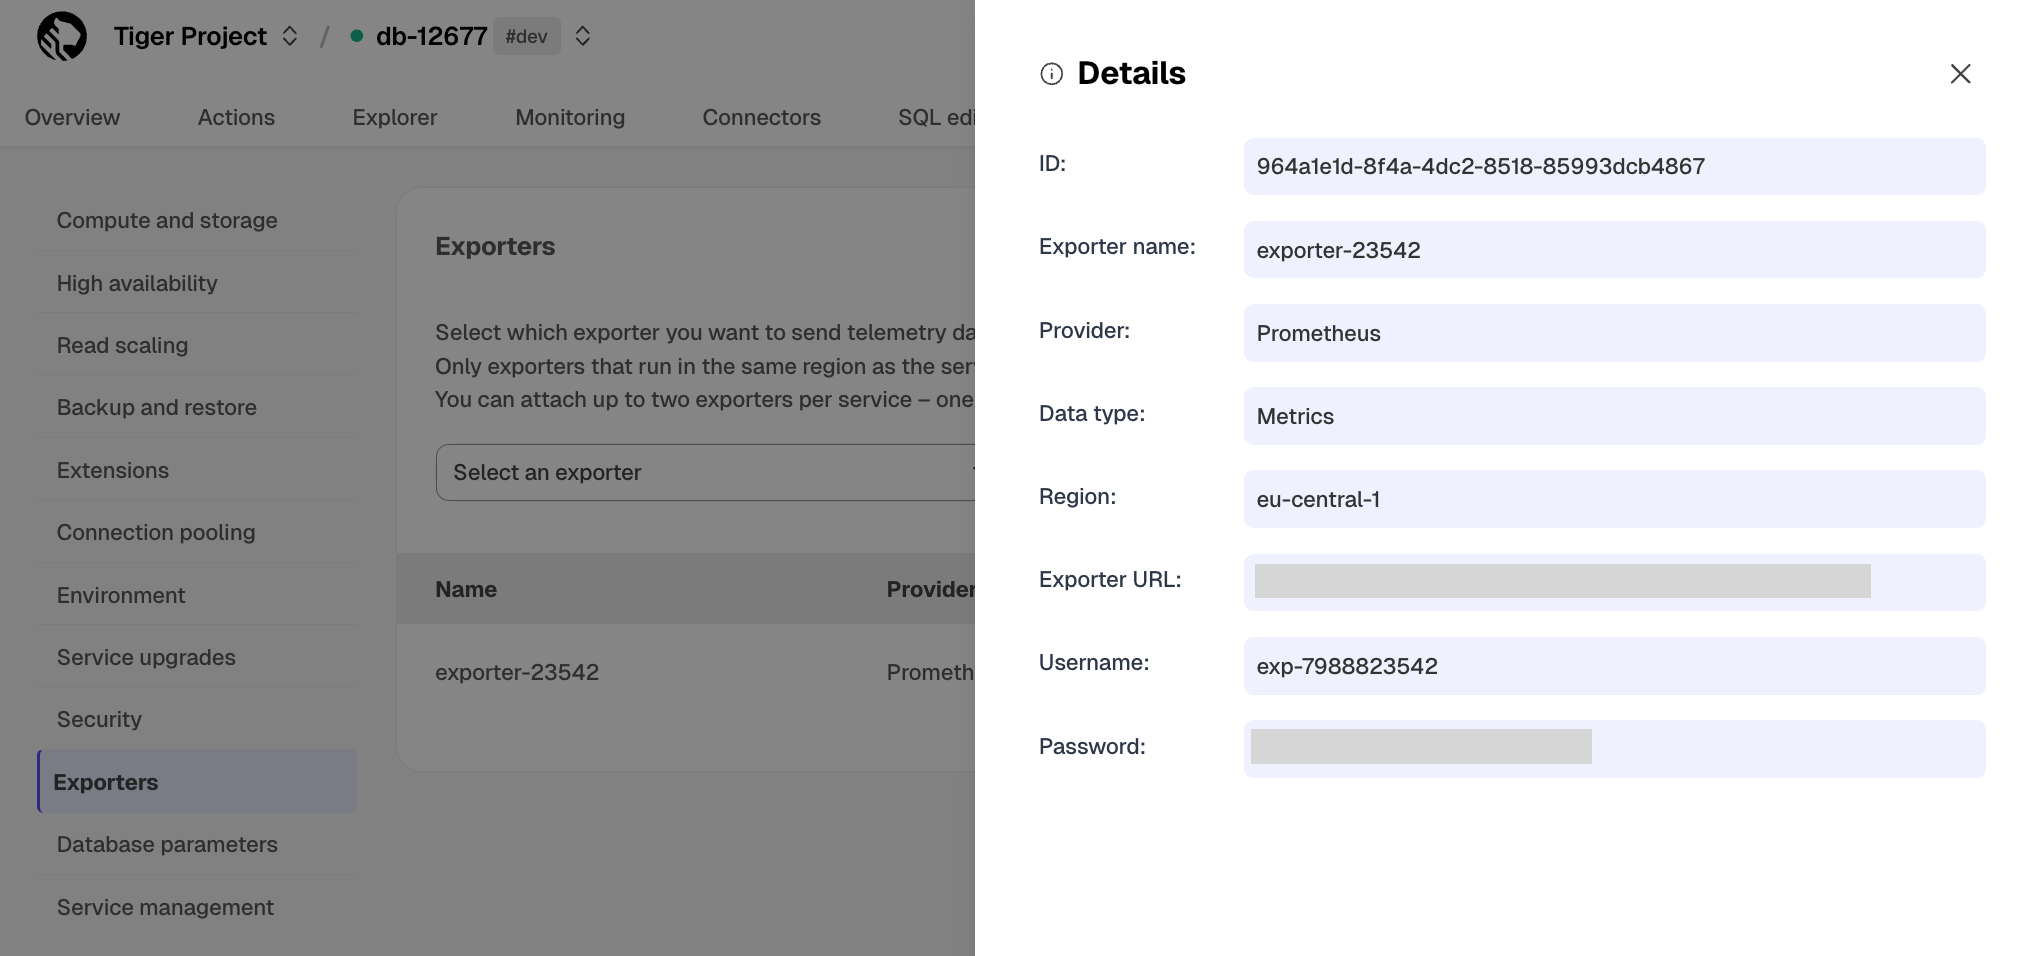
Copy the exporter URL.
In your Prometheus installation, update
prometheus.ymlto point to the exporter URL as a scrape target:ymlscrape_configs: - job_name: "timescaledb-exporter" scheme: https static_configs: - targets: ["my-exporter-url"] basic_auth: username: "user" password: "pass"See the [Prometheus documentation][scrape-targets] for details on configuring scrape targets.
You can now monitor your service metrics. Use the following metrics to check the service is running correctly:
timescale.cloud.system.cpu.usage.millicorestimescale.cloud.system.cpu.total.millicorestimescale.cloud.system.memory.usage.bytestimescale.cloud.system.memory.total.bytestimescale.cloud.system.disk.usage.bytestimescale.cloud.system.disk.total.bytes
Additionally, use the following tags to filter your results.
Tag Example variable Description hostus-east-1.timescale.cloudproject-idservice-idregionus-east-1AWS region rolereplicaorprimaryFor service with replicas
To export metrics from self-hosted TimescaleDB, you import telemetry data about your database to Postgres Exporter, then configure Prometheus to scrape metrics from it. Postgres Exporter exposes metrics that you define, excluding the system metrics.
Create a user to access telemetry data about your database
Connect to your database in [
psql][psql] using your [connection details][connection-info].Create a user named
monitoringwith a secure password:sqlCREATE USER monitoring WITH PASSWORD '<password>';Grant the
pg_read_all_statspermission to themonitoringuser:sqlGRANT pg_read_all_stats to monitoring;
Import telemetry data about your database to Postgres Exporter
Connect Postgres Exporter to your database:
Use your [connection details][connection-info] to import telemetry data about your database. You connect as the
monitoringuser:- Local installation:shell
export DATA_SOURCE_NAME="postgres://<user>:<password>@<host>:<port>/<database>?sslmode=<sslmode>" ./postgres_exporter - Docker:shell
docker run -d \
   -e DATA_SOURCE_NAME="postgres://<user>:<password>@<host>:<port>/<database>?sslmode=<sslmode>" \
   -p 9187:9187 \
   prometheuscommunity/postgres-exporter
- Local installation:
Check the metrics for your database in the Prometheus format:
- Browser: