Workshop on Building Advanced RAG Applications and Systems
📑 Table of Contents
📋 Prerequisites
Local Tools
For all the modules, you'll need the following tools installed locally:
| Tool | Version | Purpose | Installation Link |
|---|---|---|---|
| Python | 3.12 | Programming language runtime | Download |
| uv | ≥ 0.4.30 | Python package installer and virtual environment manager | Download |
| GNU Make | ≥ 3.81 | Build automation tool | Download |
| Git | ≥2.44.0 | Version control | Download |
| Docker | ≥27.4.0 | Containerization platform | Download |
Cloud Services
Also, the course requires access to these cloud services. The authentication to these services is done by adding the corresponding environment variables to the .env file:
| Service | Purpose | Cost | Environment Variable | Setup Guide |
|---|---|---|---|---|
| OpenAI API | LLM API | Pay-per-use | OPENAI_API_KEY | Quick Start Guide |
When working locally, the infrastructure is set up using Docker. Thus, you can use the default values found in the config.py file for all the infrastructure-related environment variables.
But, in case you want to deploy the code, you'll need to setup the following services with their corresponding environment variables:
| Service | Purpose | Cost | Required Credentials | Setup Guide |
|---|---|---|---|---|
| MongoDB | document database (with vector search) | Free tier | MONGODB_URI | 1. Create a free MongoDB Atlas account 2. Create a Cluster </br> 3. Add a Database User </br> 4. Configure a Network Connection |
🎯 Getting Started
1. Clone the Repository
Start by cloning the repository and navigating to the workshop directory:
git clone https://github.com/decodingml/second-brain-ai-assistant-course.git
cd second-brain-ai-assistant-course/workshops/rag
cd solution # or template
2. Installation
To install the dependencies and activate the virtual environment, run the following commands:
uv venv .venv-rag
. ./.venv-rag/bin/activate # or source ./.venv-rag/bin/activate
uv pip install -e .
3. Environment Configuration
Before running any command, you have to set up your environment:
- Create your environment file:bash
cp .env.example .env - Open
.envand configure the required credentials following the inline comments and the recommendations from the Cloud Services section.
🏗️ Set Up Your Local Infrastructure
We use Docker to set up the local infrastructure (ZenML, MongoDB).
WARNING
Before running the command below, ensure you do not have any processes running on port 27017 (MongoDB).
To start the Docker infrastructure, run:
make local-infrastructure-upTo stop the Docker infrastructure, run:
make local-infrastructure-downNOTE
To visualize the raw and RAG data from MongoDB, we recommend using MongoDB Compass or Mongo's official IDE plugin (e.g., MongoDB for VS Code). To connect to the working MongoDB instance, use the MONGODB_URI value from the .env file or found inside the config.py file.
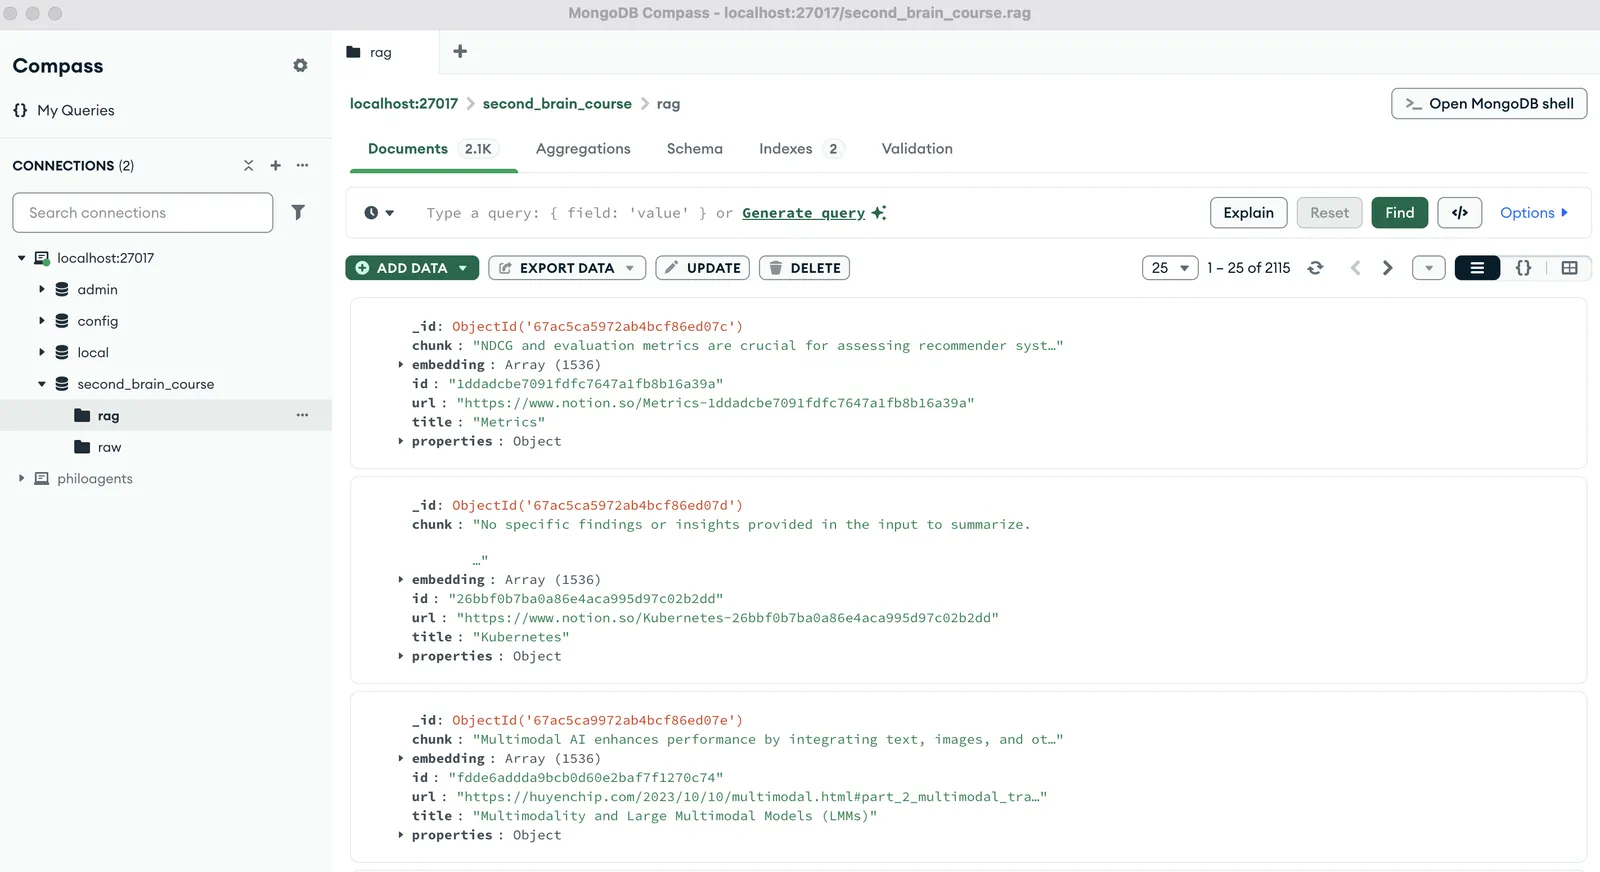
⚡️ Running the Code
The ML pipeline consists of three main steps that can be run using Make commands:
Data Ingestion Pipeline
bashmake run-ingestion-pipelineThis step processes and loads your raw data into the vector database.
Generation Pipeline
bashmake run-generation-pipelineThis step runs the RAG pipeline to generate responses.
Interactive Agent Application
bashmake run-agent-appThis launches an interactive application where you can interact with the agentic RAG system.
IMPORTANT
Make sure you have the local infrastructure running (make local-infrastructure-up) before executing any of these pipeline steps.