Getting Started with this course
We are very excited for you to start this course and see what you get inspired to build with Generative AI!
非常期待你开始这门课程,看看生成式 AI 会启发你做出什么。
To ensure your success, this page outlines setup steps, technical requirements, and where to get help if needed.
为帮助你顺利学完,本页列出环境配置步骤、技术要求,以及遇到问题时可以去哪里求助。
Setup Steps
To start taking this course, you will need to complete the following steps.
开始这门课之前,需要完成以下步骤。
1. Fork this Repo
Fork this entire repo to your own GitHub account to be able to change any code and complete the challenges. You can also star (🌟) this repo to find it and related repos easier.
把整个仓库 fork 到自己的 GitHub 账号,这样才能修改代码、完成挑战;也可以给仓库加星标(🌟),方便日后找到它和相关仓库。
2. Create a codespace
To avoid any dependency issues when running the code, we recommend running this course in a GitHub Codespaces.
为了避免运行代码时出现依赖问题,建议在 GitHub Codespaces 中学习本课程。
In your fork: Code -> Codespaces -> New on main
在自己的 fork 中依次点击:Code -> Codespaces -> New on main。
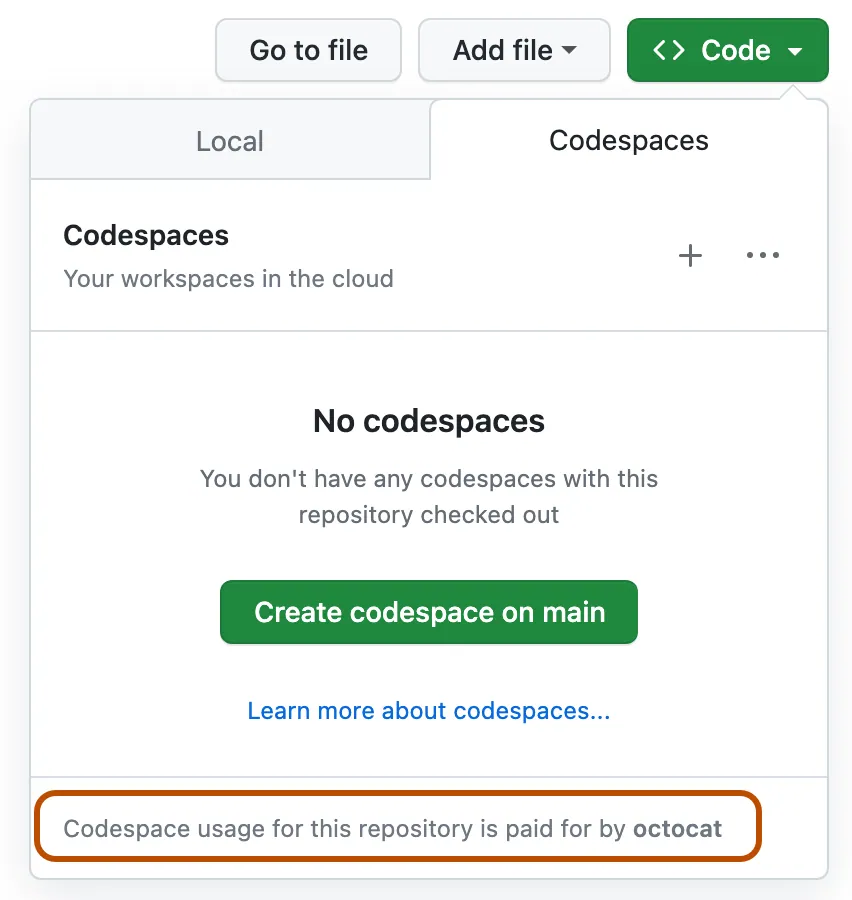
2.1 Add a secret
- ⚙️ Gear icon -> Command Pallete-> Codespaces : Manage user secret -> Add a new secret.
- Name OPENAI_API_KEY, paste your key, Save.
1. 齿轮图标 → Command Palette → Codespaces: Manage user secret → Add a new secret;2. 名称填 OPENAI_API_KEY,粘贴你的 key,保存。
3. What’s next?
| I want to… | Go to… |
|---|---|
| Start Lesson 1 | 01-introduction-to-genai |
| Work offline | setup-local.md |
| Setup an LLM Provider | providers.md |
| Meet other learners | Join our Discord |
Troubleshooting
| Symptom | Fix |
|---|---|
| Container build stuck > 10 min | Codespaces ➜ “Rebuild Container” |
python: command not found | Terminal didn’t attach; click + ➜ bash |
401 Unauthorized from OpenAI | Wrong / expired OPENAI_API_KEY |
| VS Code shows “Dev container mounting…” | Refresh the browser tab—Codespaces sometimes loses connection |
| Notebook kernel missing | Notebook menu ➜ Kernel ▸ Select Kernel ▸ Python 3 |
Unix-based systems:
基于 Unix 的系统:
touch .envWindows:
Windows:
echo . > .env- Edit the
.envFile: Open the.envfile in a text editor (e.g., VS Code, Notepad++, or any other editor). Add the following lines to the file, replacing the placeholders with your actual Microsoft Foundry Models endpoint and key (seeproviders.mdfor how to get these):
3. 编辑 .env 文件:用文本编辑器(VS Code、Notepad++ 或其他均可)打开 .env,写入下面几行,把占位符替换成你自己的 Microsoft Foundry Models endpoint 和 key(获取方式见 providers.md):
Note: GitHub Models (and its
GITHUB_TOKENvariable) is retiring at the end of July 2026. Use Microsoft Foundry Models instead.
注意:GitHub Models 及其 GITHUB_TOKEN 变量将于 2026 年 7 月底退役,请改用 Microsoft Foundry Models。
AZURE_INFERENCE_ENDPOINT=your_foundry_endpoint_here
AZURE_INFERENCE_CREDENTIAL=your_foundry_api_key_here- Save the File: Save the changes and close the text editor.
4. 保存文件:保存修改并关闭编辑器。
- Install
python-dotenv: If you haven't already, you'll need to install thepython-dotenvpackage to load environment variables from the.envfile into your Python application. You can install it usingpip:
5. 安装 python-dotenv:如果还没安装,需要先装上 python-dotenv,才能把 .env 中的环境变量载入 Python 应用;用 pip 即可安装。
pip install python-dotenv- Load Environment Variables in Your Python Script: In your Python script, use the
python-dotenvpackage to load the environment variables from the.envfile:
6. 在 Python 脚本中加载环境变量:在脚本里用 python-dotenv 把 .env 中的变量读进来。
from dotenv import load_dotenv
import os

# Load environment variables from .env file
load_dotenv()

# Access the Microsoft Foundry Models variables
endpoint = os.getenv("AZURE_INFERENCE_ENDPOINT")
token = os.getenv("AZURE_INFERENCE_CREDENTIAL")

print(endpoint)
That's it! You've successfully created a .env file, added your Microsoft Foundry Models credentials, and loaded them into your Python application.
至此,你已经建好 .env 文件、填入了 Microsoft Foundry Models 凭据,并成功加载到 Python 应用里。
How to Run locally on your computer
To run the code locally on your computer, you would need to have some version of Python installed.
要在自己的电脑上本地运行代码,需要先安装某个版本的 Python。
To then use the repository, you need to clone it:
接下来克隆仓库,然后才能使用:
git clone https://github.com/microsoft/generative-ai-for-beginners
cd generative-ai-for-beginners
Once you have everything checked out, you can get started!
一切就绪之后就可以开始了。
Optional Steps
Installing Miniconda
Miniconda is a lightweight installer for installing Conda, Python, as well as a few packages. Conda itself is a package manager, that makes it easy to setup and switch between different Python virtual environments and packages. It also comes in handy for installing packages that are not available via pip.
Miniconda 是一个轻量安装器,用来安装 Conda、Python 以及少量常用包。Conda 本身是包管理器,方便创建和切换不同的 Python 虚拟环境与依赖组合,也适合安装无法通过 pip 获取的包。
You can follow the MiniConda installation guide to set it up.
按 Miniconda 官方安装指南完成安装即可。
With Miniconda installed, you need to clone the repository (if you haven't already)
装好 Miniconda 后,克隆仓库(如果还没有克隆的话)。
Next, you need to create a virtual environment. To do this with Conda, go ahead and create a new environment file (environment.yml). If you are following along using Codespaces, create this within the .devcontainer directory, thus .devcontainer/environment.yml.
接下来创建虚拟环境。用 Conda 的话,新建一个环境文件 environment.yml。如果是在 Codespaces 里跟做,就把它建在 .devcontainer 目录下,即 .devcontainer/environment.yml。
Go ahead and populate your environment file with the snippet below:
把下面的片段填进环境文件: